Create an IOS App With PhoneGap Build
PayMoney Mobile App
A certificate and a mobile provisioning file are required to build your iOS apps on PhoneGap Build, and in order to obtain these, membership in the Apple Developer Program is required. During development, you will use a development certificate that will allow you to install your iOS apps on a pre-selected set of specific devices (identified by their UUID). Once you’re ready to publish, you’ll sign the application with a distribution certificate.
Note: For development/testing you must need certificate for IOS app development & the same for the provisioning profile otherwise you will get the error no signing certificate for the development.
-
Mac Users
-
Open the Keychain Access application (in the Applications/Utilities folder).
-
If you have not already added the certificate to Keychain, select File > Import. Then navigate to the certificate file (the .cer file) you obtained from Apple.
-
Select the Keys category in Keychain Access.
-
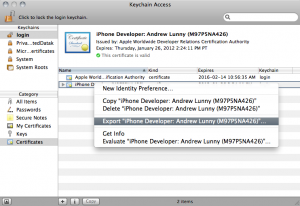
Select the private key associated with your iPhone Development Certificate. The private key is identified by the iPhone Developer: public certificate that is paired with it.
-
Command-click the iPhone Developer certificate and select, Export “iPhone Developer: Name…”.
-
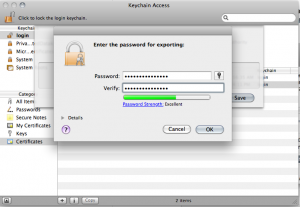
Save your Keystore in the Personal Information Exchange (.p12) file format.
-
You will be prompted to create a password that is used when you use the Keystore to sign applications or transfer the key and certificate in this Keystore to another Keystore.
Register Devices
-
Visit Apple Developer Portal.
-
Go to the Device section. Under the Manage tab, provide Device Name and Device UDID (40 hex characters).
Create Provisioning profile
-
Visit Apple Developer Portal.
-
Go to Provisioning section. Create new profile under Development tab.
-
Fill the form with Profile Name, Certificates (as per .cer above), App ID and your development device.
Submit to Build
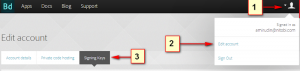
Go to your Account > Edit Setting > Signing Keys’ tab:
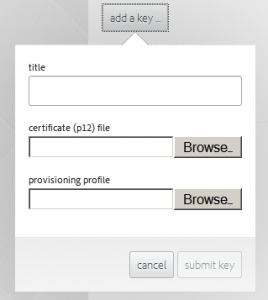
Click ‘add a key…’ and supply your previously generated p12:
Unlocking the key
Go to your Account > Edit Setting > Signing Keys’ tab:

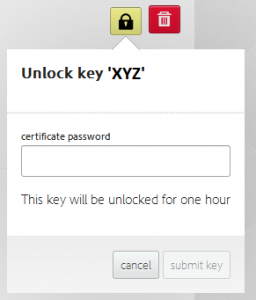
Click ‘lock’ button and supply the certificate password you used to export your cert.
- Windows Users:
Prerequisites:
Apple Developer account (99 USD/year) Basic knowledge of web technologies (HTML,CSS,javascript) Ability to use simple online services as well as basic file management and web usage; zipping, uploading etc from a computer. Using PATH variable and command-line tools. A windows/ubuntu machine with a reliable Internet connection.
PhoneGap account creation and free-ness
First thing to note, getting your first private app running with PGB (PhoneGap Build) is free! No matter how many builds or which of supported platforms (iOS, android and Windows) you need. You also have unlimited public apps as well. You will have an app size limit of 50Mb and you won’t be able to use private plugins — but this is fine if you just want to get up and running.
Second, account setup is a breeze. Pop over to PGB’s main site and hit ‘Sign In’ at the top right then just use your Facebook or Google account to get up in seconds.
Get your notifications in order
As with all iOS development, you need to have your developer keys and related certificates etc setup for building and code signing the application.
The PGB interface is going to accept your code (we’ll get to that soon) to build and create an app or each of the target mobile operating systems, however for a successful iOS app to be produced you will need to upload and associate a key with PhoneGap Build.
Note that the following process works for Windows and should also work on Ubuntu.
We’ll need to create a Certificate Signing Request (.csr) first.
This is needed for the next step. You will need to ensure that your windows machine has OpenSSL installed. Ensure that OpenSSL’s bin directory is also in your PATH variable.
Open up a new terminal window and change to a directory to work on the certificates. I’d create a new directory for this work.
Next, create the key we’ll use to get the CSR. Run the following on the command line in the terminal.
openssl genrsa -des3 -out ios.key 2048
This generates a key file named “ios.key”. Take note of the password you used to create this file, you’ll need it in a few minutes.
Next we have to create the actual CSR file. Running the following command will generate “ios.csr” using the “ios.key” file.
openssl req -new -key ios.key -out ios.csr -subj “/emailAddress=MY-EMAIL-ADDRESS, CN=COMPANY-NAME, C=COUNTRY-CODE”
You will need to set your own email address, company name and country code accordingly. Get a full list of applicable country codes here.
1.Log into your Apple Developer Portal
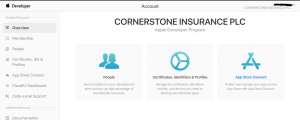
You’re going to head on over to the developer.apple.com and log in. Let’s get the base stuff setup for your app if it’s not done as yet.
2. Create a Developer Certificate
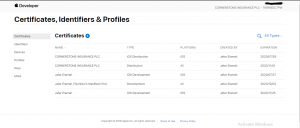
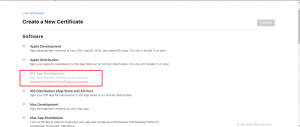
Hit “+” and enter your information. Ensure you select the “iOS Developer Certificate” option. Follow the wizard, you will need to upload a “ios.csr” file we created earlier as well as set the name and select type as “Developer Certificate”.
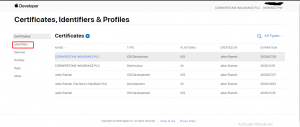
Now, download the resulting certificate to our working folder we’ll need it soon. Clicking on the certificate you want to use will give you the option to download. Ensure it is a Developer certificate and not Production.
3. Create a unique App ID for your application
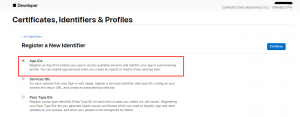
You’ll want to use the reverse domain convention and specify something like “com.techvill.paymoney” for the Bundle ID. I’m using “com.techvill.paymoney” for this project as the Bundle ID and “payMoney” as the Name.
Another thing to note about this step is that you will need to specify all the service entitlements for the application.
Leave all other services as default.
4. Add your device(s) you want to have the development app run on
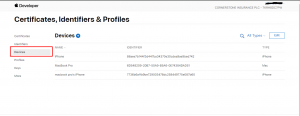
You will need your device(s) UUID to complete this step. You can get your UUID by following these steps.
Next, we need to register the devices we intend to install the app on. Go to the Devices section and hit “+”. You will need to get the UUID from your device(s) to add them. Assign a name that you’ll remember use and enter the UUID for the device as specified.
Do this for all devices you intend to run the app on.
5. Get your provisioning profile

Next, we need to create a Provisioning profile that will be used to sign the app.
Go over the Provisioning Profile section and click “+”. You’ll need to go through a short wizard and specify the following.
Select the Type as “iOS Development” Select the “Developer Certificate” you created and downloaded it earlier (It’s important that these match). Select the devices you want to run this app. Select the App ID that this will be tied to (the one we created earlier) Enter the name for the Profile Once you’ve successfully created the Provisioning Profile, download it to the same folder as the Developer Certificate we downloaded earlier and the “ios.key” file we started with.
Next, we have to convert the Developer Certificate downloaded earlier to the p12 format Run the following in the terminal window at the location of the directory you downloaded the certificate to (NOTE that ios.key file will need to be in this folder as well). This command will create a PEM file out of our Developer Certificate.
openssl x509 -in ios_development.cer -inform DER -out ios_development.pem -outform PEM
Next we want to use the “ios.key” file with the generated “ios_development.pem” file to create the final “ios_development.p12” file
openssl pkcs12 -export -inkey ios.key -in ios_development.pem -out ios_development.p12
You will have to enter the original password you used to create the “ios.key” file at this stage. You will then be asked to create an export password for the new “.p12” file and to verify the password. Keep note of this export password, we’ll need it to unlock the keys in the PGB interface before building.
We should now have the following: p12 certificate file provisioning profile the export password for the p12 certificate Keep these, we’ll need them when uploading the application to PGB.
Uploading & building
Let’s upload our app. Head on over to here after you’ve created your account and signed in to PGB.
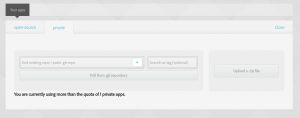
Hit the “+ new app” button in the top-right corner and you’ll see your upload options. You can pull directly from your project in Git by connecting your Git account to PGB, or you can just zip your web application’s folder and upload it as a single zip file.
After upload, you should now be presented with the application build screen where you will see your different builds, platforms. You will be able to update your code as well as a few other things from here, the interface is pretty intuitive.
If you ended up on the application list page instead, click on the name of the application you just uploaded and it will take you to this page.
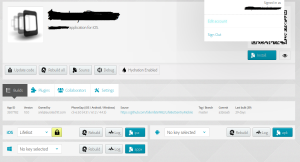
However, we’re not done. We need to add AND unlock the keys to be able to get a successful iOS app build.
Head over to the edit account section by accessing the menu to the top-right of the page. Next click on the “Signing Keys” tab.
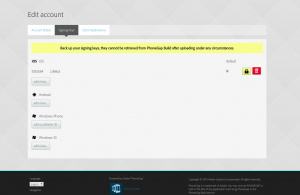
Click “add a key” under the iOS section. Enter a title and select the files from your computer in the relevant section for the certificate (.p12 we generated) as well as the provisioning profile (.mobileprovisioning) we downloaded.
Once uploaded, you need to unlock the keys before you can use it to compile the iOS application. Click the lock to the right of the key and enter the export password we set when generating the .p12 file earlier.
Now head over back to the application main page and select the key under the iOS build section. Click rebuild.
Next, you want to check your log after the build to ensure all went well. Click on the “Logs” button in the iOS section.
If everything was followed correctly, you should have a message in the log saying “Build Succeeded” and the provisioned devices.
Installing & testing
Now we want to get that app onto our iOS device to test. This is easily done by heading back to the Application Screen in PGB and using the large QR code for the app, displayed to the right of this page.
Simply open the camera on the iOS device and scan the code. You’ll get the necessary prompts to install the app. Remember this will need to be one of the devices that were added when you created the provisioning profile.