Woo-Commerce Working Process
Common Issues
Step 1:
First of all, go to the Woo-Commerce site’s admin panel. Then upload the woo-commerce plugin (zip file).
See figure 1 –
Add New Plugin
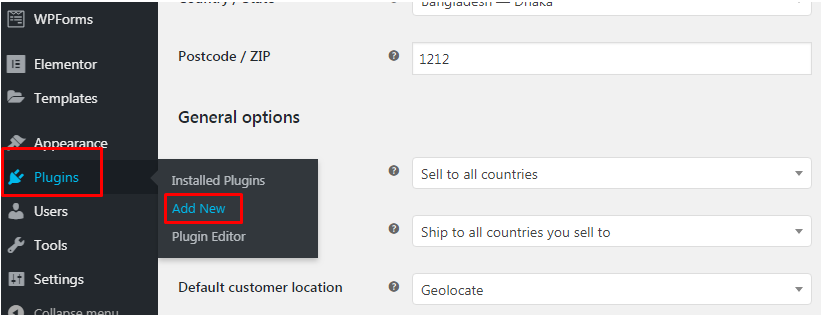
Figure 1: Add New Plugin
Step 2: Then, Go to the Woo-Commerce Setting and then Payment Method and enable the plugin.
See figure 2 –
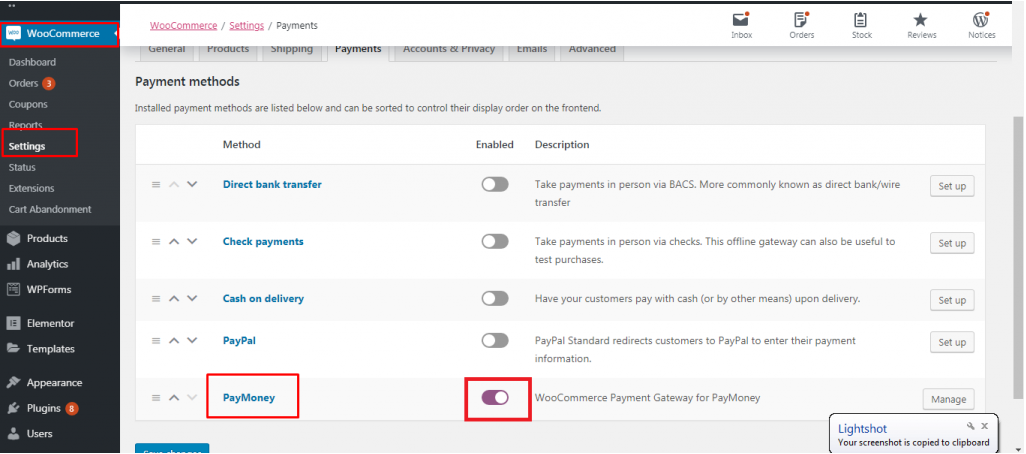
Figure 2: Payment Method Setting
Step 3: After that, you have to configure the plugin. So, click on the plugin and give appropriate information.
You have to give Client id and Secret key of Express Merchant Account. This is the key part.
See figure 3 –
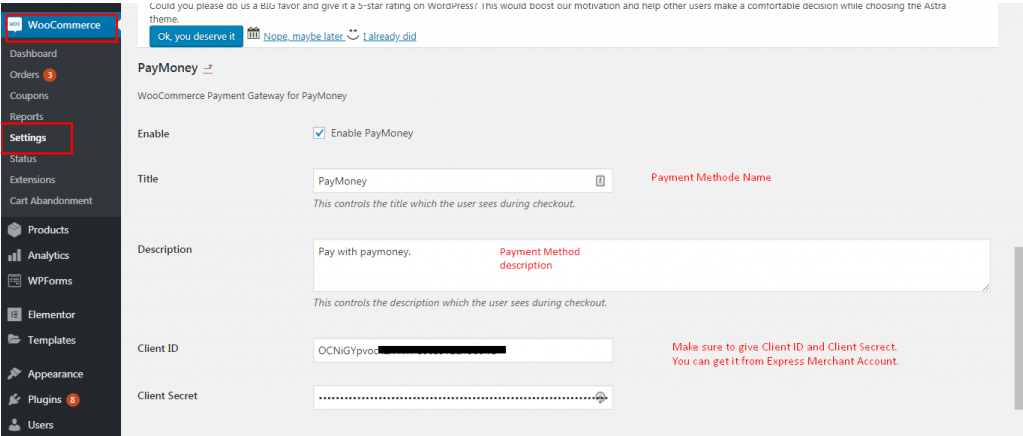
Figure 3: Merchant Credentials
Step 4:
To get the client id and secret key open the paymoney.techvill.org (Your site) in another browser (This is important). And, logged in as a merchant and navigate to merchants.
See figure 4 and figure 5 –
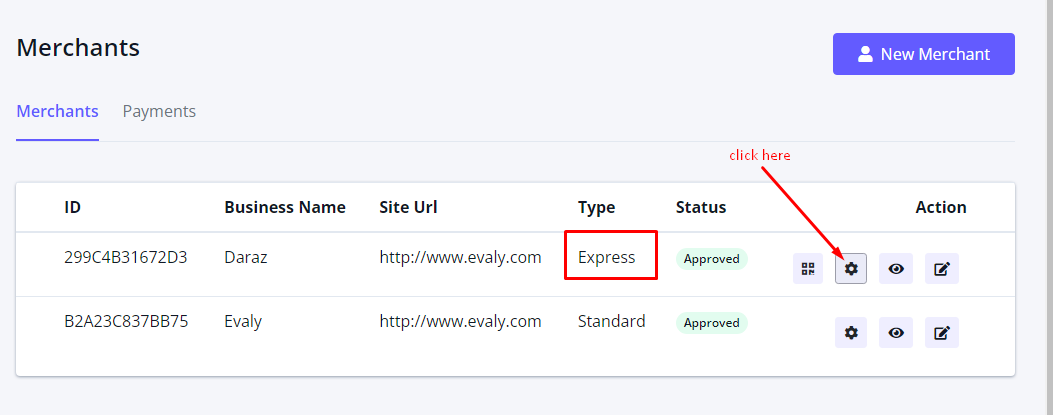
Figure 4: How to get Express Merchant’s credentials
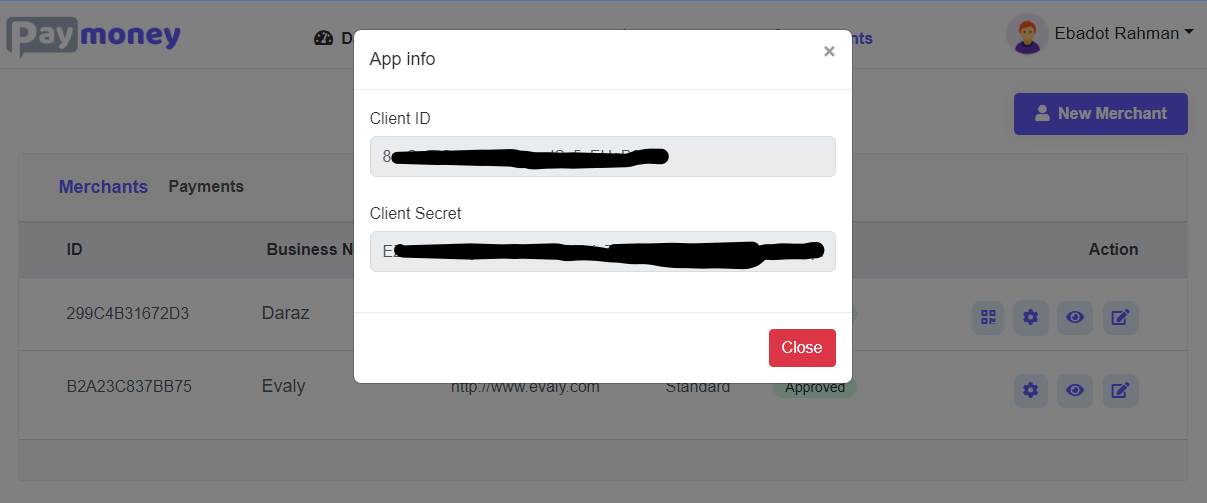
Figure 5: Client Id and Secret Key
Step 5: While checkout from the woo-commerce site make sure that payment method is Paymoney.
See figure 6 –
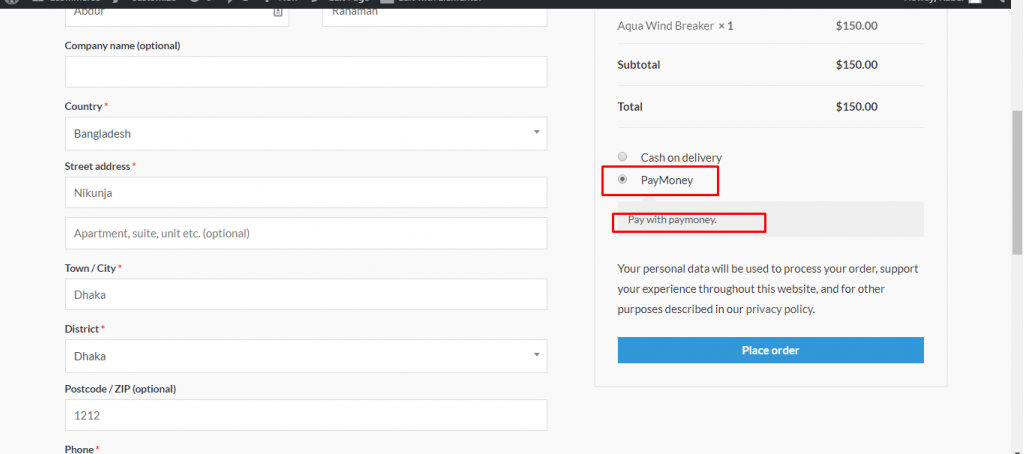
Figure 6: Checkout with Paymoney
You can change the title and description from the Woo-Commerce plugin setting in the Woo-Commerce Admin panel.
See figure 7 –
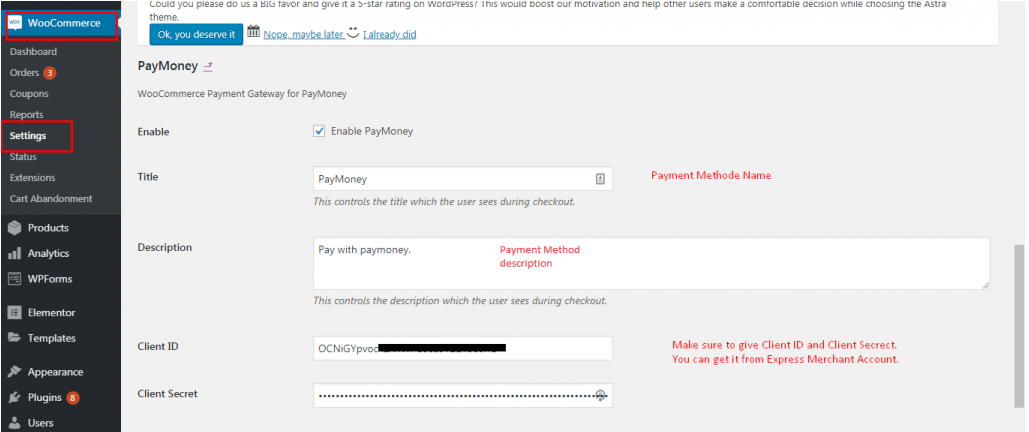
Figure 7: Changing Payment Method Name
Step 6: After clicking on place order you will be redirected to Paymoney (Your site) page and asked you to log in. Make sure that not to give the same merchant credentials while login there, as user cannot pay to himself.
See figure 8 –
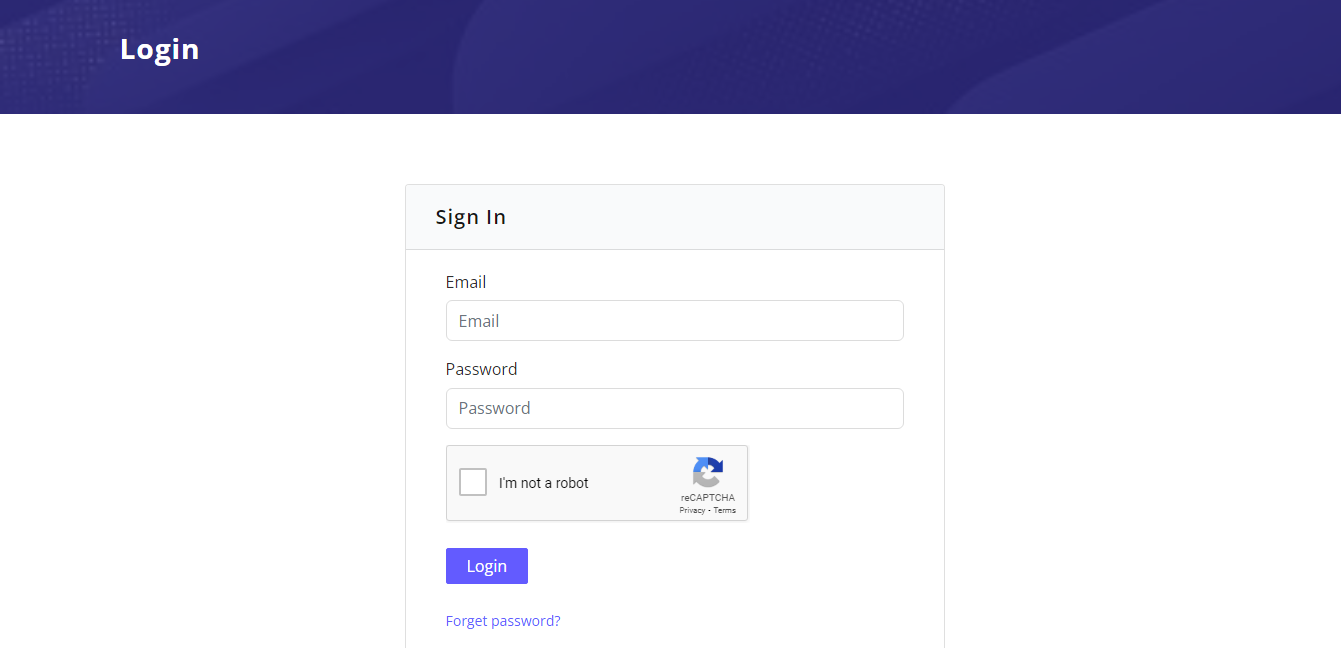
Figure 8: Redirecting to Paymoney Site
Step 7: Finally, you can cancel and confirm your payment.
If you don’t have sufficient money on Paymoney, the order will not be successful.
Otherwise, it will deduct your money and the order will be successful.
See figure 9 –
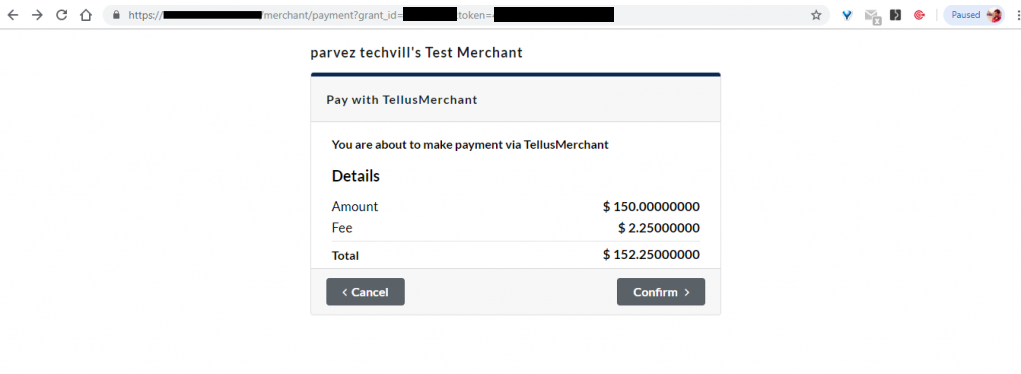
Figure 9: Payment Form
Case 1(Insufficient balance):

Figure 10: Insufficient balance
Case 2(Sufficient balance):
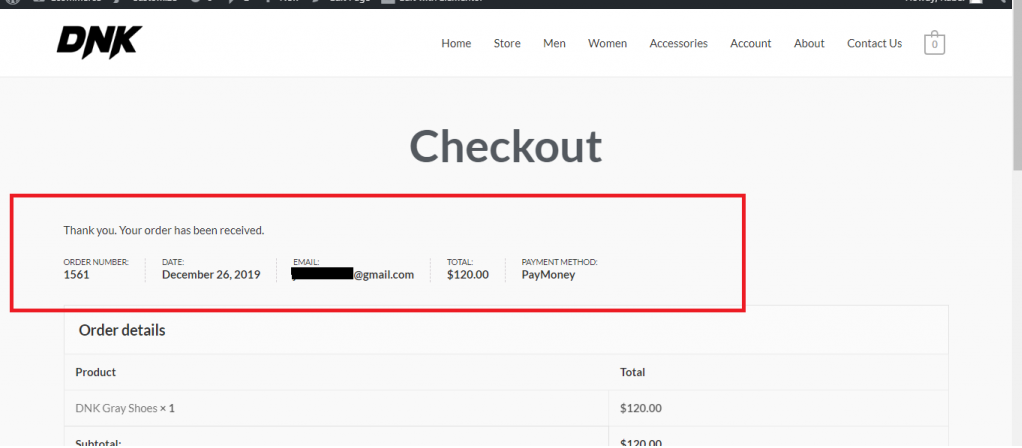
Figure 11: Sufficient balance