Fix Gradle Sync and Generate Signed Bundle with Android Studio
PayMoney Mobile App
1) At first extract your paymoney.zip file.
2) Open “config.xml” file to your text editor ( Notepad, Sublime Text, Atom, Vs Code e.t.c).
i. Search “widget xml” markup tag and change the id by your app id like id = “com.hostName.appName” and version by your app version like version = “1.0.1”.
ii. Search “name xml” tag and replace the text by yourappName like
iii. Serach “description xml” tag and replace the text by your appDescription like
iv. Search “author xml” tag abd replace the text by your authorDetails like

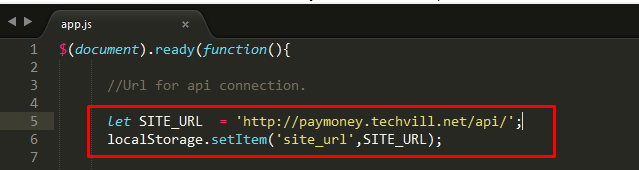
3) If you want, you can change your app site_url.
i) Go to projectName\www\js\app.js.
ii) Open app.js file
iii)Change the site_url from the source code like below screenshot with your details.
4) To custom your app icon which you want to launch into your device please create an icon with 1024 * 1024 size and convert it from following website.
i) Go to abiro
ii) Upload your resize image & download the file.
iii) Extract the downloaded zip file.
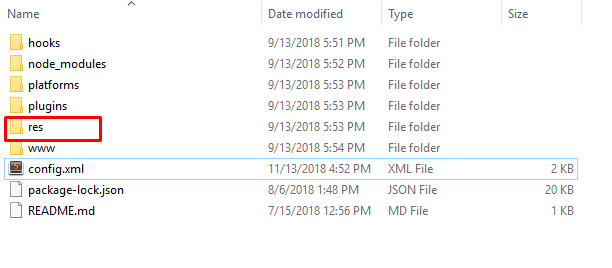
iv) Copy only the “res” folder from extracted folder.
v) Delete the res folder from your project root and keep the new res folder with your custom app like below screenshot.
Requirement-1
Make sure you install the latest version of Java Development Kit
(https://www.oracle.com/technetwork/java/javase/downloads/index.html) on your machine and configure it in your system environmental variables (https://docs.oracle.com/cd/E19182-01/820-7851/inst_cli_jdk_javahome_t/)
At the time of writing, the latest version is – 12.0.1
Requirement-2
Make sure you install the latest version of Android Studio (https://developer.android.com/studio/releases) on your machine and set the above installed JDK to android studio (https://developer.android.com/studio/intro/studio-config#jdk)
At the time of writing, the latest version is – 3.4.1
Requirement-3
Make sure you install the latest version of Gradle (https://gradle.org/releases/) on your machine and configure it in your system environmental variables (https://www.360logica.com/blog/how-to-configure-gradle-on-windows-machine/)
At the time of writing, the latest version is – 5.5
Note: If requirements-1,2 and 3 are not fulfilled, you will not be able to compile Cordova/Native application with android app bundle and thus fail to generate signed bundle for deploying to Google Play Store.
If above requirements are fulfilled, then continue with the steps below:-
A) FIXING GRADLE SYNC
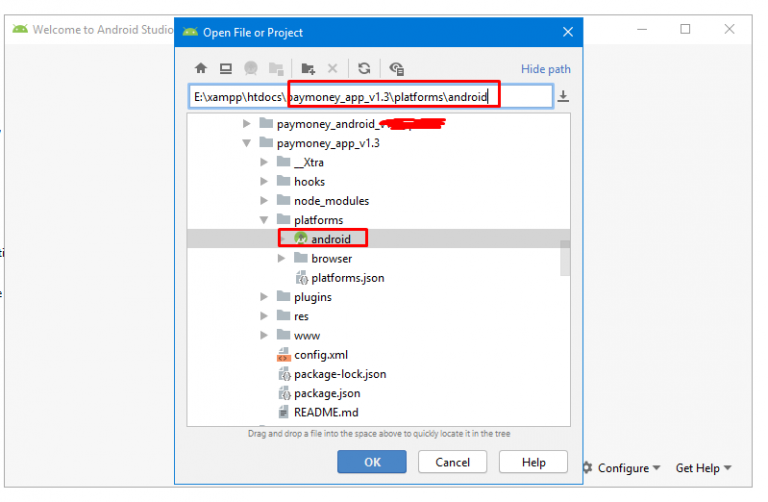
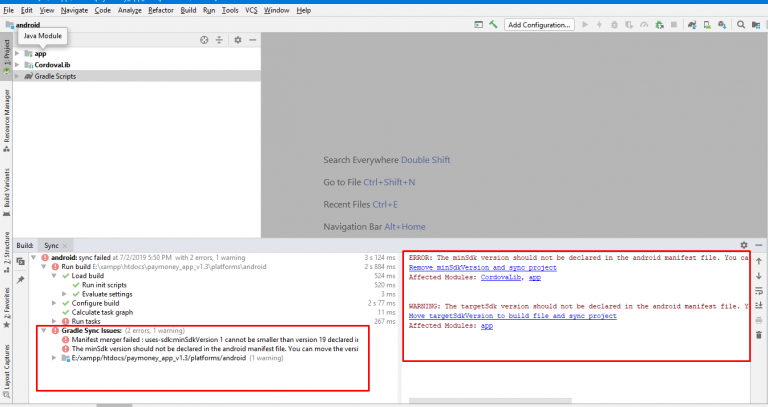
1) Go to the location in your system where PayMoney – Mobile App v1.1 is situated, copy the android platform location (example – E:\xampp\htdocs\paymoney_app_v1.3\platforms\android) and open it on android studio (see below screenshots)

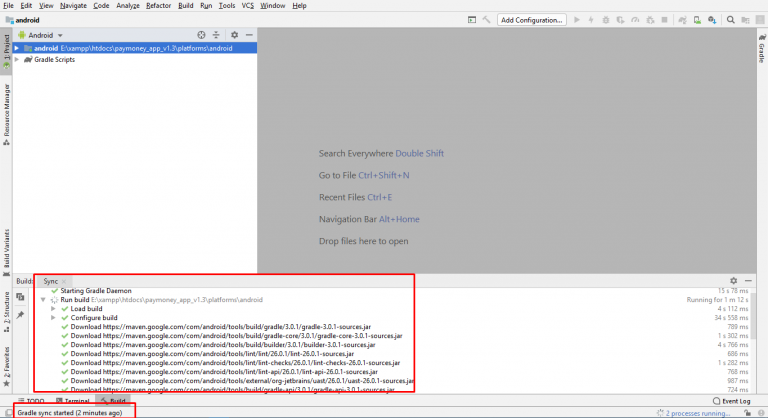
Let Gradle complete the sync process.
If you face an error message like below –
“The minSdk version should not be declared in the android manifest file. You can move the version from the manifest to the defaultConfig in the build.gradle file.”
(see below screenshot)
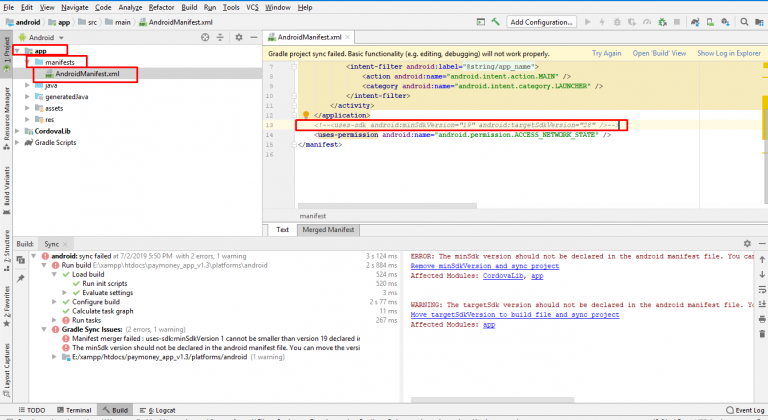
Go to app->manifests->AndroidManifest.xml and uncomment
“
(see below screenshot)
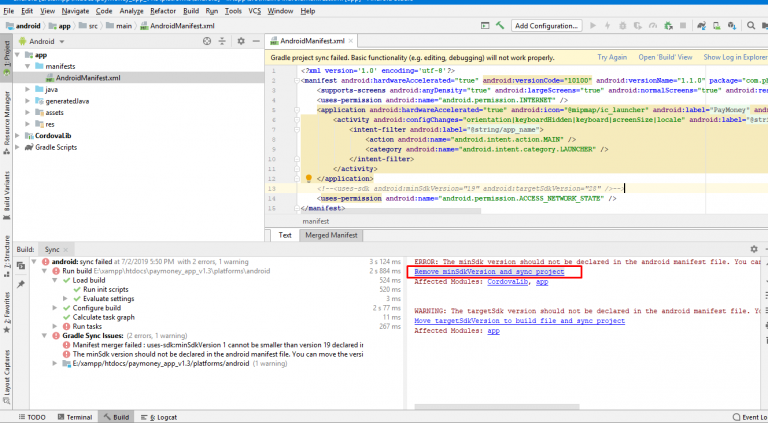
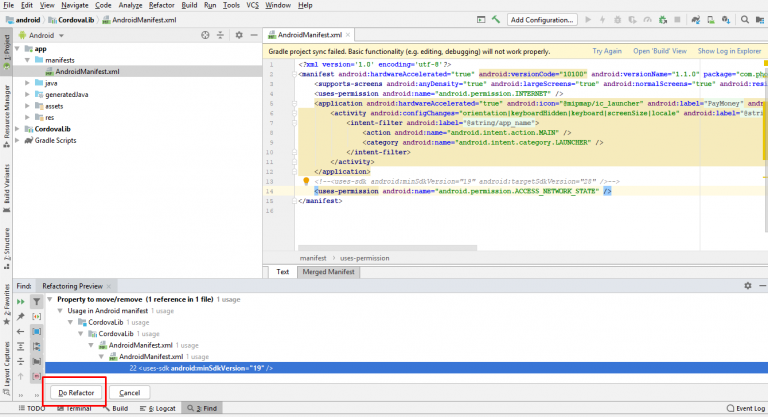
Now, click “move minSdkVersion to build files and sync project” and then click “Do Refractor” (see below screenshots)
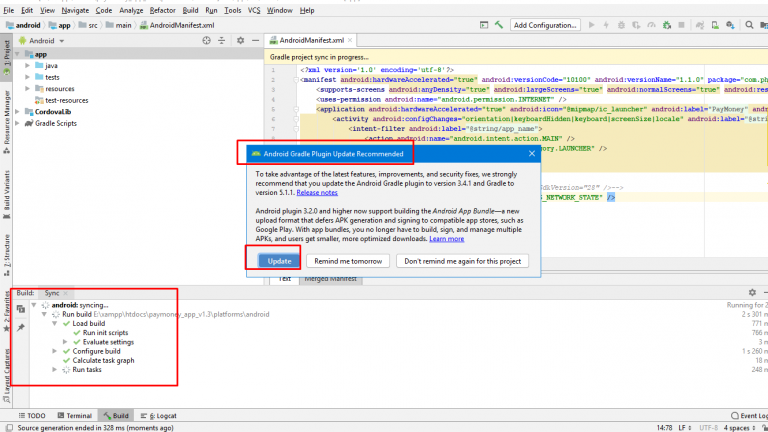
You might see a pop-up window of “Android Gradle Plugin Update Recommended” and click on Update (see below screenshot).
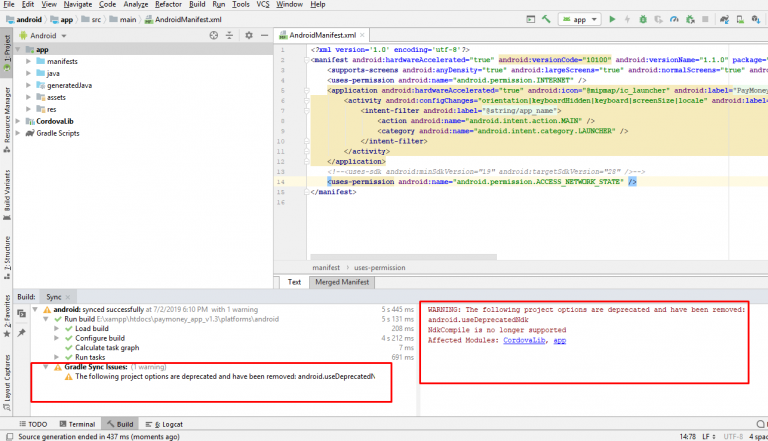
Gradle will sync again and might throw a deprecated NdkCompile warning (see below screenshot)
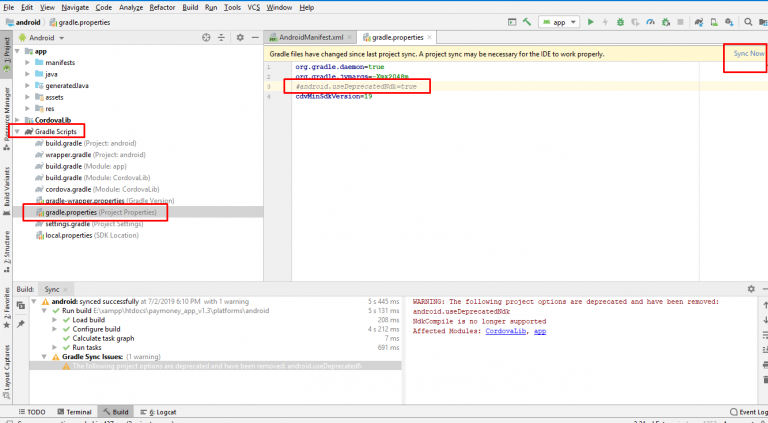
To remove the warning, go to Gradle Scripts->gradle.properties and uncomment line
“android.useDeprecatedNdk=true”
and sync again (see below screenshot)
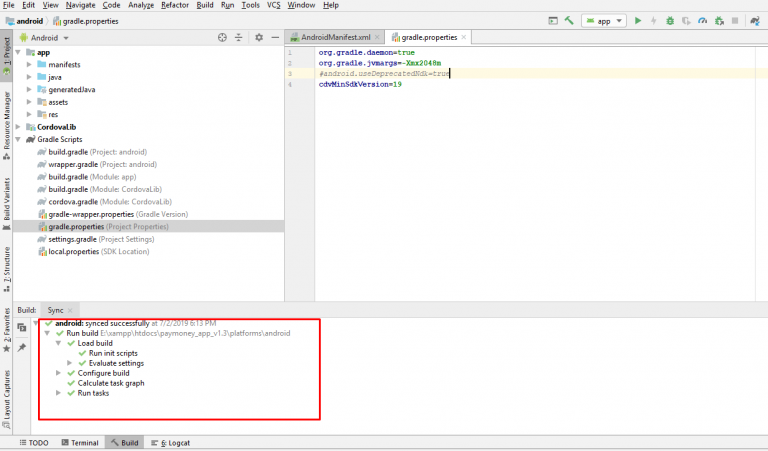
Finally, Gradle will be able to sync without errors or warnings.
B) GENERATE SIGNED BUNDLE
To generate signed bundle, follow the steps below:-
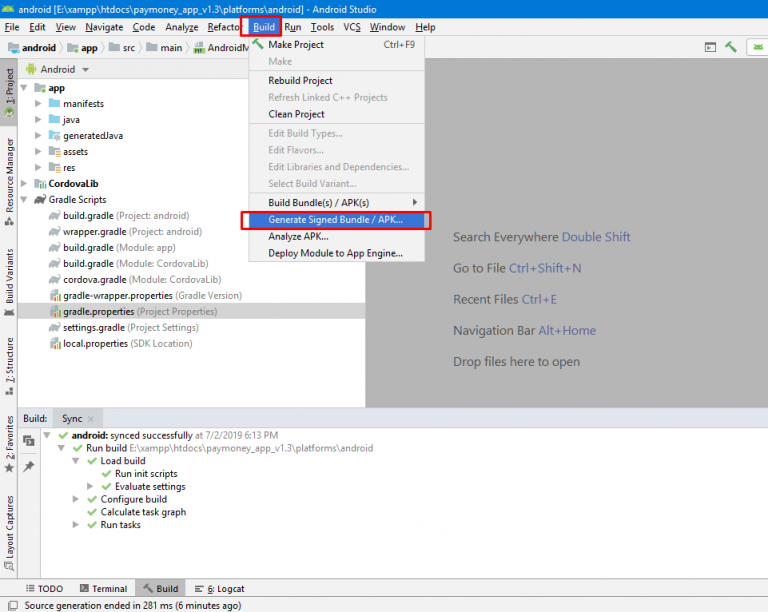
1) From toolbar of Android Studio, click on “Build” and select “generate signed bundle/apk” (see below screenshot)
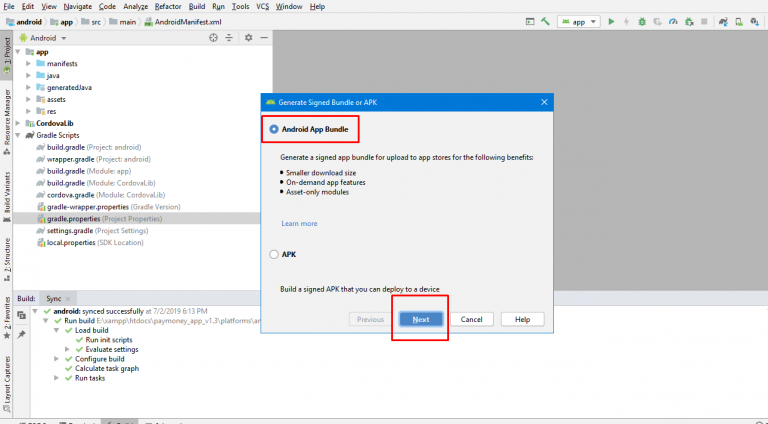
2) Select “Android app bundle” and click “Next” (see below screenshot)
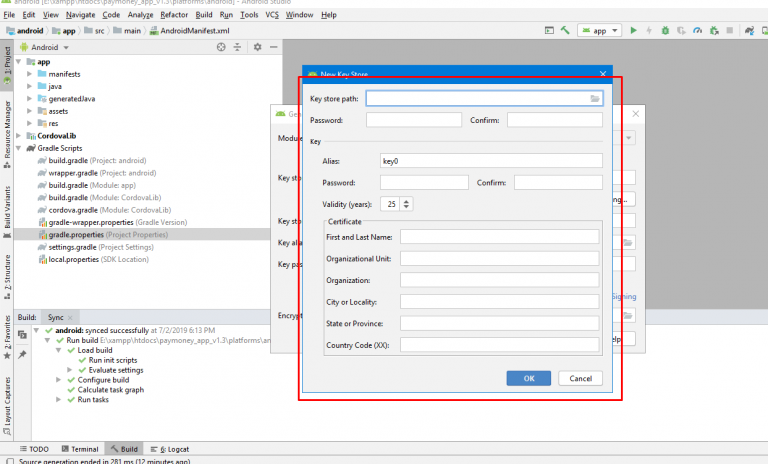
3) Now, a window will open regarding key store (which is needed to sign the app and deploy to play store). Click on “Create new” and fill the following fileds –
i) key store path: the path where you want to save the .keystore file in your machin. Must have .keystore extension (example- E:\xampp\htdocs\paymoney_app_v1.3__playstore_files__keystore\sample.keystore)
ii) Password and Confirm(key store path): enter your preferred password(this must be remembered for later use)
iii) Alias(key):S enter your preferred alias name for your app (this must be remembered and the alias name cannot be changed if you want to deploy upgrades to app later on play store)
iv) Password and Confirm(key): enter your preferred password (this must be remembered for later use)
v) Validity(years)(key): no need to change.
vi) Certificate details (key): enter your preferred values(valid values should be given) in the following fields:-
First and Last Name: should be valid
Organizational Unit: should be valid (usually two letters)
Organization: should be valid
City or Locality: should be valid
State or Province: should be valid
Country Code(XX): should be valid (usually two letters)
(see below screenshots)
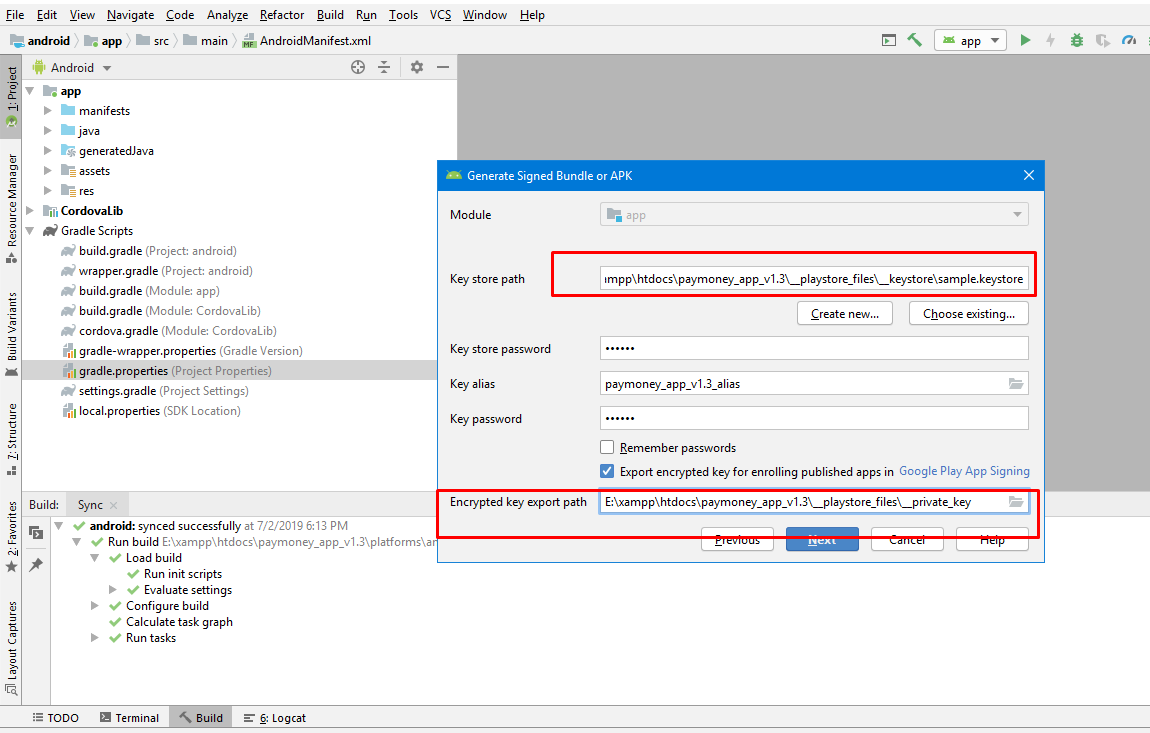
Once, proper values are given, you will be redirected back to below window, where you can see your alias name and key path.
Now, select the path where you want to save the encrypted/private key (this will be needed for app deployment to play store) and click "Next".
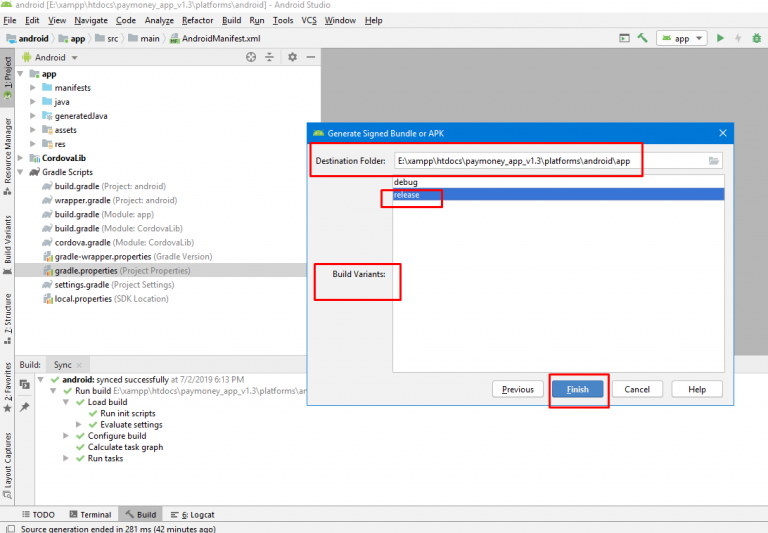
You will see a window with destination folder and build variants.
Select “Release” and click on “Finish” to complete signing the app bundle (see below screenshot)
Android studio will build again. Wait for few moments. You will see a popup indicating “locate” and analyze (on bottom right side).
Now , click on “locate” and go to app->release folder and you will find “app.aab” file.
This file – “app.aab” and “private_key.pepk” file (located at the path where you had saved the encrypted/private key earlier) will be needed at initial stage of your app deployment to play store.
Note: If in any case, you deleted or lost your .keystore file, you can create a new keystore file but you must give the same alias and password that you had given earlier before you deleted or lost the .keystore file.
So, you must remember alias and password.