Project Setup - iOS version
Paymoney React Native App
Paymoney app project setup (iOS version)
-
Initially, extract the
sourcecode_v3.zipfile. -
If you want, you can change your
app name,app versionandbundle identifierwhich should be unique for every app.-
To change the app name: Open
info.plist, replace the value after
<key>CFBundleDisplayName</key>to your app name.
-
To change the app version and bundle identifier:
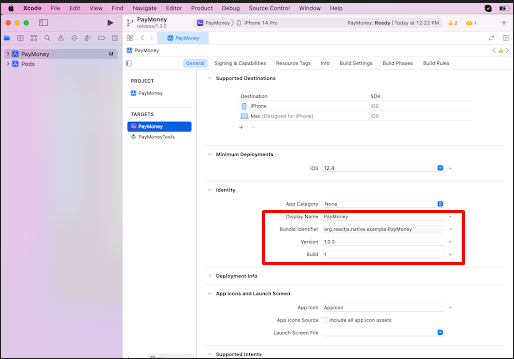
-
-
To change the base URL go to the
“.env”file in the project root folder.- Set the base URL using
BASE_URL_VERISON = your_web_live_url/api/v2
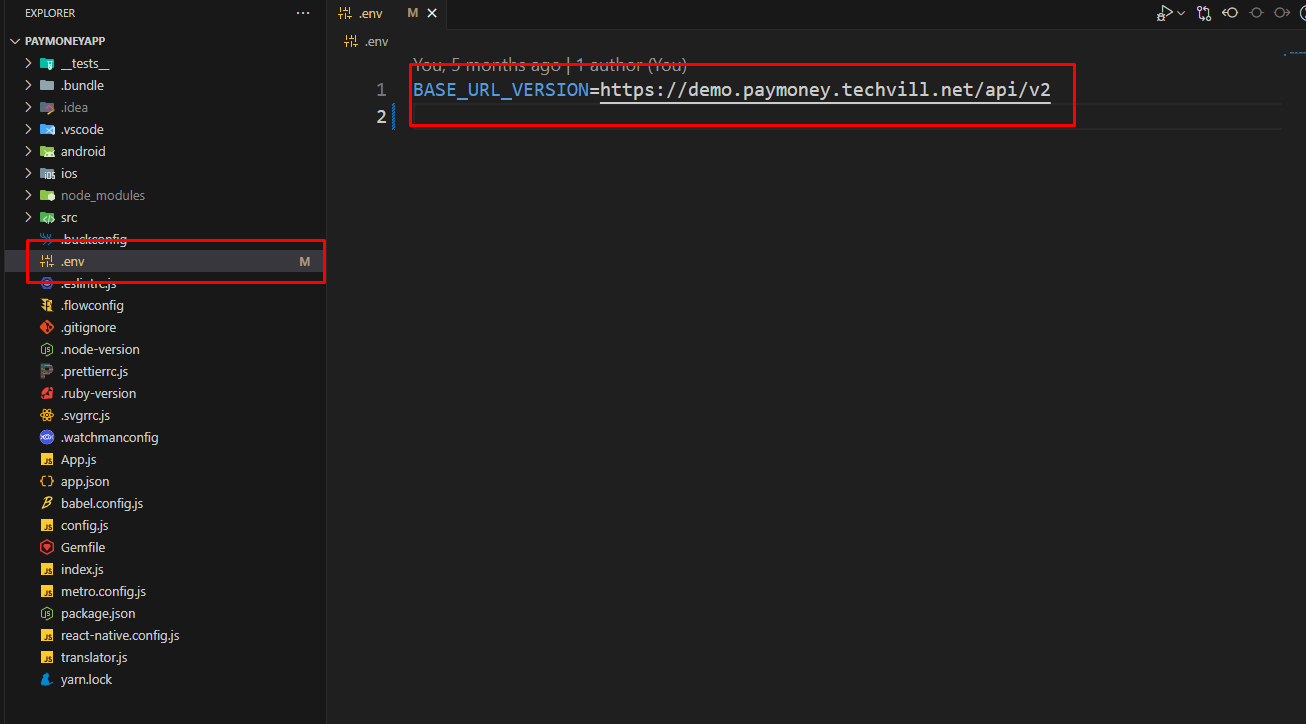
- Set the base URL using
-
To customize the app icon which you want to launch into your device please create an icon with
1024*1024size and convert it from the following website. ( Recommended File Type: png )- Go to https://easyappicon.com.
-
Upload your resized image & download the file. (Make sure to download
“iOS + Adaptive Icon”)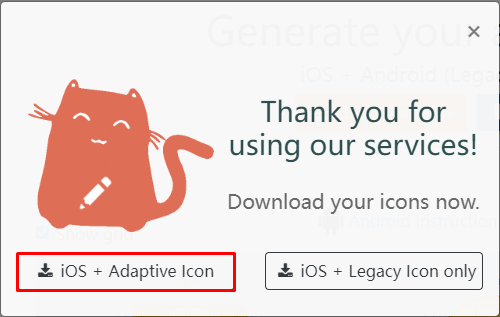
-
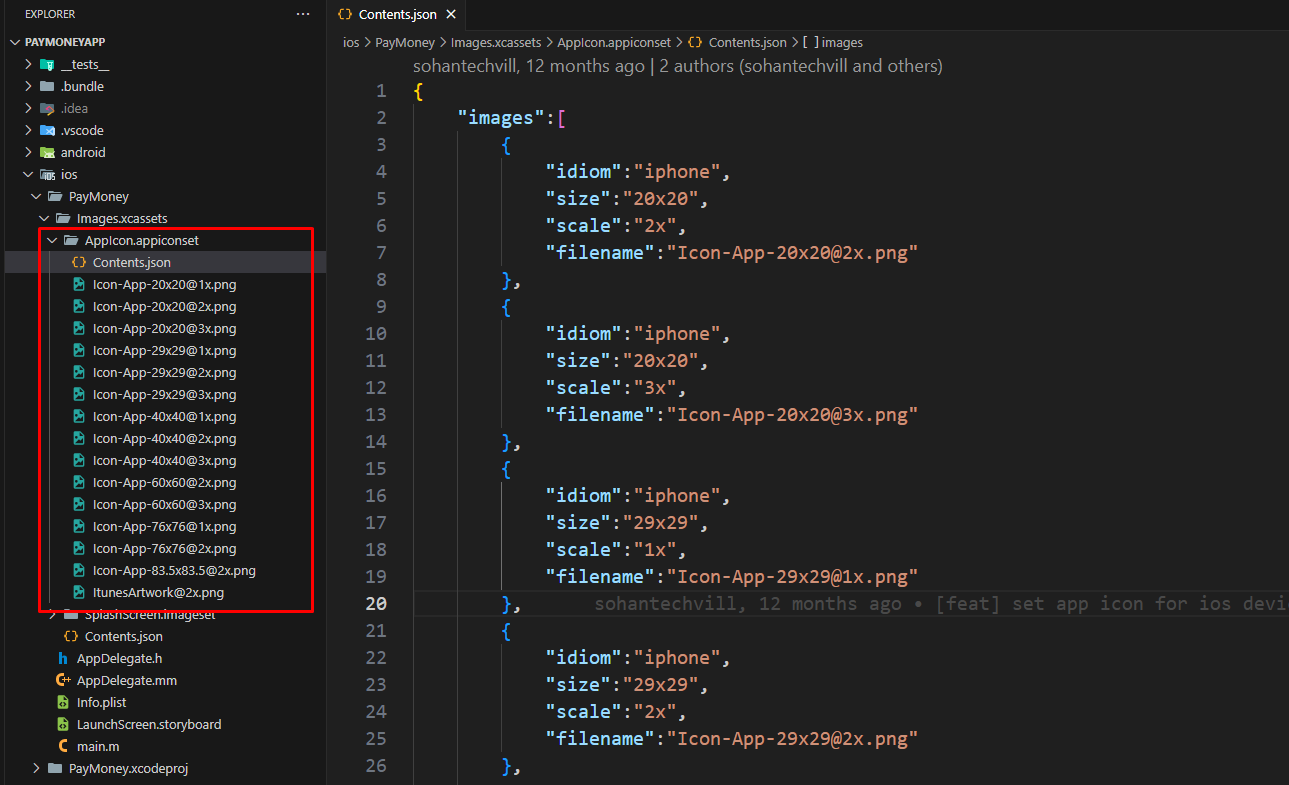
Extract the downloaded zip file.
- Go to the ios folder. Inside the ios folder copy the folder named as AppIcon.appiconset.
- Placed the folder inside directory
ios\projectname\Images.xcassets
-
To customize your app splash screen icon which you want to display in your app please create an icon with
240×240dp size and convert it from the following website. ( Recommended File Type: png )- Go to https://www.appicon.co/#image-sets
- Change your file name to
“launch_screen”. - Upload your resized image & download the file. (Before upload must change your file name to “launch_screen”)
- Extract the downloaded zip file
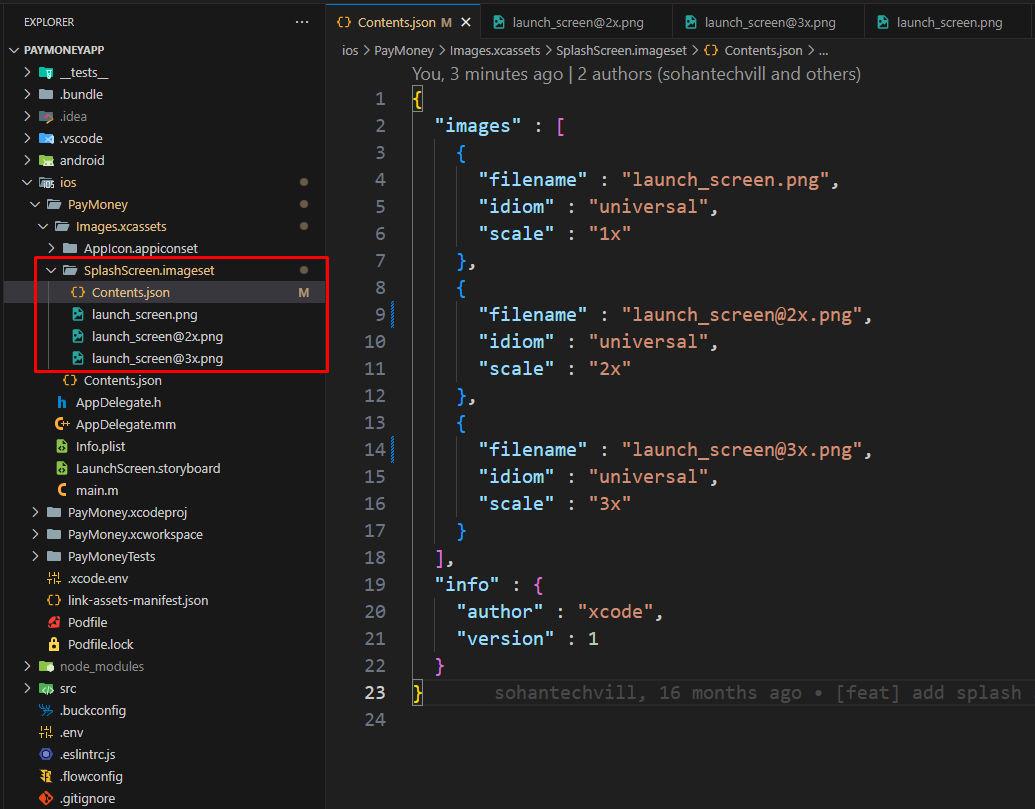
- Inside the ios folder copy the three image items named as
launch_screen.png, launch_screen@2x.png, launch_screen@3x.png. - Place those items in the directory
ios\projectname\SplashScreen.imageset
-
If you want to change the app icon please go to
projectName\src\assets\image\logoand replace your logo with “dark_logo.png” (For dark mode) and “light_logo.png” (For light mode) ( Recommended Dimension:160px * 40px, Recommended File Type:png).
-
Setting up the development environment for React Native
- You will need Node, Watchman, the React Native command line interface, Xcode and CocoaPods.
-
While you can use any editor of your choice to develop your app, you will need to install Xcode in order to set up the necessary tooling to build your React Native app for iOS.
-
Node and watchman:
- We recommend installing Node and Watchman using Homebrew. Run the following commands in a Terminal after installing Homebrew:
brew install nodebrew install watchman
If you have already installed Node on your system, make sure it is Node 18 or newer.
Watchman is a tool by Facebook for watching changes in the filesystem. It is highly recommended you install it for better performance. - We recommend installing Node and Watchman using Homebrew. Run the following commands in a Terminal after installing Homebrew:
-
Xcode:
- Please use the latest version of Xcode.
- The easiest way to install Xcode is via the Mac App Store. Installing Xcode will also install the iOS Simulator and all the necessary tools to build your iOS app.
If you have already installed Node on your system, make sure it is Node 18 or newer.
Watchman is a tool by Facebook for watching changes in the filesystem. It is highly recommended you install it for better performance. -
Command Line Tools
You will also need to install the Xcode Command Line Tools. Open Xcode, then choose Settings... (or Preferences...) from the Xcode menu. Go to the Locations panel and install the tools by selecting the most recent version in the Command Line Tools dropdown.
-
Installing an iOS Simulator in Xcode
To install a simulator, open
Xcode > Settings... (or Preferences...) and select
the Platforms (or Components) tab. Select a simulator with the corresponding version of iOS you wish to use. If you are using Xcode version 14.0 or higher to install a simulator, open the
Xcode > Settings > Platforms tab, then click the"+"icon and selectiOS…option. -
CocoaPods
CocoaPods is one of the dependency management systems available for iOS. CocoaPods is a Ruby gem. You can install CocoaPods using the version of Ruby that ships with the latest version of macOS. For more information, please visit CocoaPods Getting Started guide.
-
Run the application on the iOS simulators-
- After configuring the react native environment successfully (completing step 7) you can run the app following these commands at project root directory:
yarn install(for installing all the dependencies)cd ios & pod install(responsible for managing the project dependencies for iOS version)cd..(back to the root directory of the project)yarn start(run the metro builder)yarn ios( build the project)
- After configuring the react native environment successfully (completing step 7) you can run the app following these commands at project root directory:
-
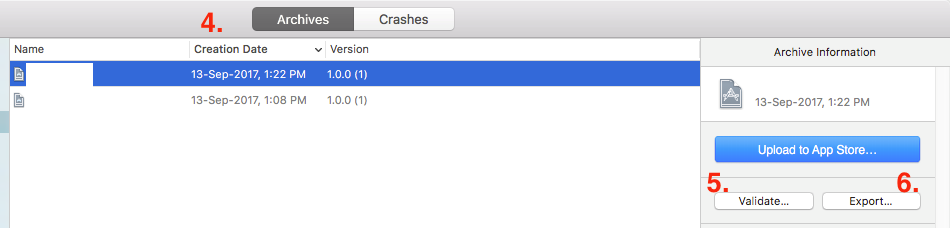
Generating the Archive for creating the IPA file:
-
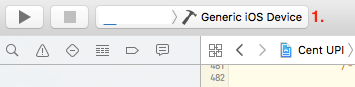
Select ‘Generic iOS Device’ on device list in Xcode
-
Clean the project (
cmd + shift + kas shortcut)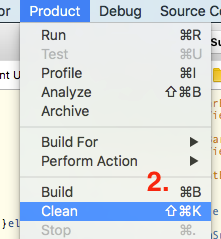
-
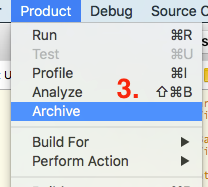
Go to Product -> Archive your project
-
Once the archive is succeeded this will open a window with the archived project.
-
You can validate your archive by pressing Validate (optional step but recommended).
-
Now press on Export button
-
This will open a list of methods for export. Select the export method as per your requirement and click on Next button.

-
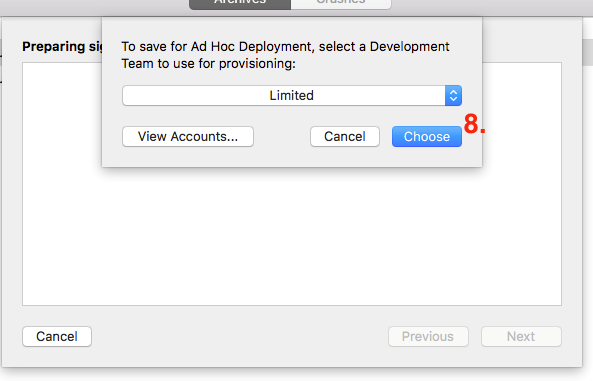
This will show a list of teams for provisioning. Select accordingly and press on the ‘Choose’ button.
-
Now you’ve to select
Device support > Export one app for all compatible devices(recommended). If you want an IPA for a specific device then select the device variant from the list and press on ‘Next’ button.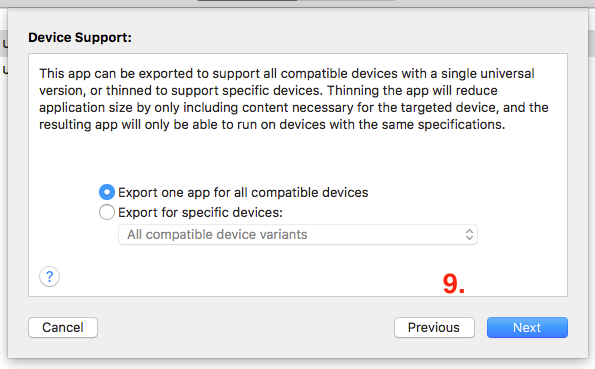
-
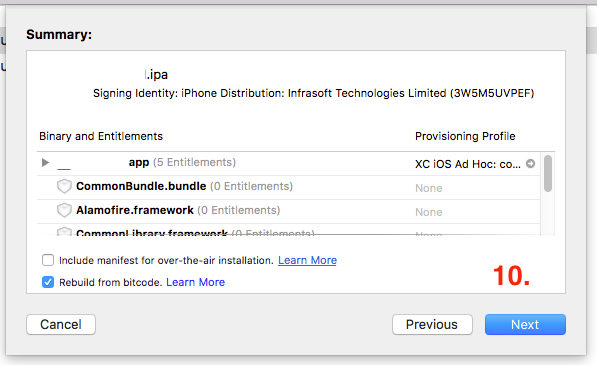
Now you’ll be able to see the ‘Summary’ and then press on ‘Next’ button
-
Thereafter IPA file generation begins and later you’ll be able to export the IPA as
[App Name - Date Time]and then press on ‘Done’.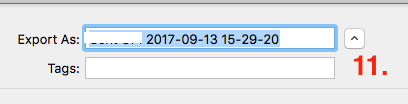
-