Language Addition or Modification for Paymoney App
Paymoney React Native App
Adding a new language (Static text)
-
Initially, after getting the source code, extract the
sourcecode_v3.zipfile. -
Make sure you have build and run the app successfully following below commands in the project root directory:
- yarn install ("We recommend using Yarn instead of npm as it provides faster performance, more reliable package installations, and better dependency management through its lockfile and caching mechanisms.")
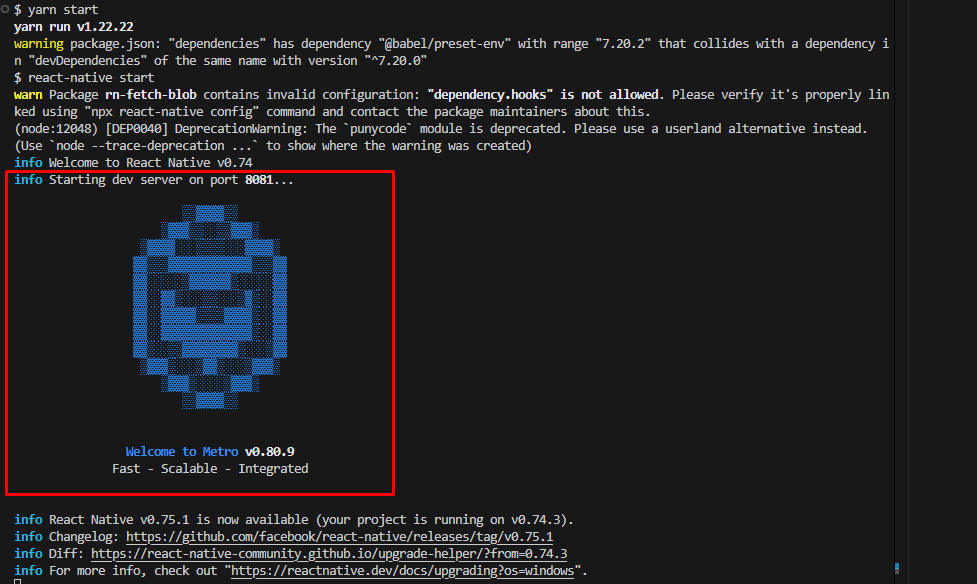
- yarn start (Which will run the metro bundler. Please wait for few seconds until the metro bundler run)
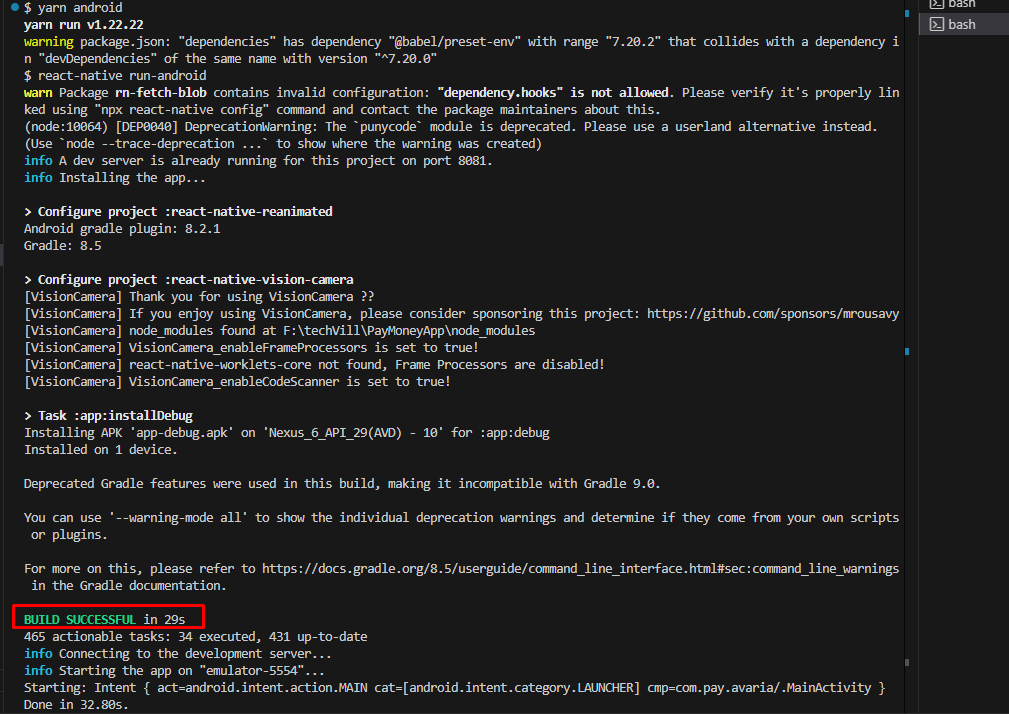
- yarn android (Which will install and build the app in the android studio virtual device)
-
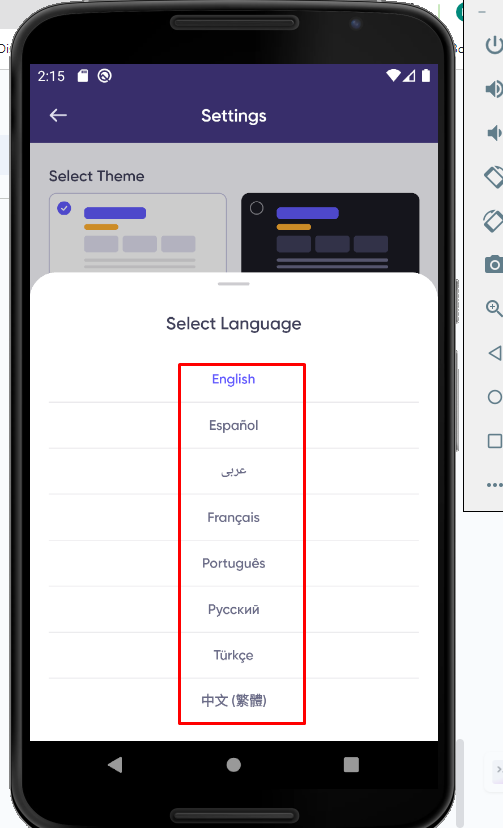
After installing the app successfully, the user needs to login to the application and check if the language portion is working properly or not for all the static text. To change the language navigate to the Settings page from the drawer and change the language to any options available.


-
If the languages are changing successfully for all the options that have been selected, please make sure you have opened your unzip source code folder in any IDE (Integrated Development Environment), we recommend vscode for the simplifications.
-
After opening the source code visit the LanguageElements.json file which is located in the
src > utils > language > LanguageElements.jsondirectory.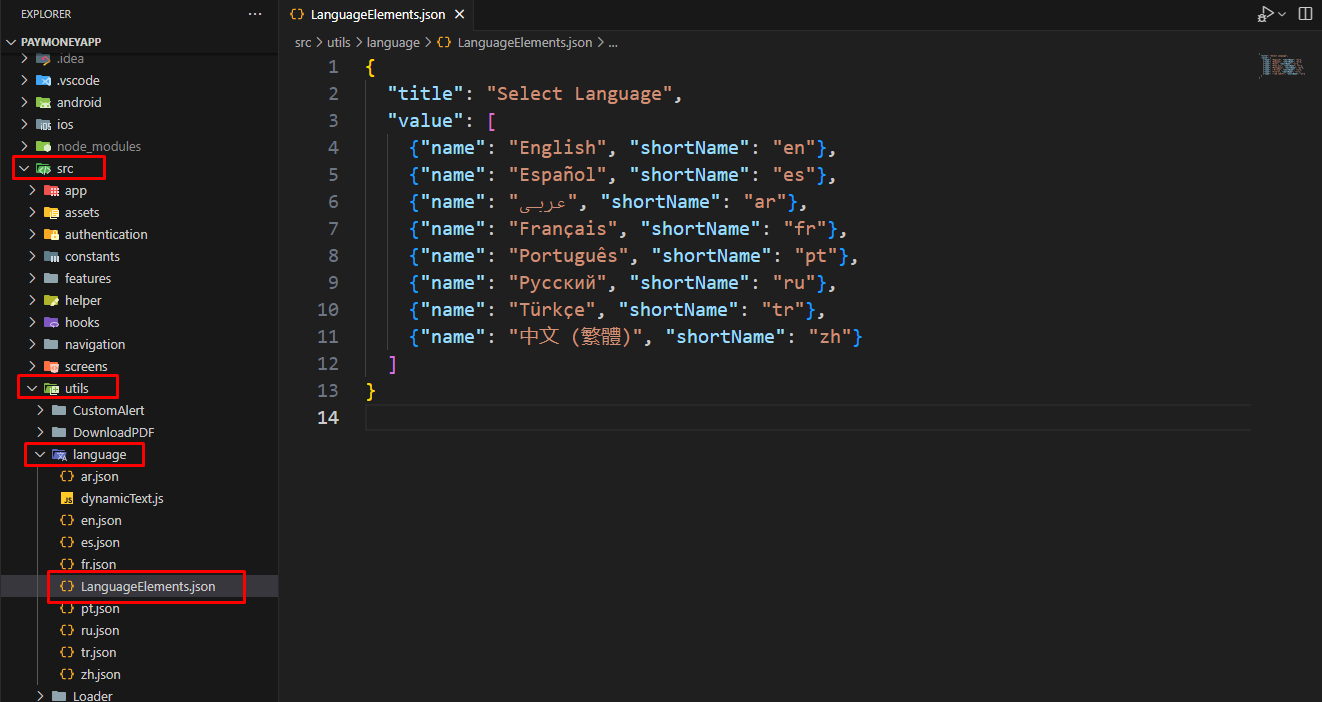
-
The name inside the value object are the options that are displayed in bottomsheet as an language option
Please make sure you have made the changes in the
translator.jsfile in the root directory file to import all the languages and place the right shortname in the resources object.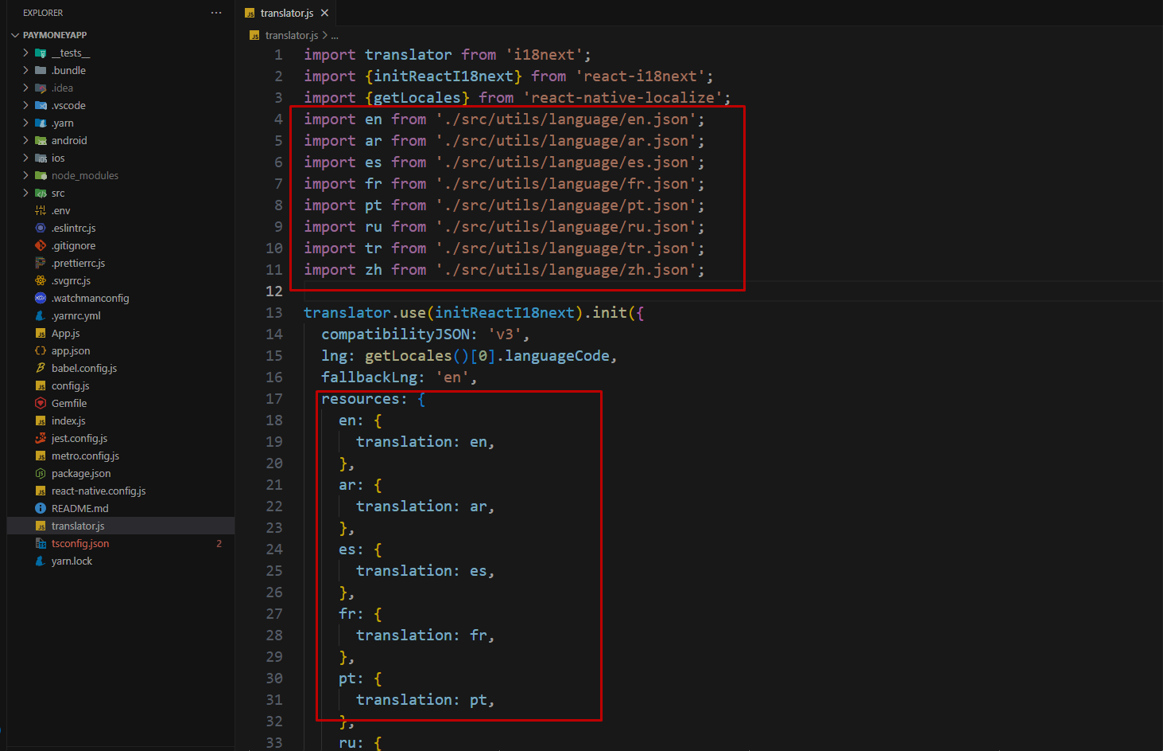
-
The short name should be the same as all the language json files. For example if for the English language:
Inside the value object
{ name: English, shortName: ‘en’}, then the json file should be en.json (following shortName ‘en’) which contains all the text as a key value pair.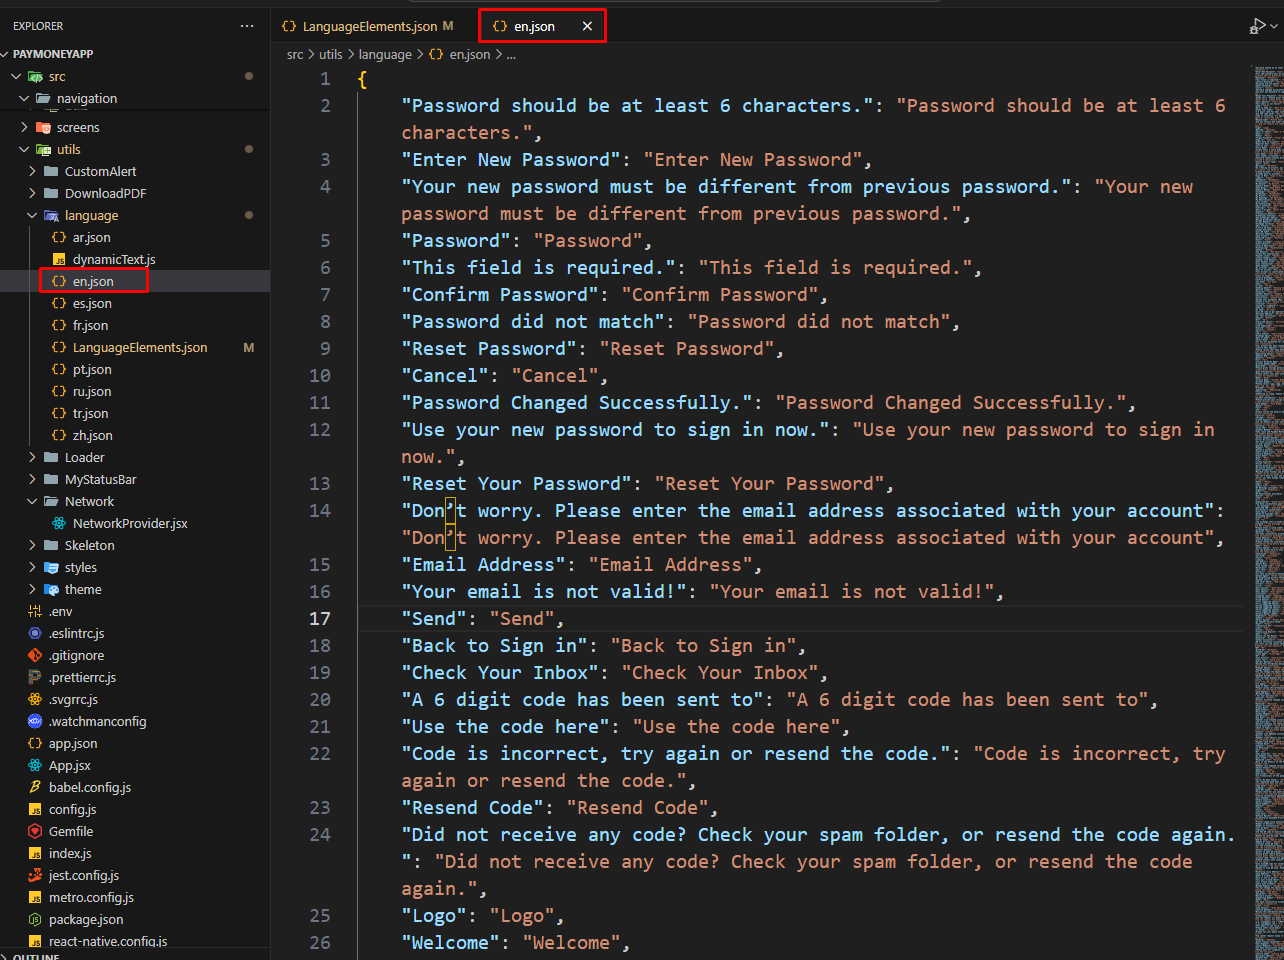
-
Therefore adding a new language needs to add a new key value pair as name and shortName. Suppose Any user wants to add a new language, it could be Italian then the key value pair would be:
{"name": "Italiano", "shortName": "it"}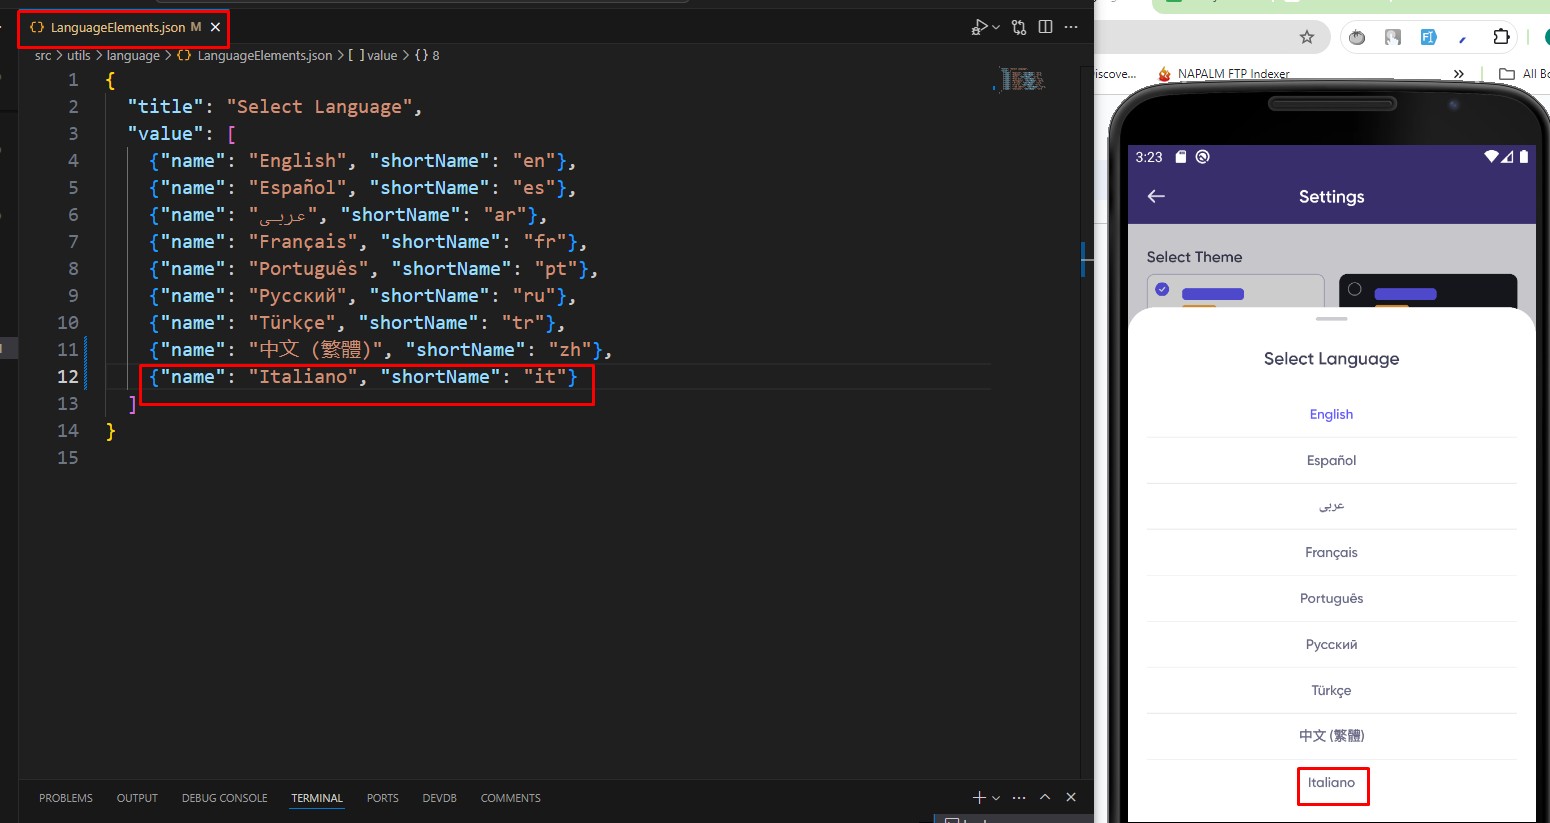
Please make sure to create a json file with the shortName it.json to make that perfectly workable.
-
-
The language json file like
en.json, es.jsonshould be look like this following json format:
Please note that, if the json format is not right the language portion will work correctly. So be careful about the syntax.
-
After adding a new language in
LanguageElements.jsonand adding a new json file there are few steps needed to follow to make the changes workable properly.- Clear the cache following that command :
yarn cache clean -
Clean the build folder to run the following commands at root directory :
cd android./gradlew clean -
Rebuild the app following step number 2.
- Clear the cache following that command :
-
After completing all these steps the new language should be added and work properly for all the static text the application contains.
Dynamic Text
-
For the dynamic text which we get normally after fetch api endpoints there could be a mix of static and dynamic variable which represents a sentence. For that case the representation of the sentence is different compared to static text in the language json file as follows:
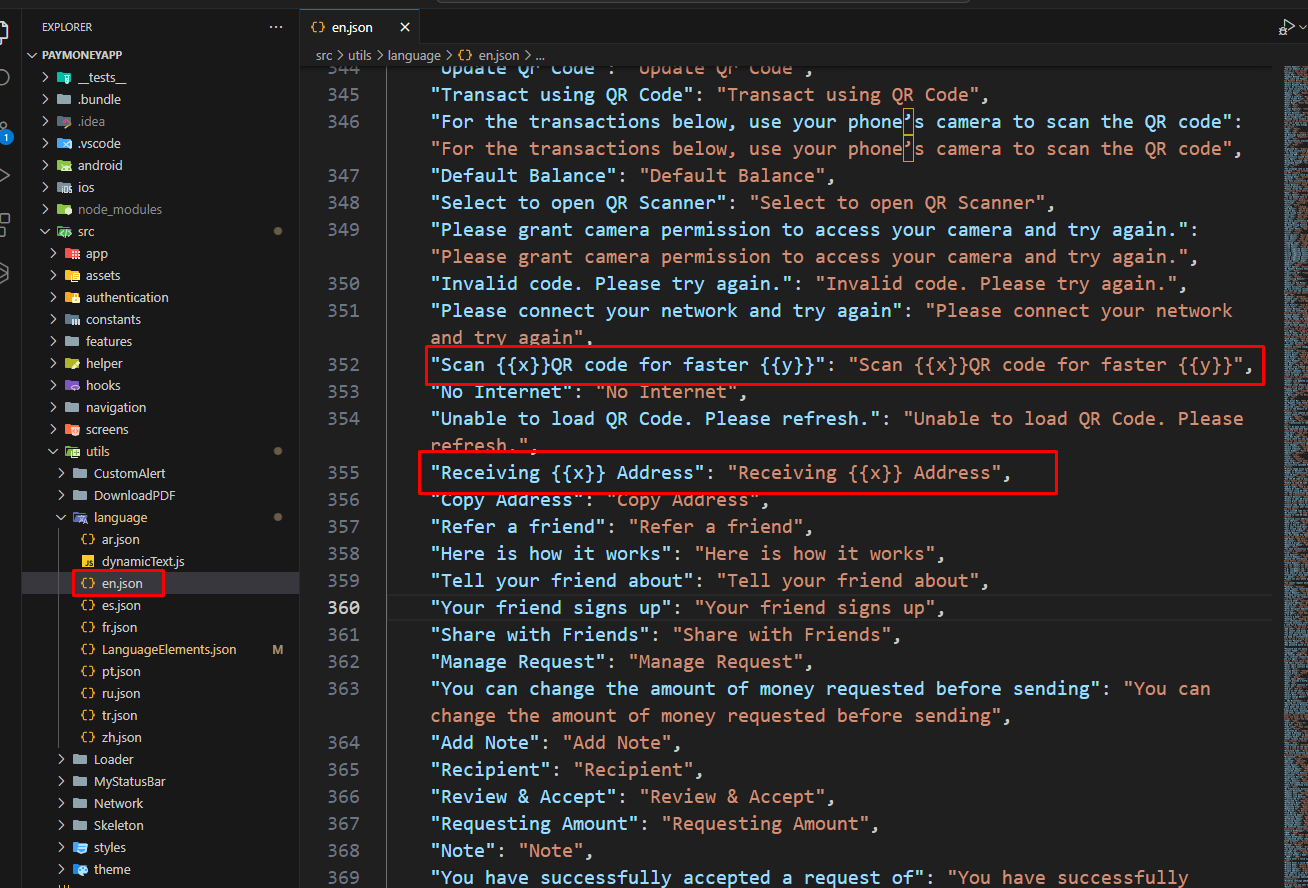
Here
xandyare the variables that represent the dynamic text portion of a sentence.xandycould be changeable as the variables are not constant. That's why it’s been referred to as dynamic text, not static. -
The files which are using this text for the translation represents the follows:
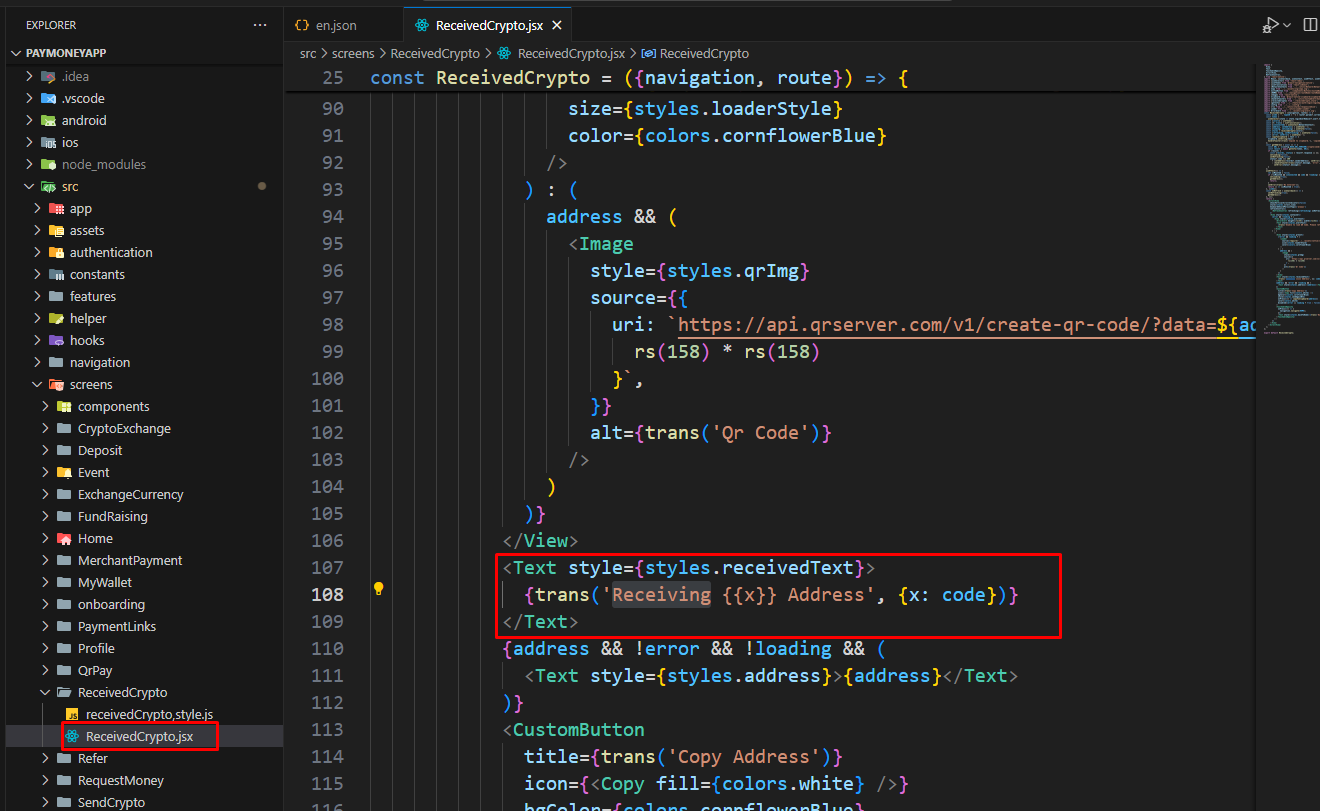
Here
xis the dynamic variable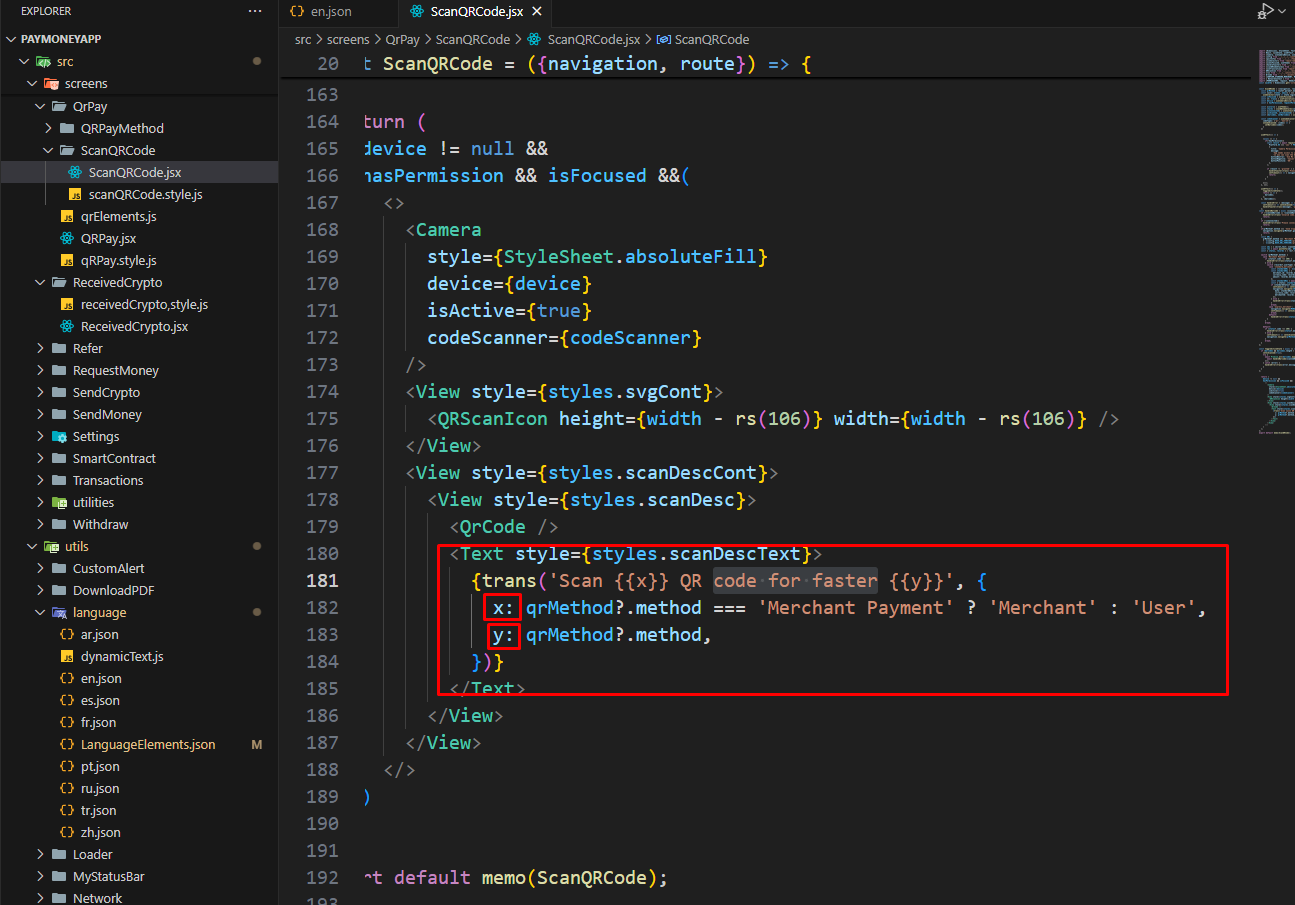
Here
xandyare the dynamic variables.
Changing an existing language
-
Changing an existing language replacing the previous one in the json file needs to replace the key value pair text for the language which needs to be changed. For example: hanging the
en.jsonfile will need to place the new key value pair object inen.jsonfile as follows: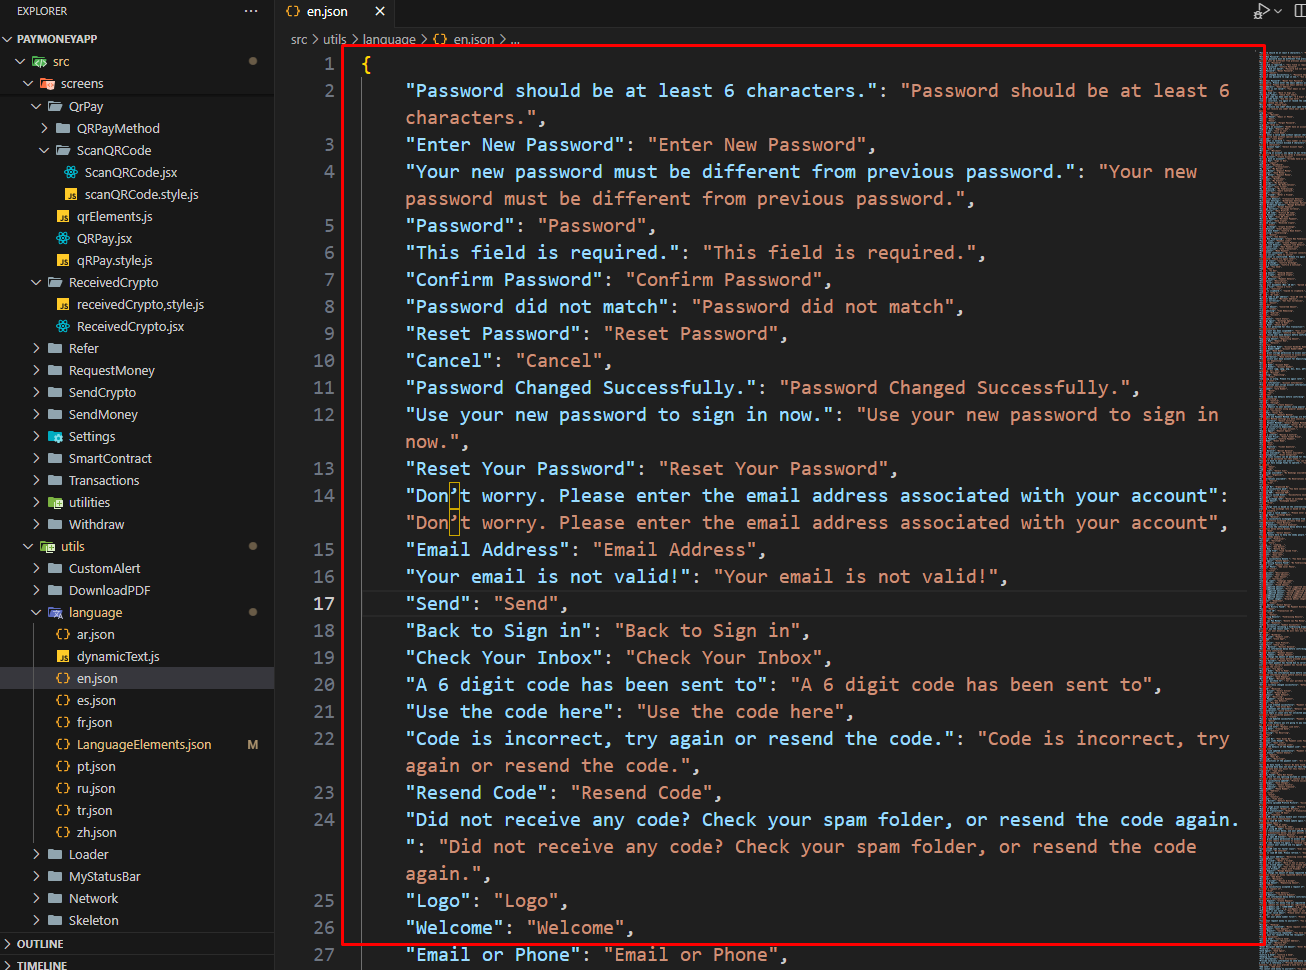
User can change any specific text if he/she wants.
-
To make the effect after changes please follow step 7 in the Adding a new language section which should make the changes properly for any existing languages that need to be changed.
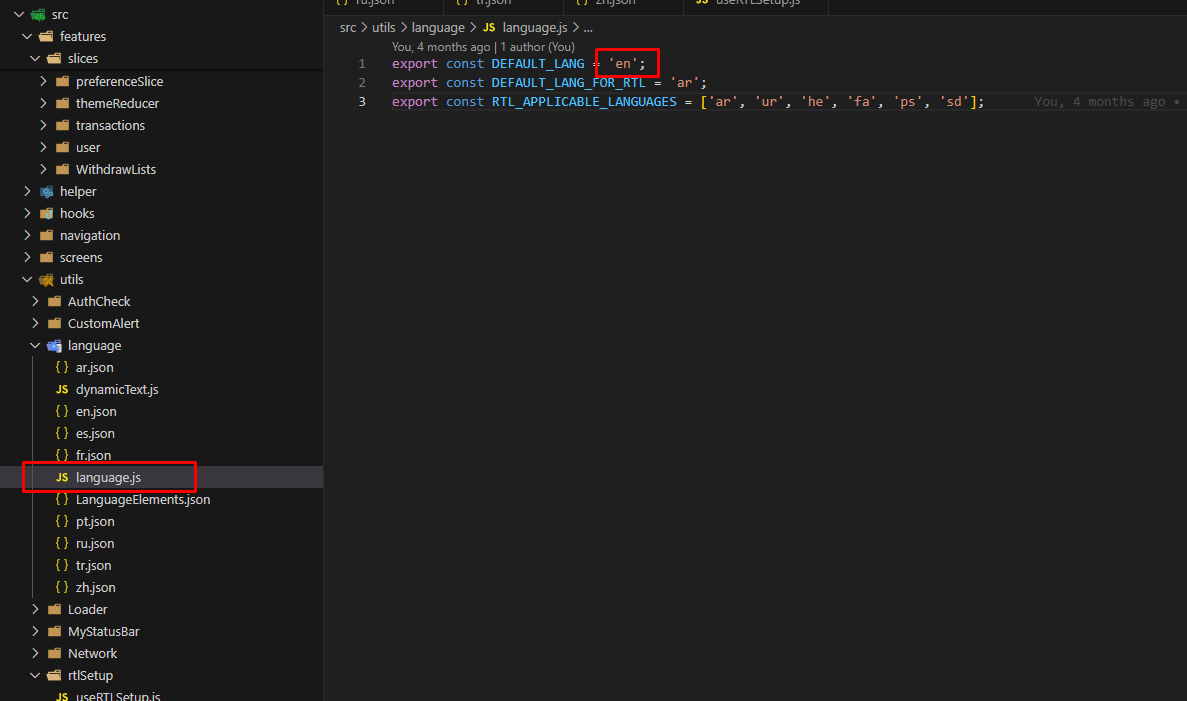
Change the default language:
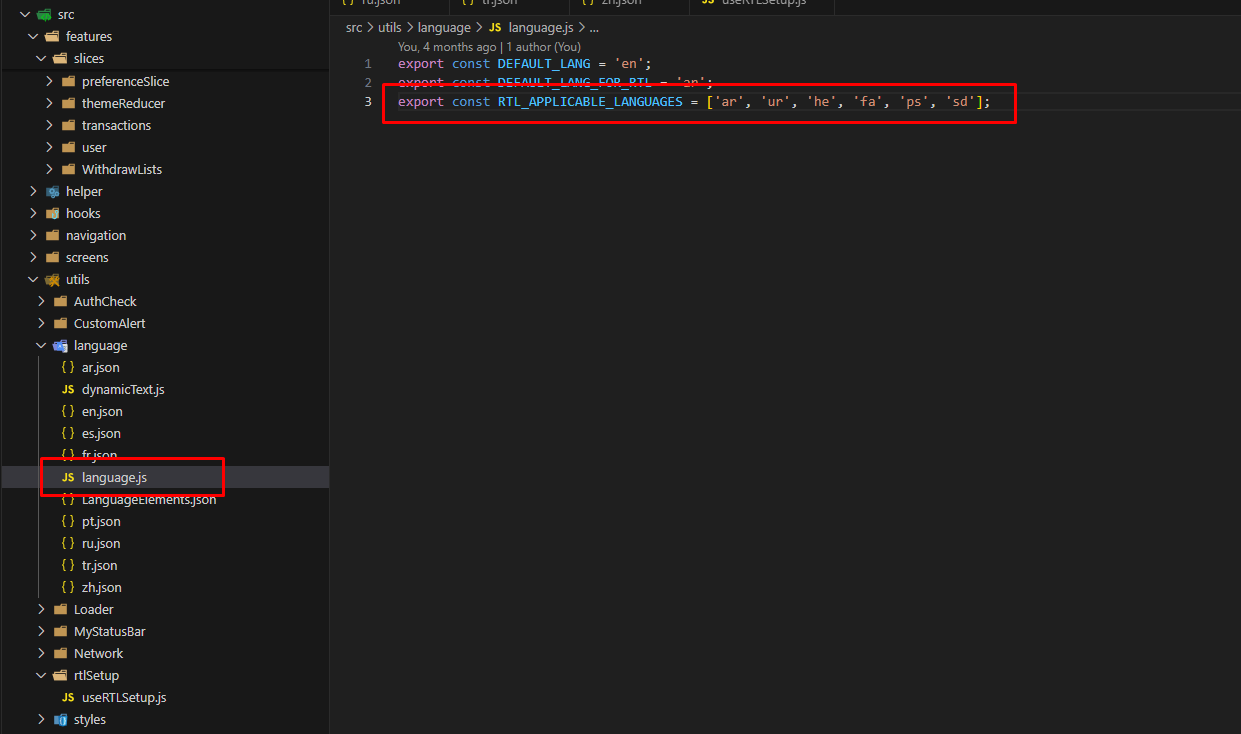
- To change the default language from English to any other language available on the app just make sure to change the shortname from
language.js(\src\utils\language\language.js) directory.
- To change the RTL default language from Arabic to any other RTL language available on the app just make sure to change the shortname from
language.js(\src\utils\language\language.js) directory.
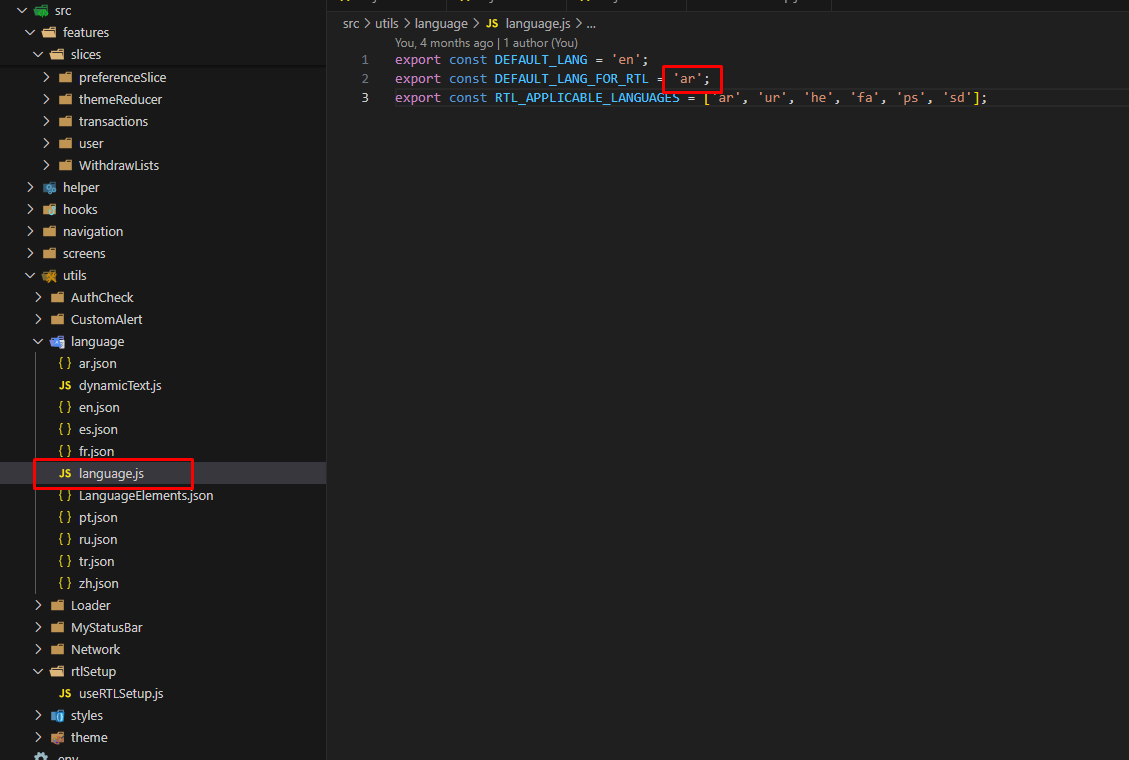
- When adding any RTL (Right-to-Left) language, if its short code is not already included in the RTL_APPLICABLE_LANGUAGES list (shown below), make sure to add the short code to ensure proper layout direction across the app.
