MoneyTransfer Service via PayMoney (Remittance Module)
Custom Features(on-demand only)
Our remittance module is a module that allows users to send money from one currency to another using multiple payment methods including Wallet, Stripe, PayPal, Bank, and other configured payment gateways.
To do this, the sender must first send money to the admin's payment account and provide the receiver's bank account information when sending money.
The admin will send the money manually to the receiver's bank account after receiving the money in his payment account.
Admin Panel Settings:
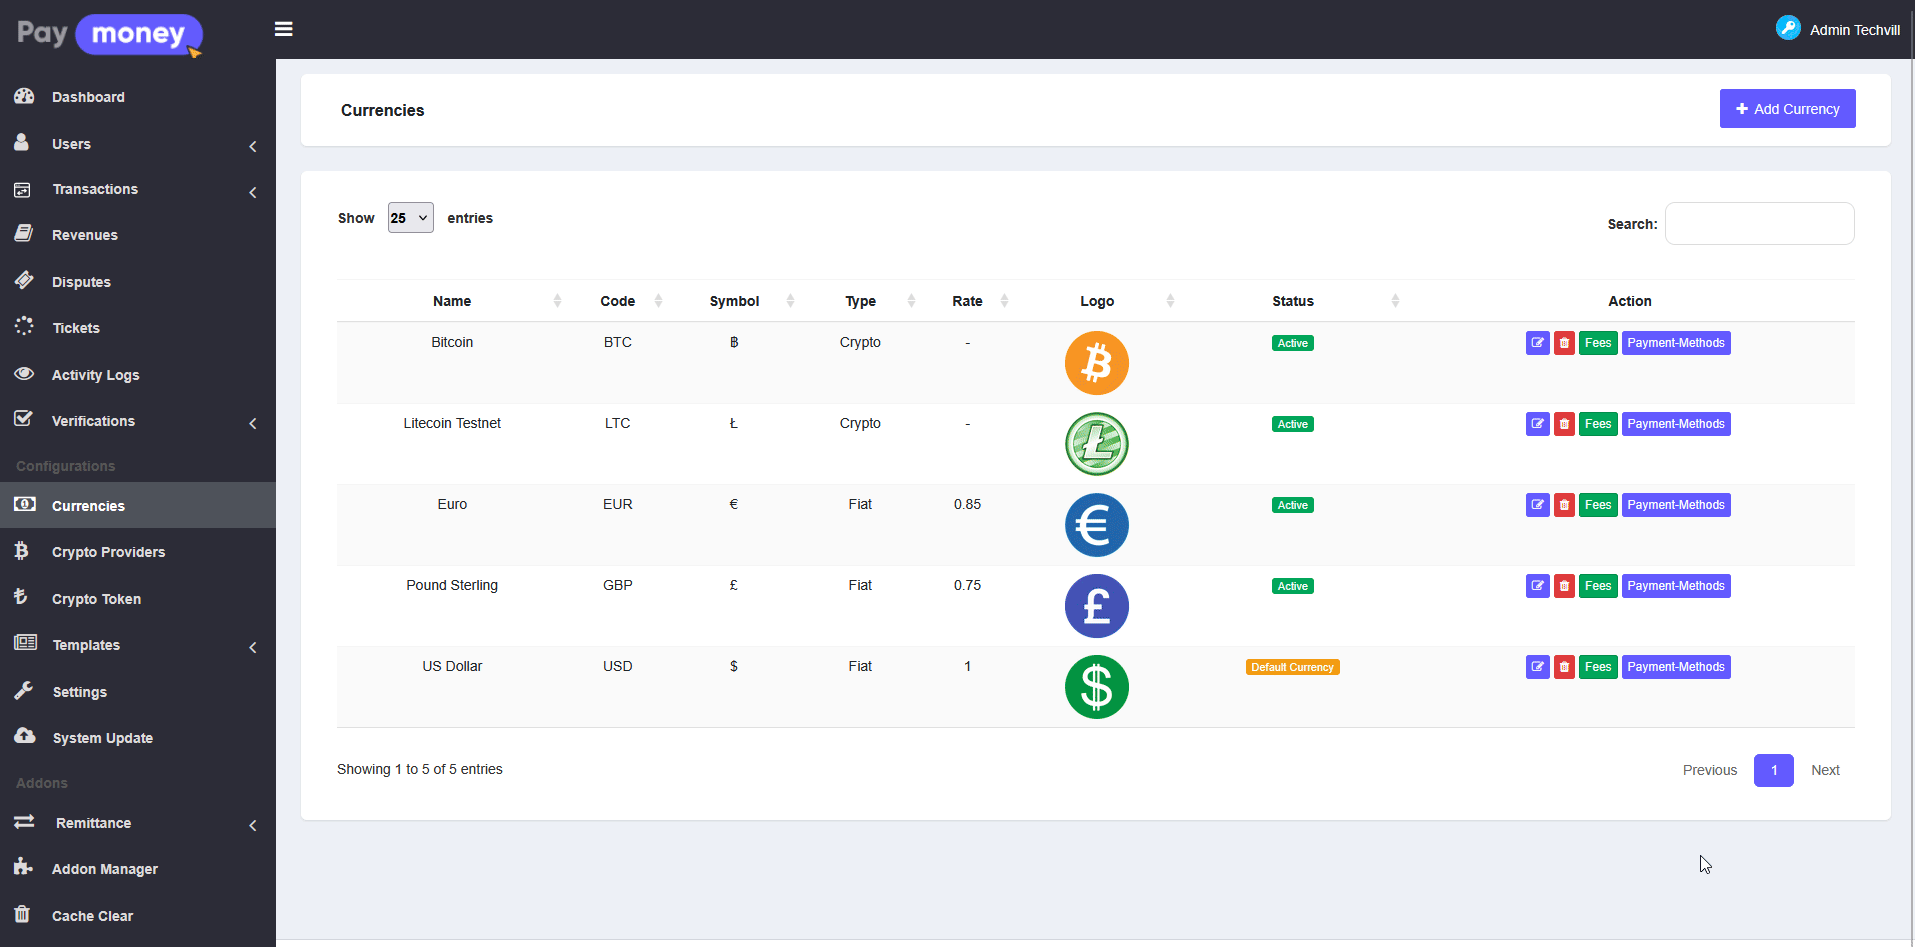
01) Login into Admin panel. Then go to the Currencies->Edit icon and select Remittance Type (send/receive) and Remittance Payout Method. See the image
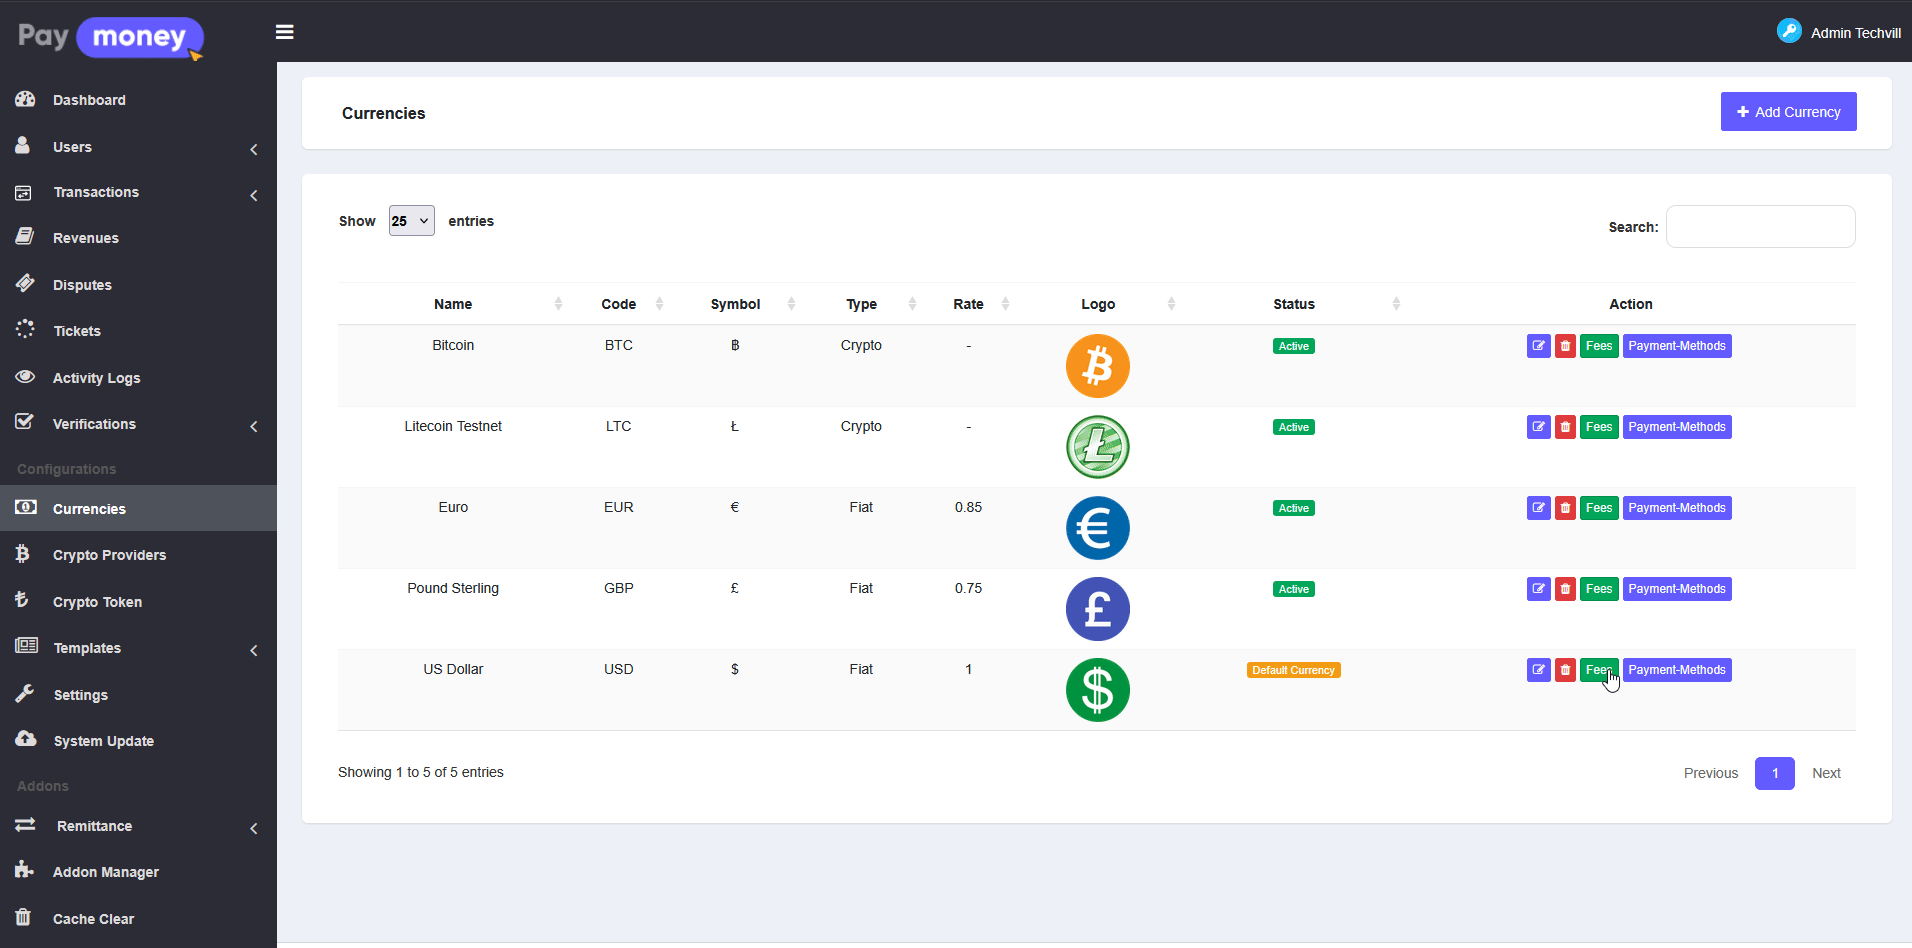
02) Then set the fees limit. For that go to Currencies->Fees & Limits. Select Transaction Type as Remittance, choose Currency and Payment Method, then set Minimum Amount, Maximum Amount, Charge Percentage, and Charge Fixed. See the image
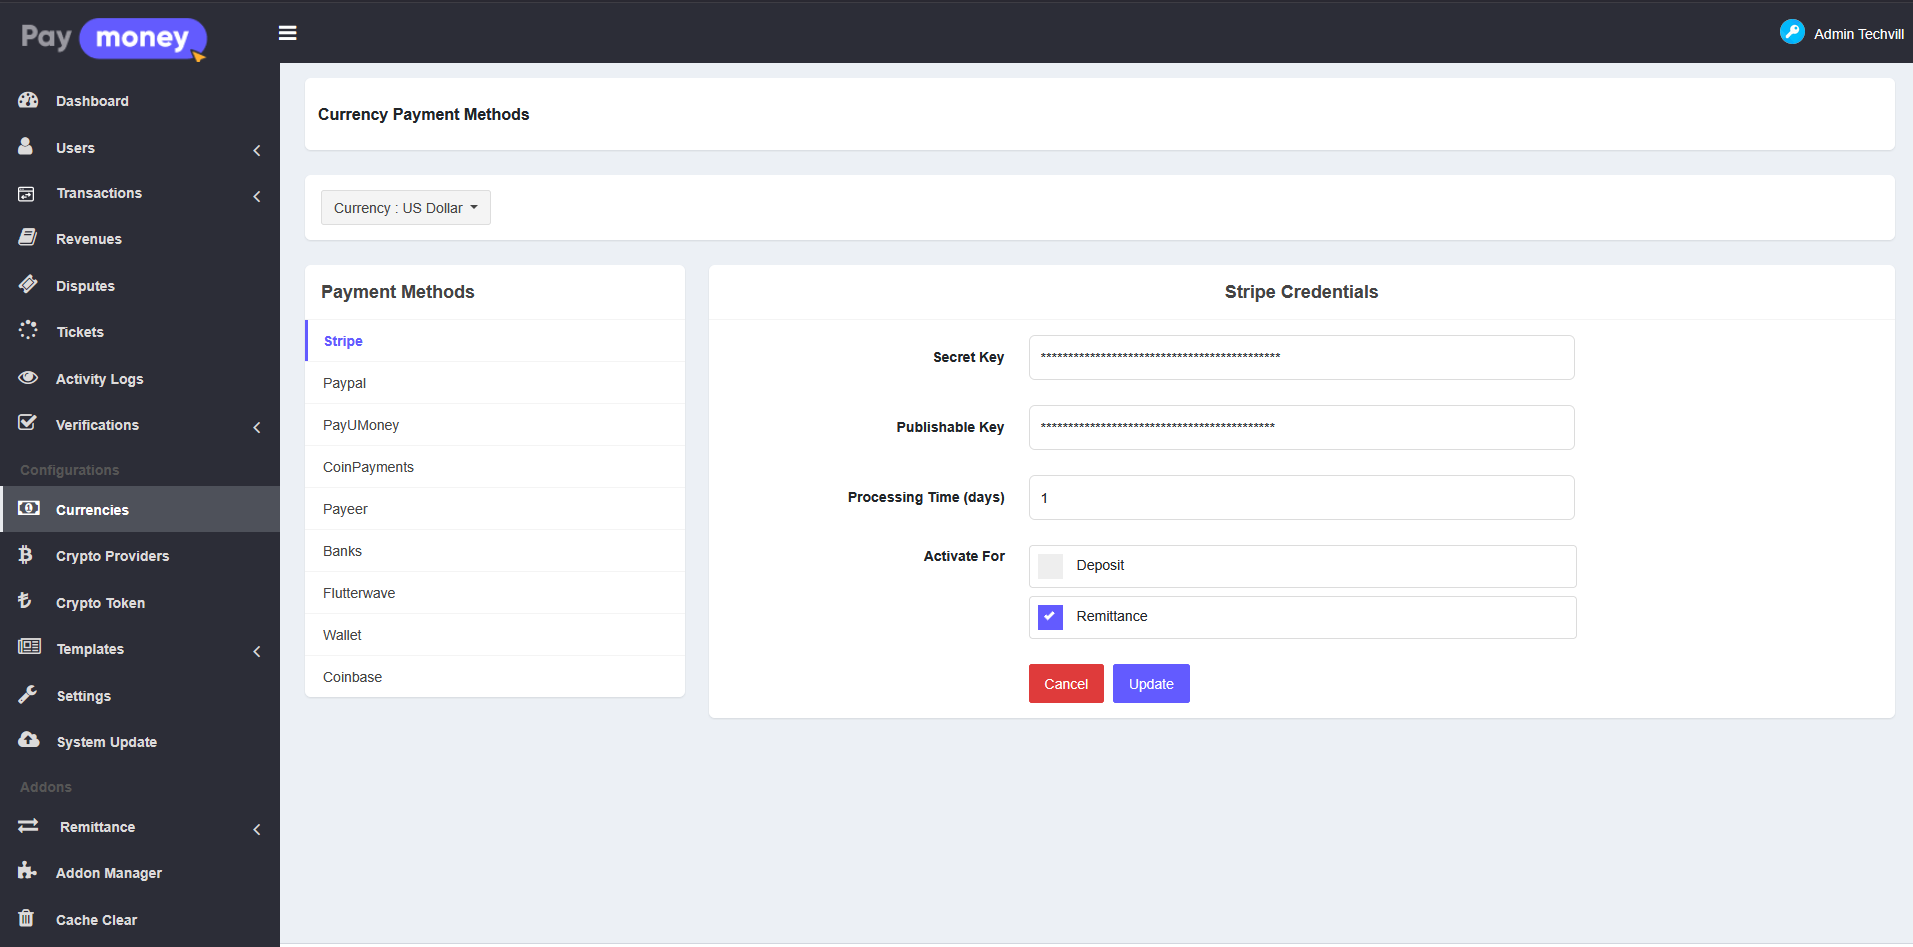
03) Active the payment methods (Wallet, Stripe, PayPal, Bank, or other configured methods). To set up payment methods go to the Currencies->Payment methods and click. Put the credentials and activate for remittance, then click the update button. See the image
04) User/Sender payment gateway can be Wallet, Stripe, PayPal, Bank, Coinbase, PayUmoney, Payeer, Coinpayments, Flutterwave and Receiver will get payment via Bank payout methods.
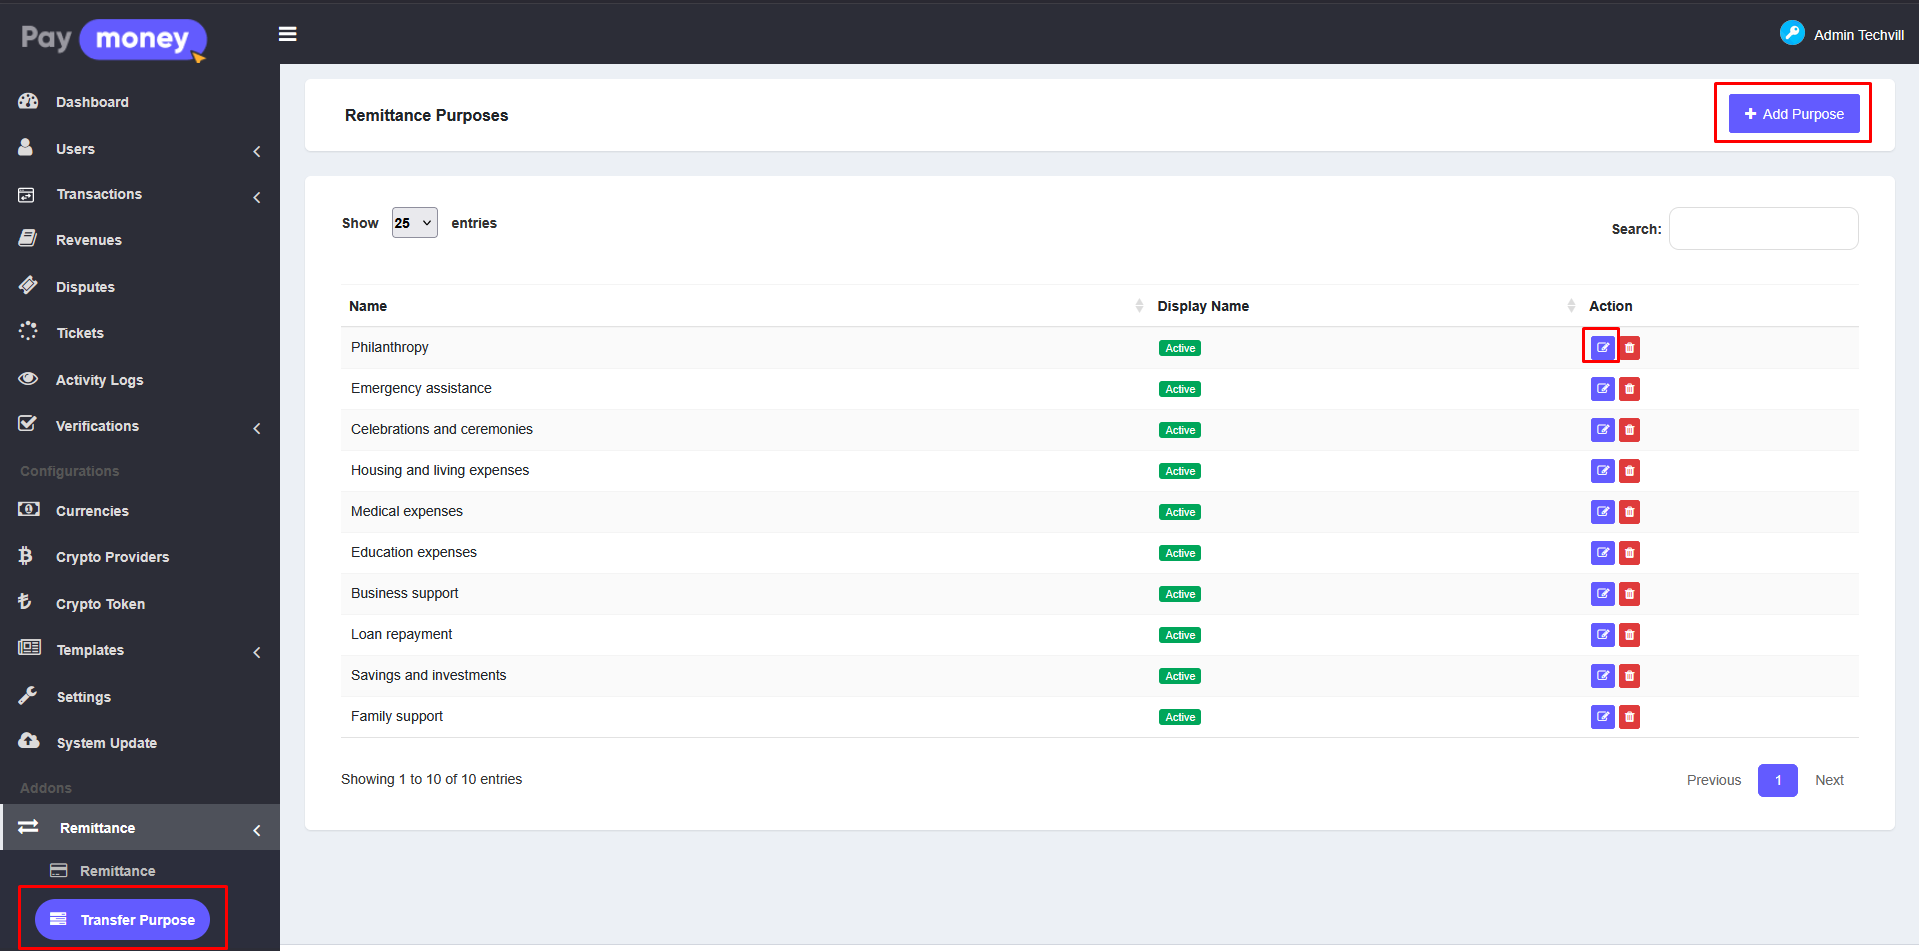
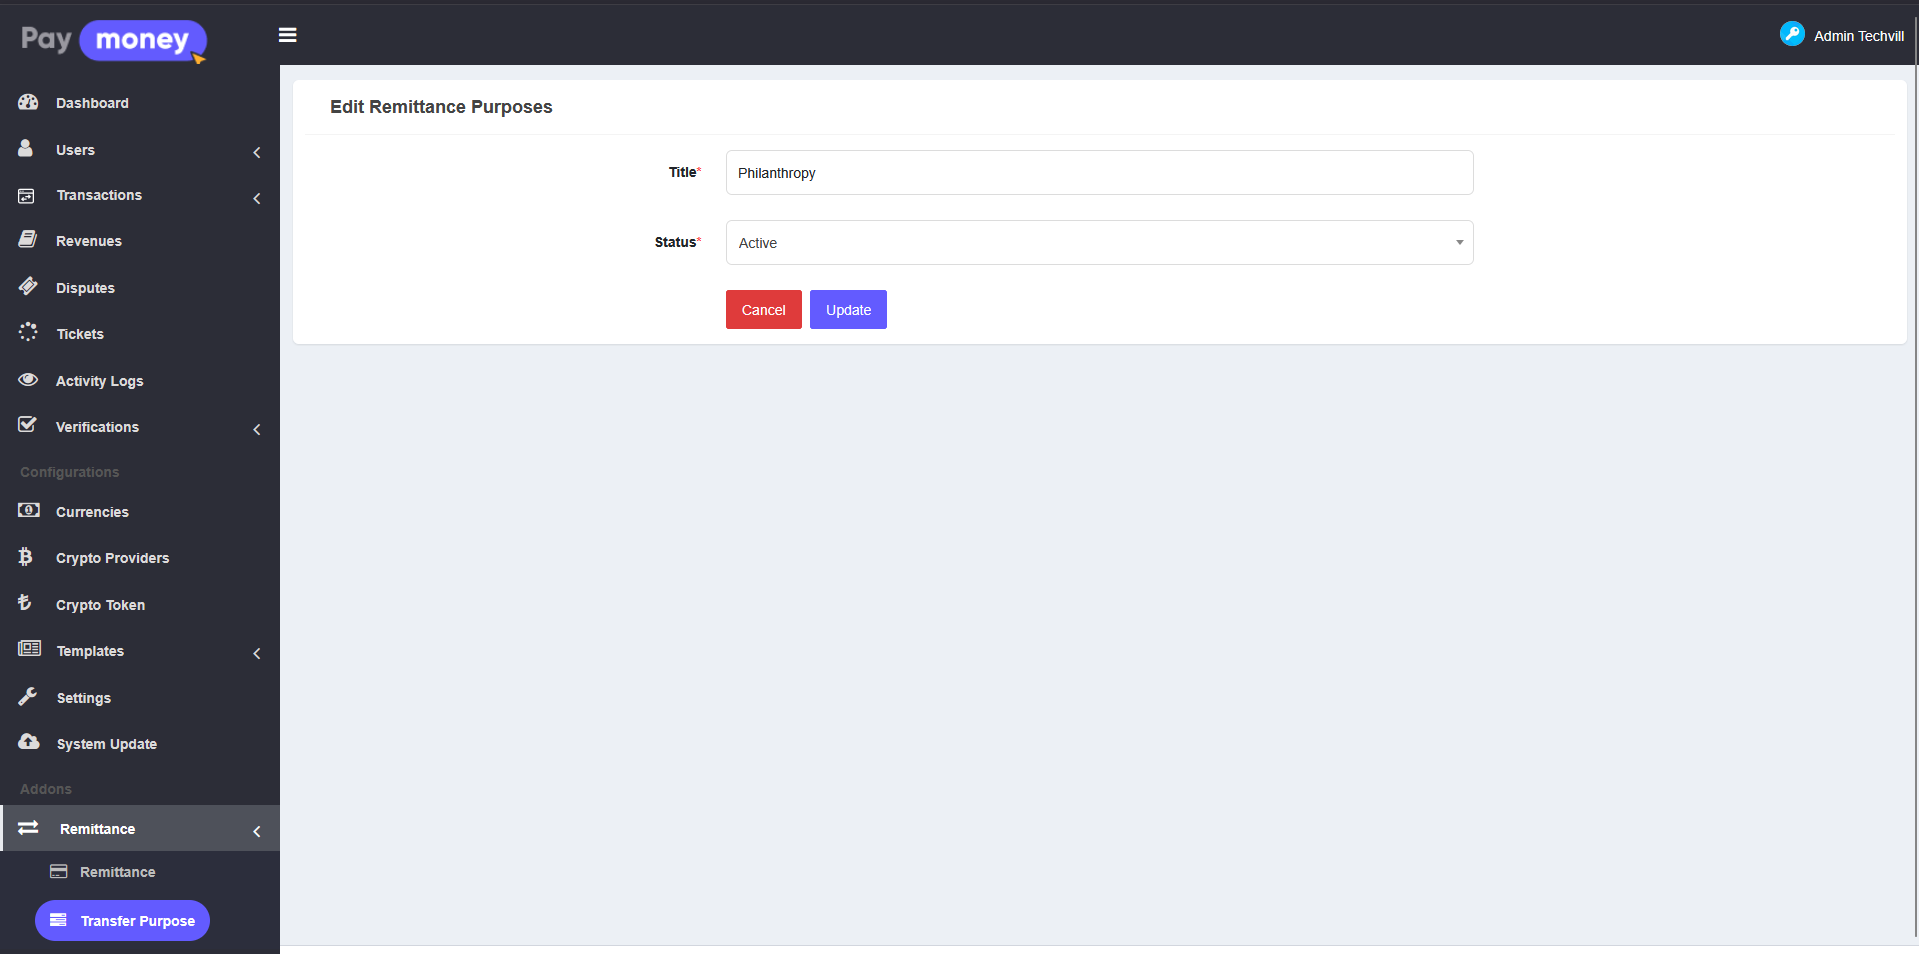
05) Admin can manage Transfer Purposes. Go to Remittance->Purpose to create, edit, or delete sending purposes like Family Support, Education, Medical Expenses, etc. See the image
06) To add a new transfer purpose, the admin must provide a title and select its status. Only transfer purposes marked as active will be visible to the user/sender during the remittance process.

07) To update a transfer purpose, the admin can use the edit option, which allows modifying both the title and the status.
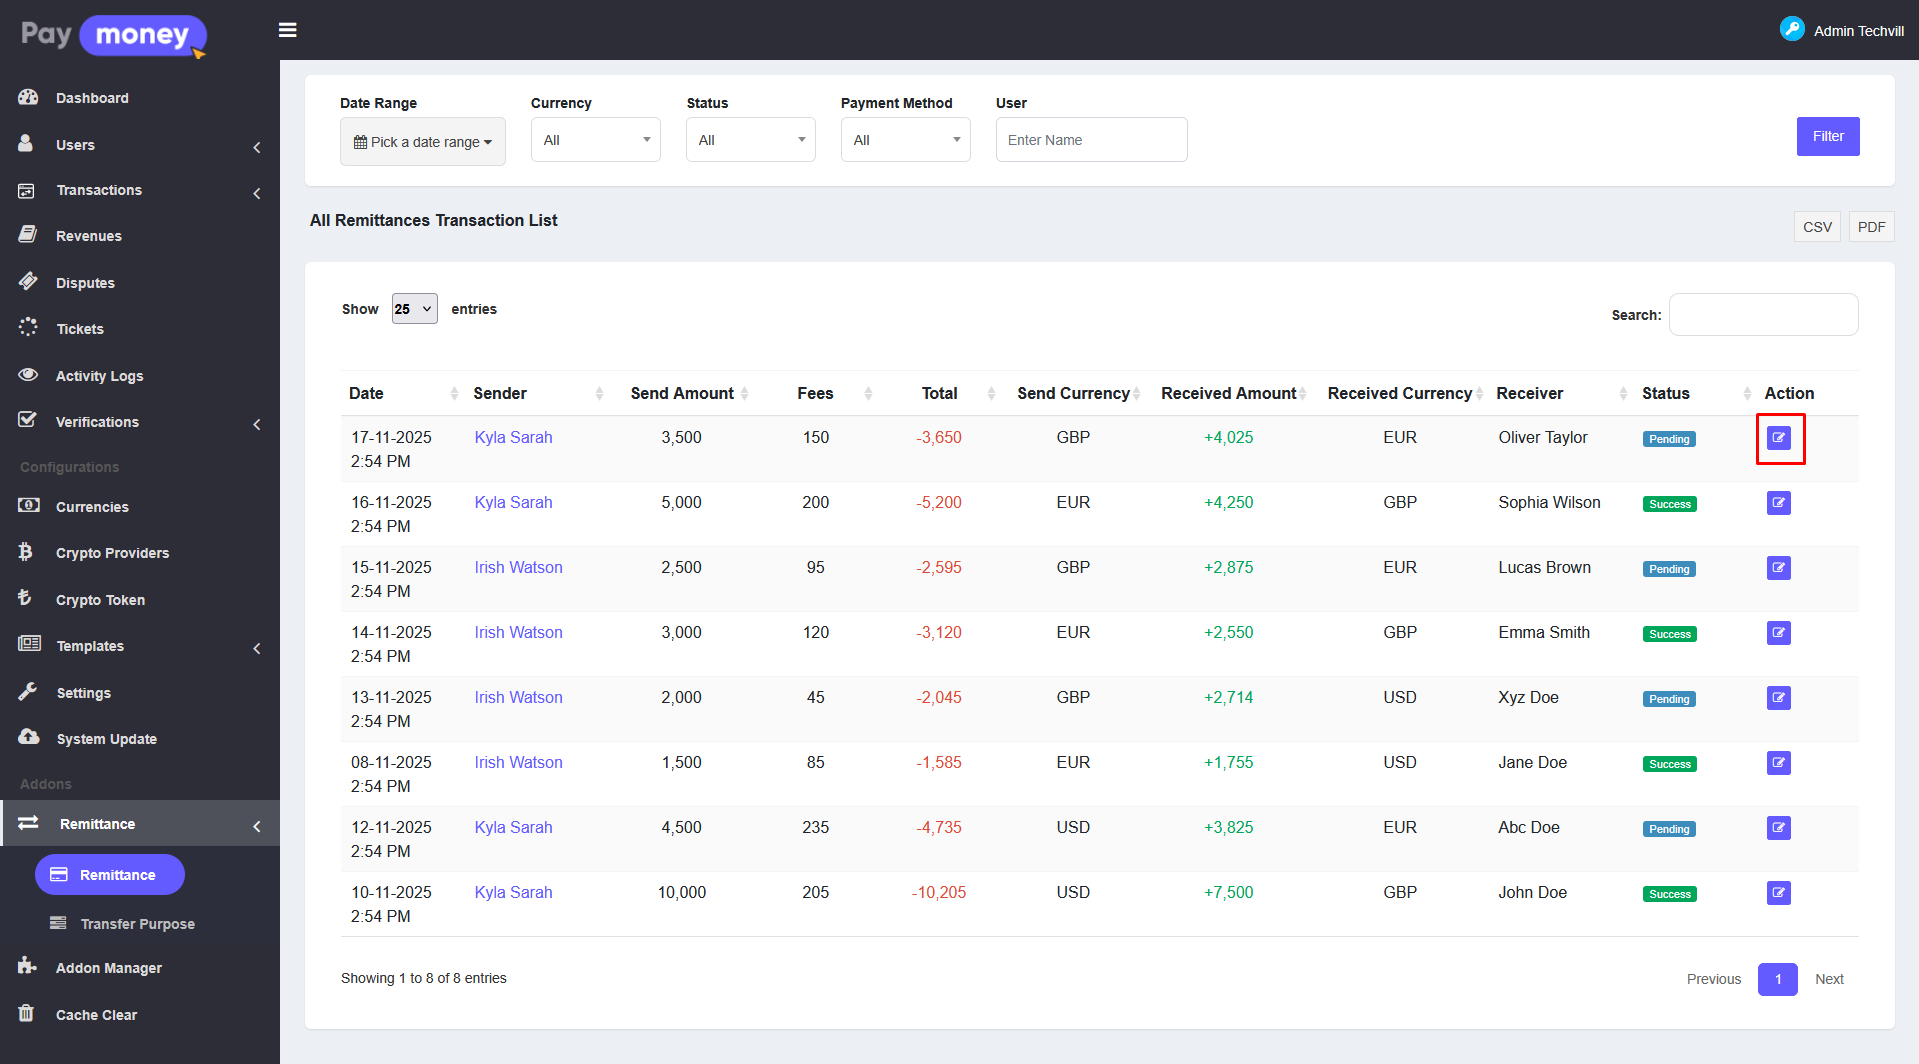
08) Admin can see the remittance transaction list by clicking Remittance from the sidebar. Admin can filter by date range, status, currency, payment method, or user. Admin can view details, update status, export to CSV/PDF, and search users. See the image
09) Admin can click on any transaction to view complete details including sender information, recipient information, amounts, exchange rate, fees, payment method, payout method, transfer purpose, and status. See the image
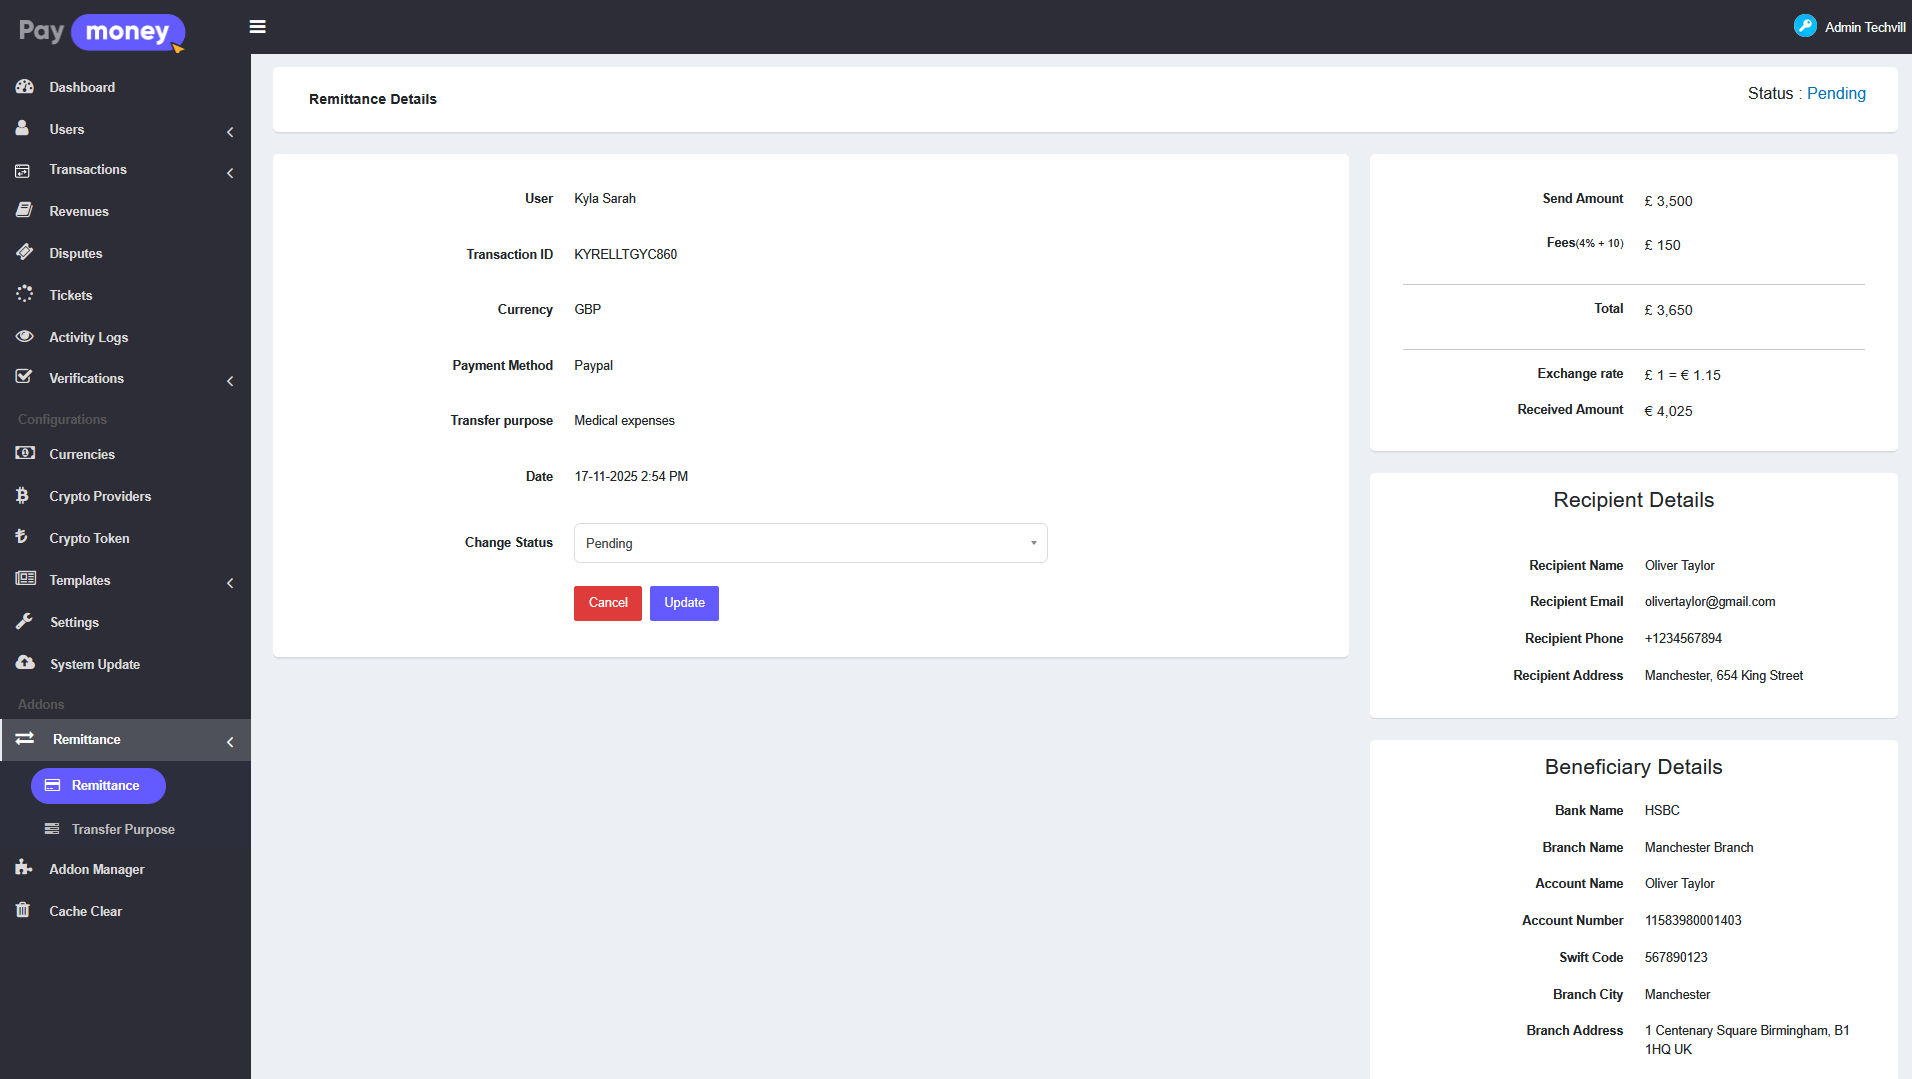
10) The admin will check the money is received in his payment accounts. Then he will send the money manually to the bank details sender gives during making the transaction. After the confirmation of the money that the receiver received, the admin will update the status to success.
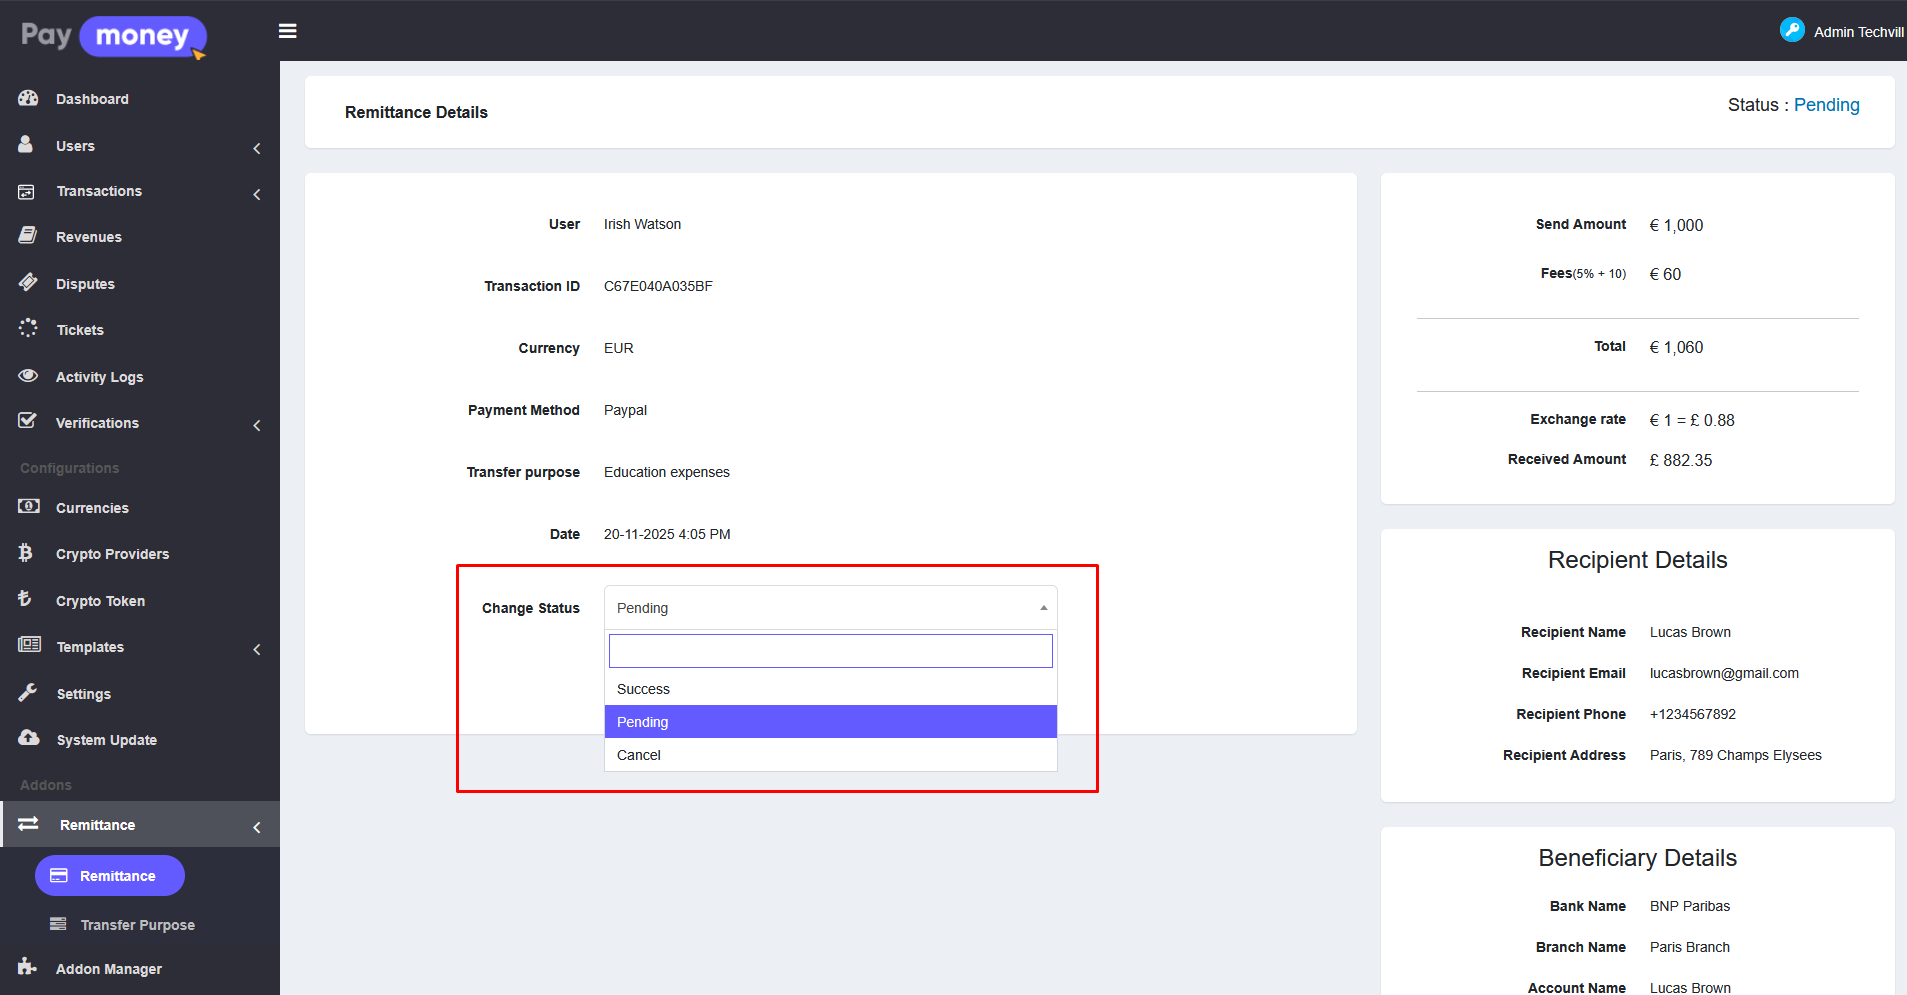
11) Admin can update transaction status (Pending, Success, Cancel). When status is updated, system automatically updates associated transaction record and sends email/SMS notification to user/sender. See the image
In that case, in the user dashboard, the sender will see the transaction list that he sends money to people and can track the status of each transaction.
Remittance Module User Panel:
01) User starts sending remittances by clicking the Remittance button from the user dashboard. See the image
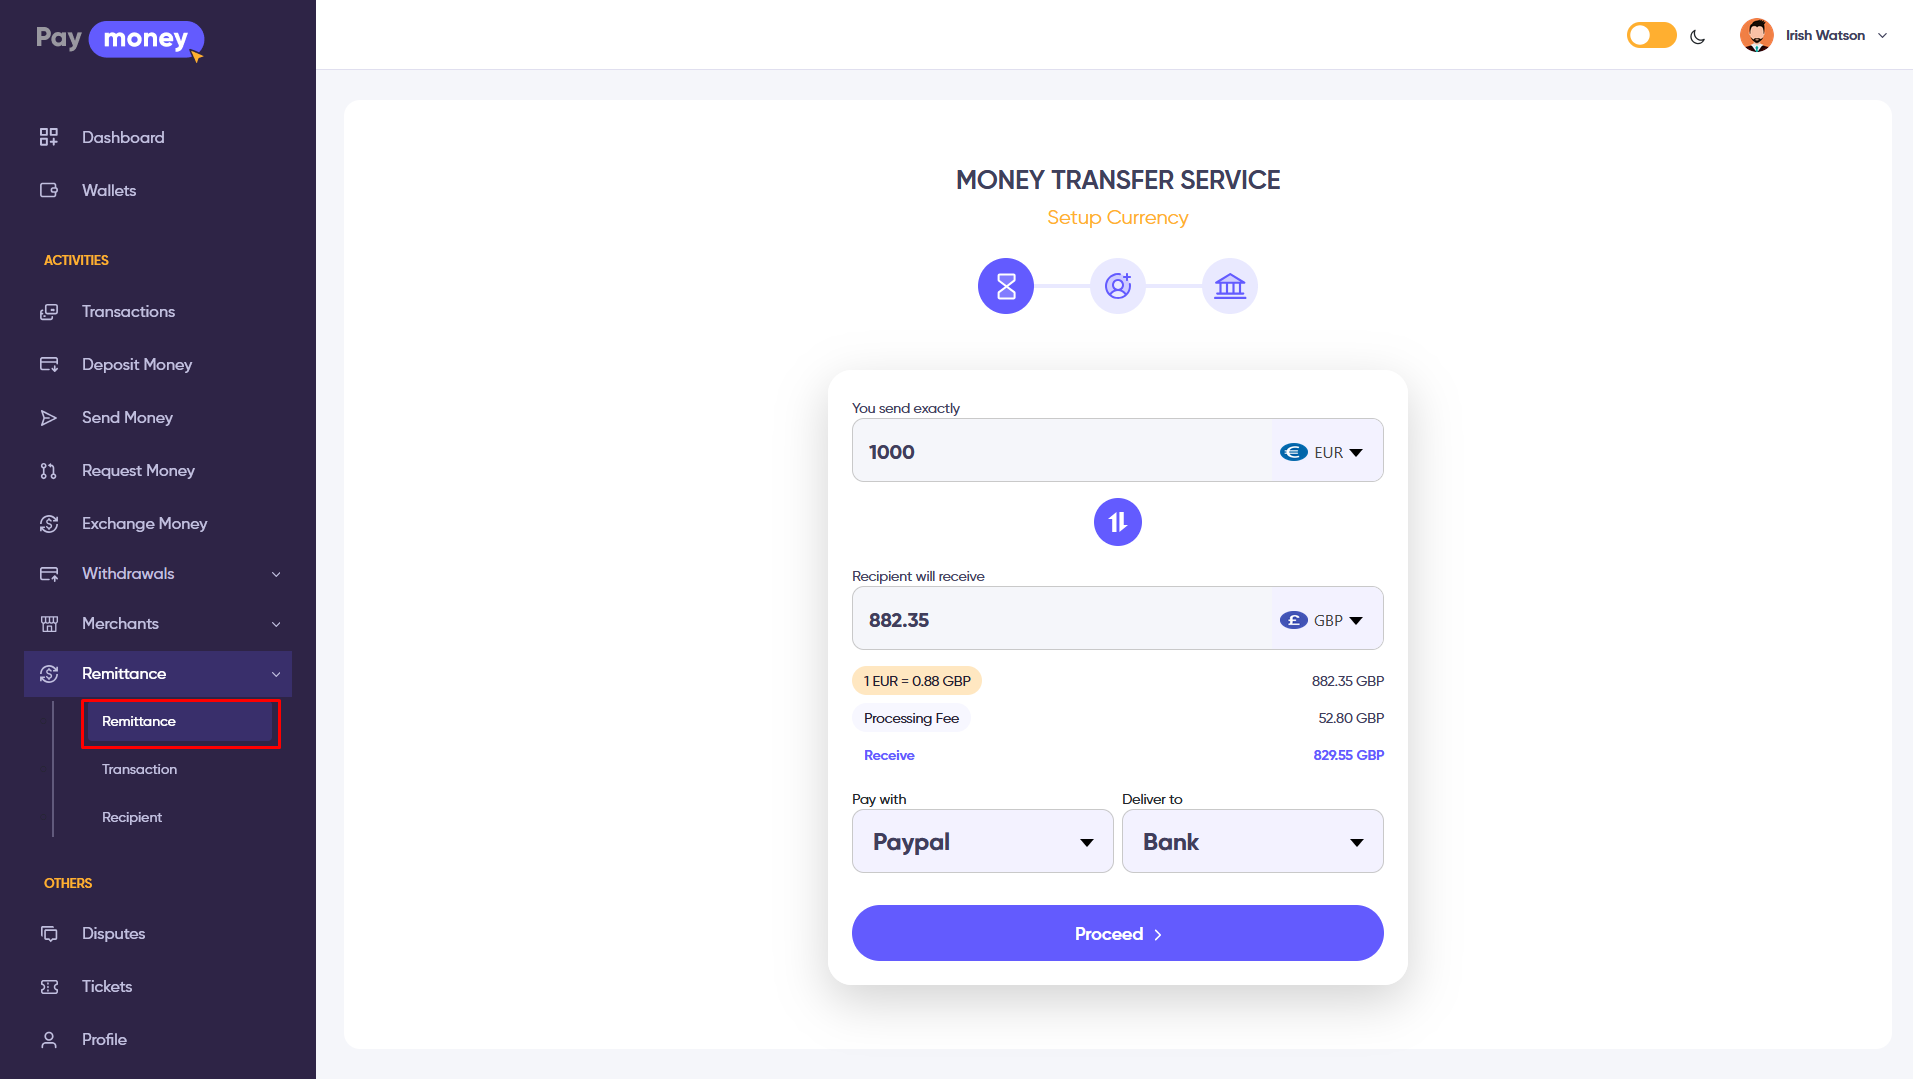
02) User/Sender selects those from the starting of the money transfer.
– User/Sender will enter the choice of currency at the start of the money transfer.
– Exchange to currency (Recipient will Get) amount will be automatically converted to currency user/sender will choose to send.
– Then the user/sender will select an option by which method (Bank details) the user will receive the converted money.
– Sender/User will select the payment option (Wallet, Stripe, PayPal, Bank, or other configured methods) by which the admin will get money.
– Fee will automatically calculate depends on the input amount and admin section fees limit.
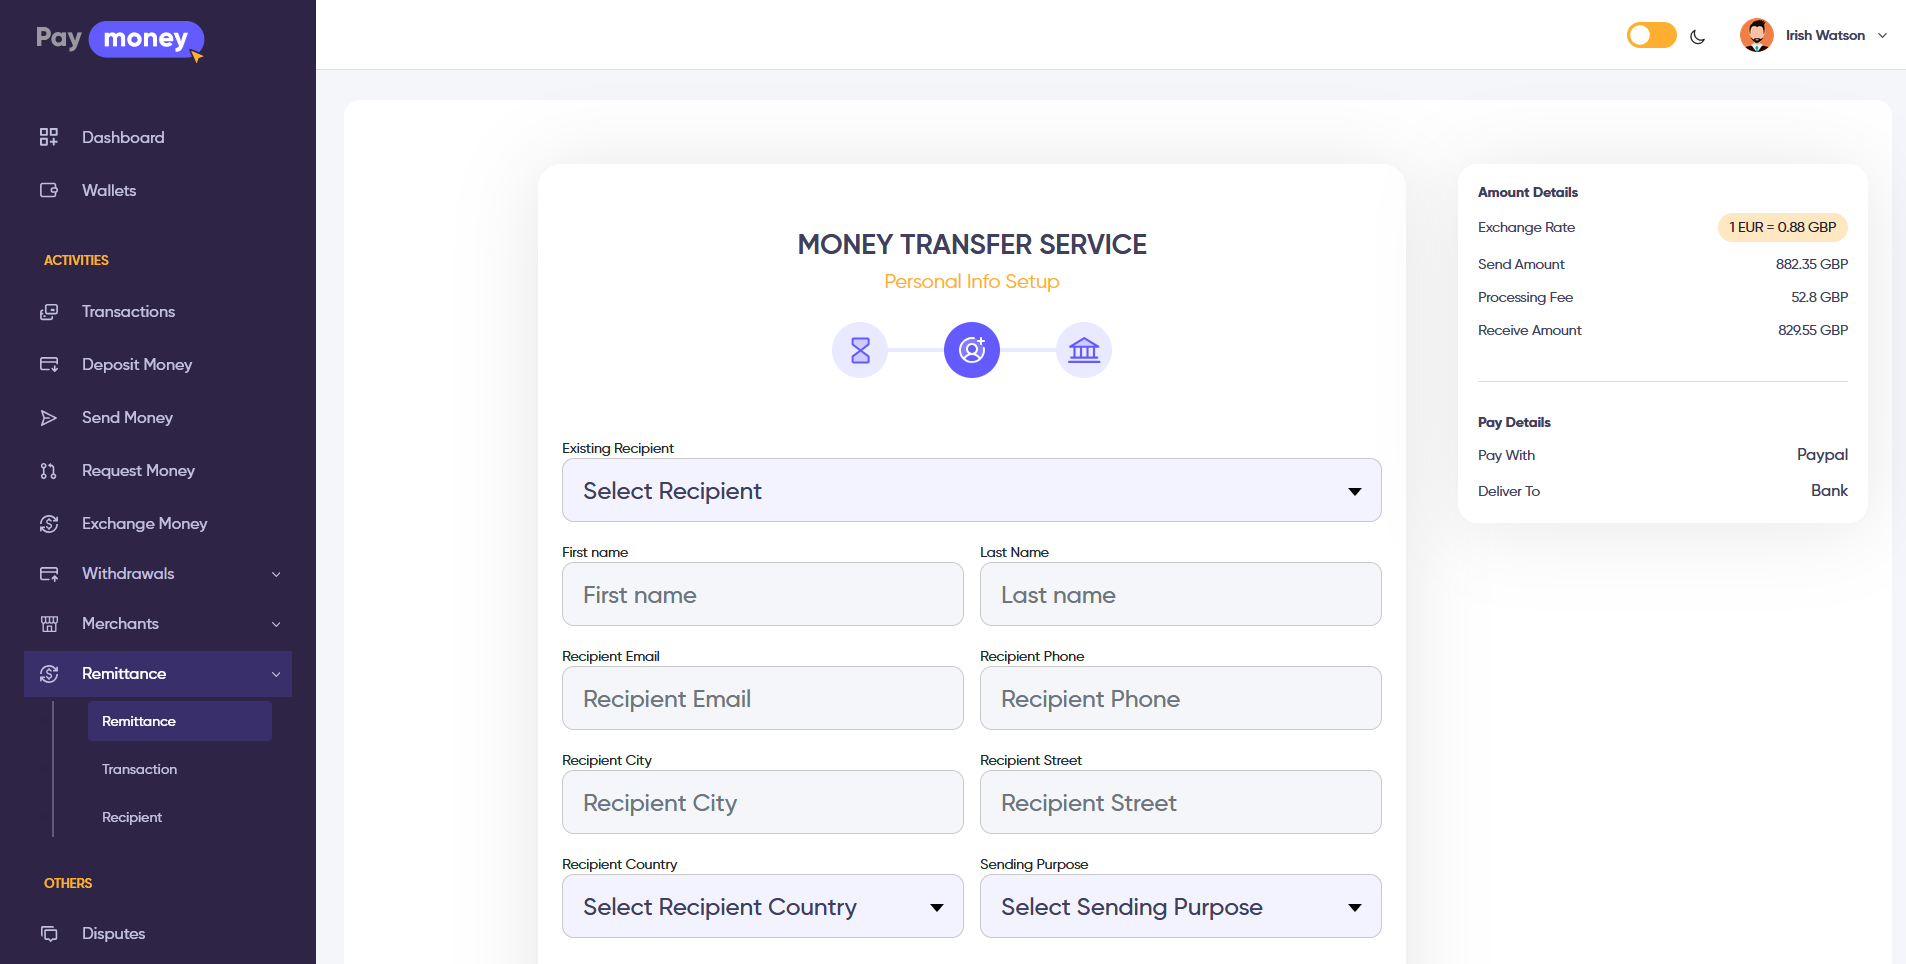
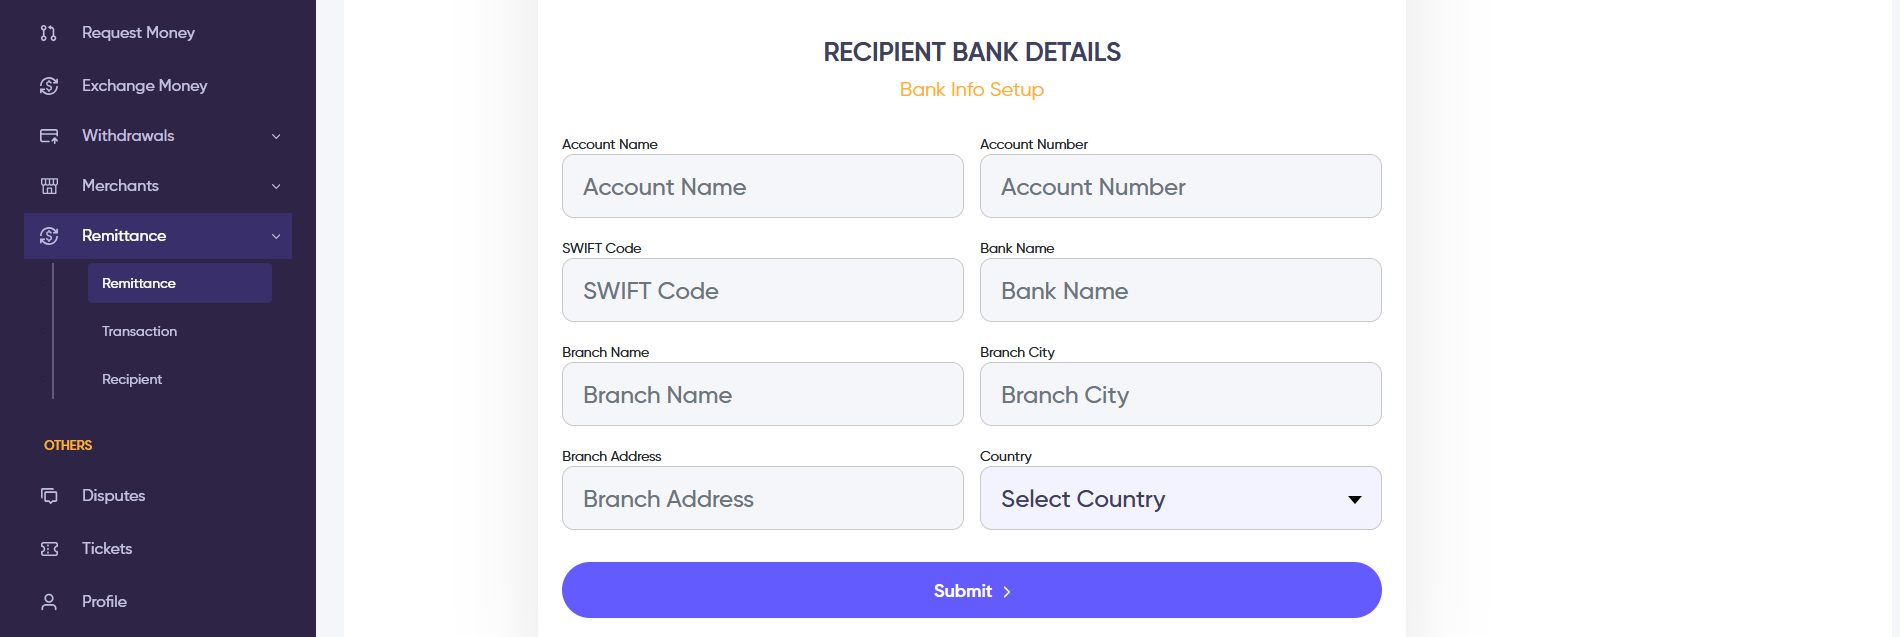
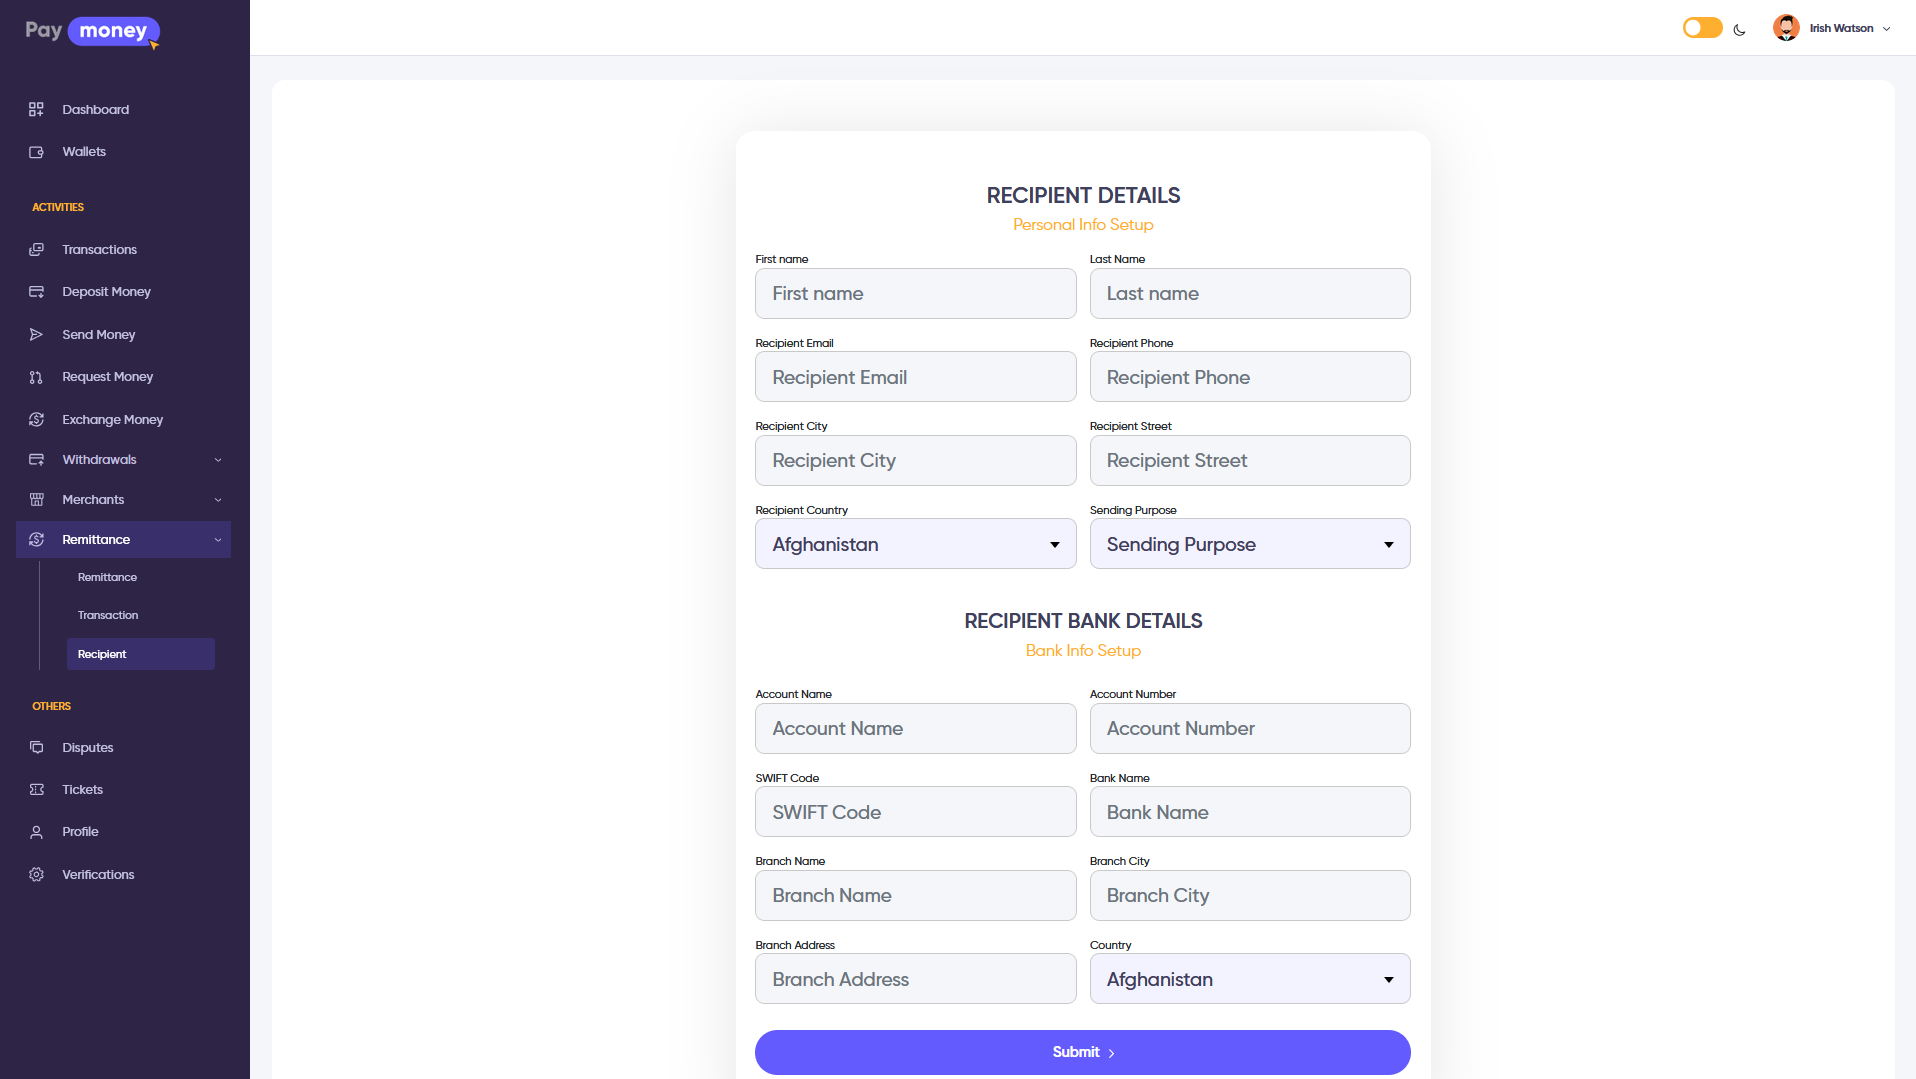
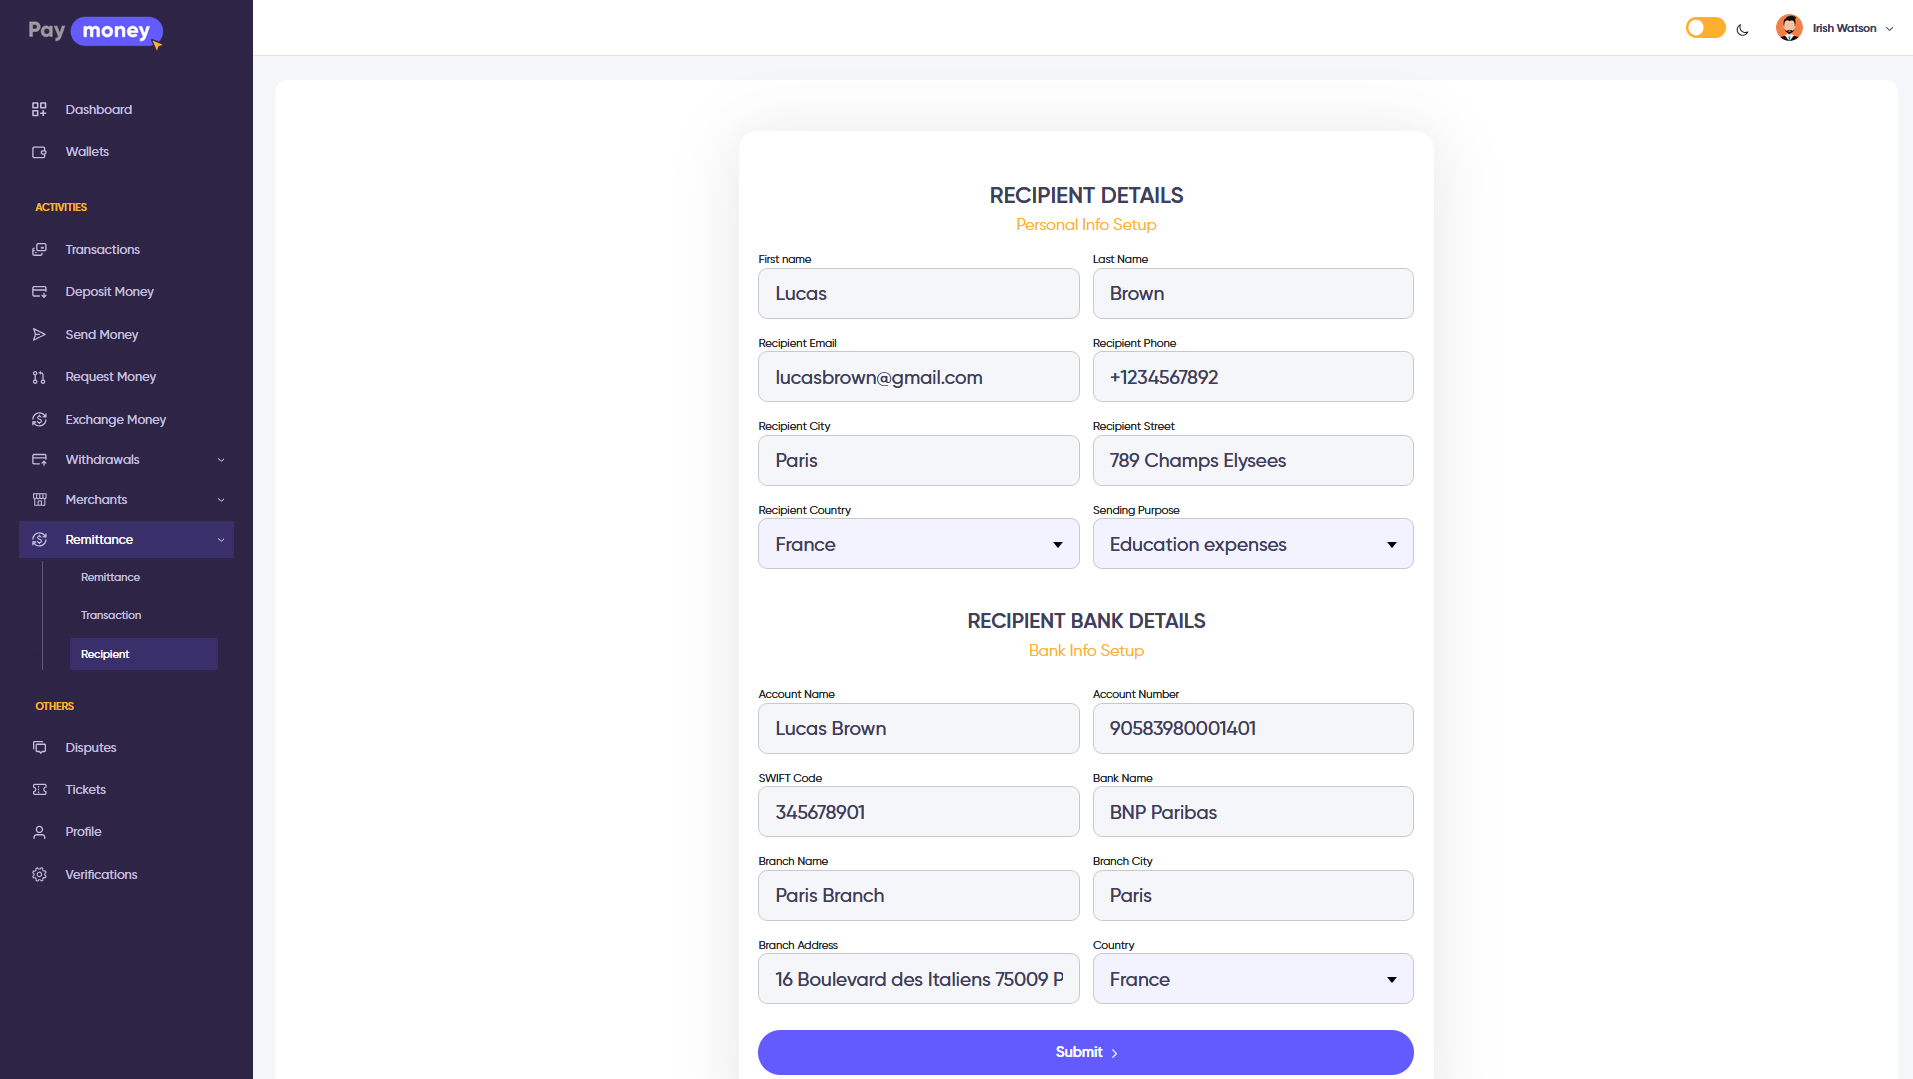
03) When the sender clicks to submit, there are show input fields. Sender gives the Recipient Details (First Name, Last Name, Email, Phone, City, Street, Country) Sending Purpose including Beneficiary Bank Details (Bank Name, Account Name, Account Number, SWIFT Code, Branch Name, Branch City, Branch Address, Beneficiary Country) in this section and clicks submit. See the image
04) When the sender clicks on submit, the transfer summary page is shown with all transaction details. Sender reviews the information and clicks to proceed. See the image

05) When the sender clicks on submit, payment gateway page is opened. If the sender selects Wallet then payment is processed from wallet balance, if he selects Stripe then shows the stripe card input page, if he selects PayPal then it redirects to the PayPal site page, or if he selects Bank then shows bank transfer instructions. See the image

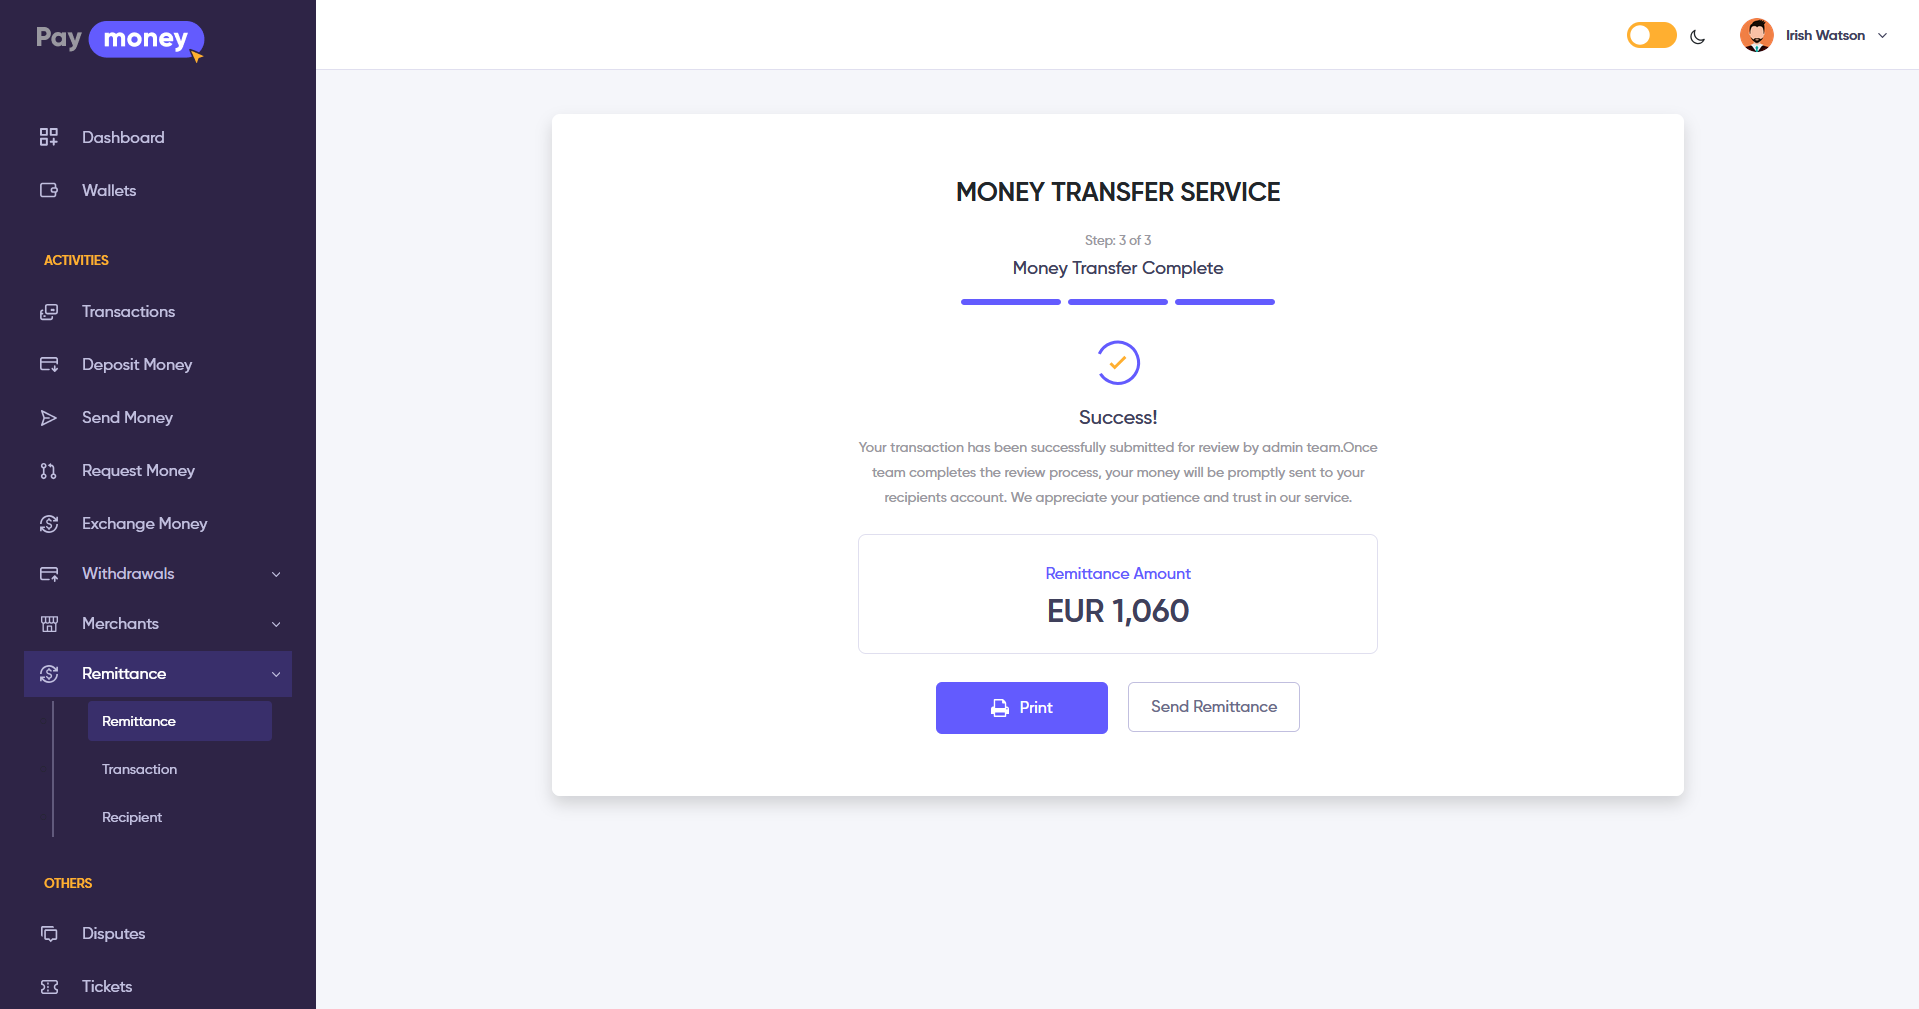
06) After confirming payment, a record will be created with the information of senders and receivers with a pending status and show the successful page. And money will be transferred to the admin payment account. See the image
Remittance Transaction List:
01) User can view all remittance transactions by clicking Remittance->Transaction from the user menu. User can filter by date range, status, or currency. See the image
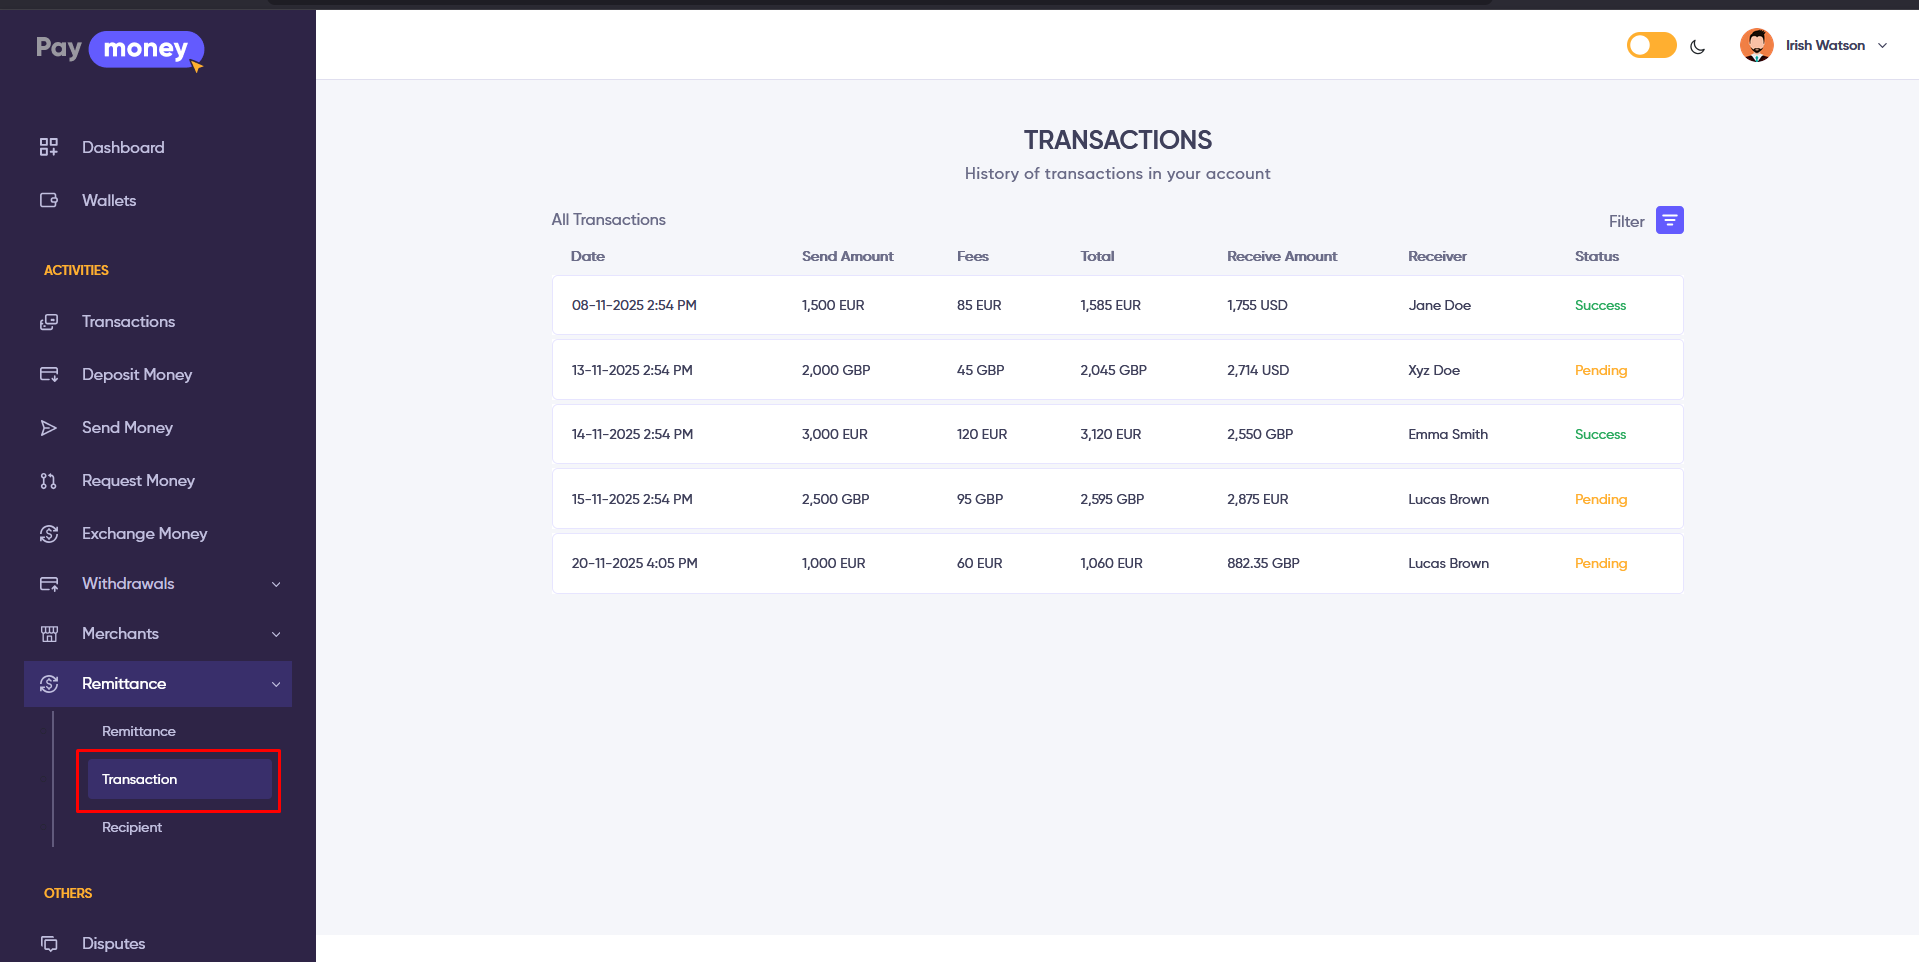
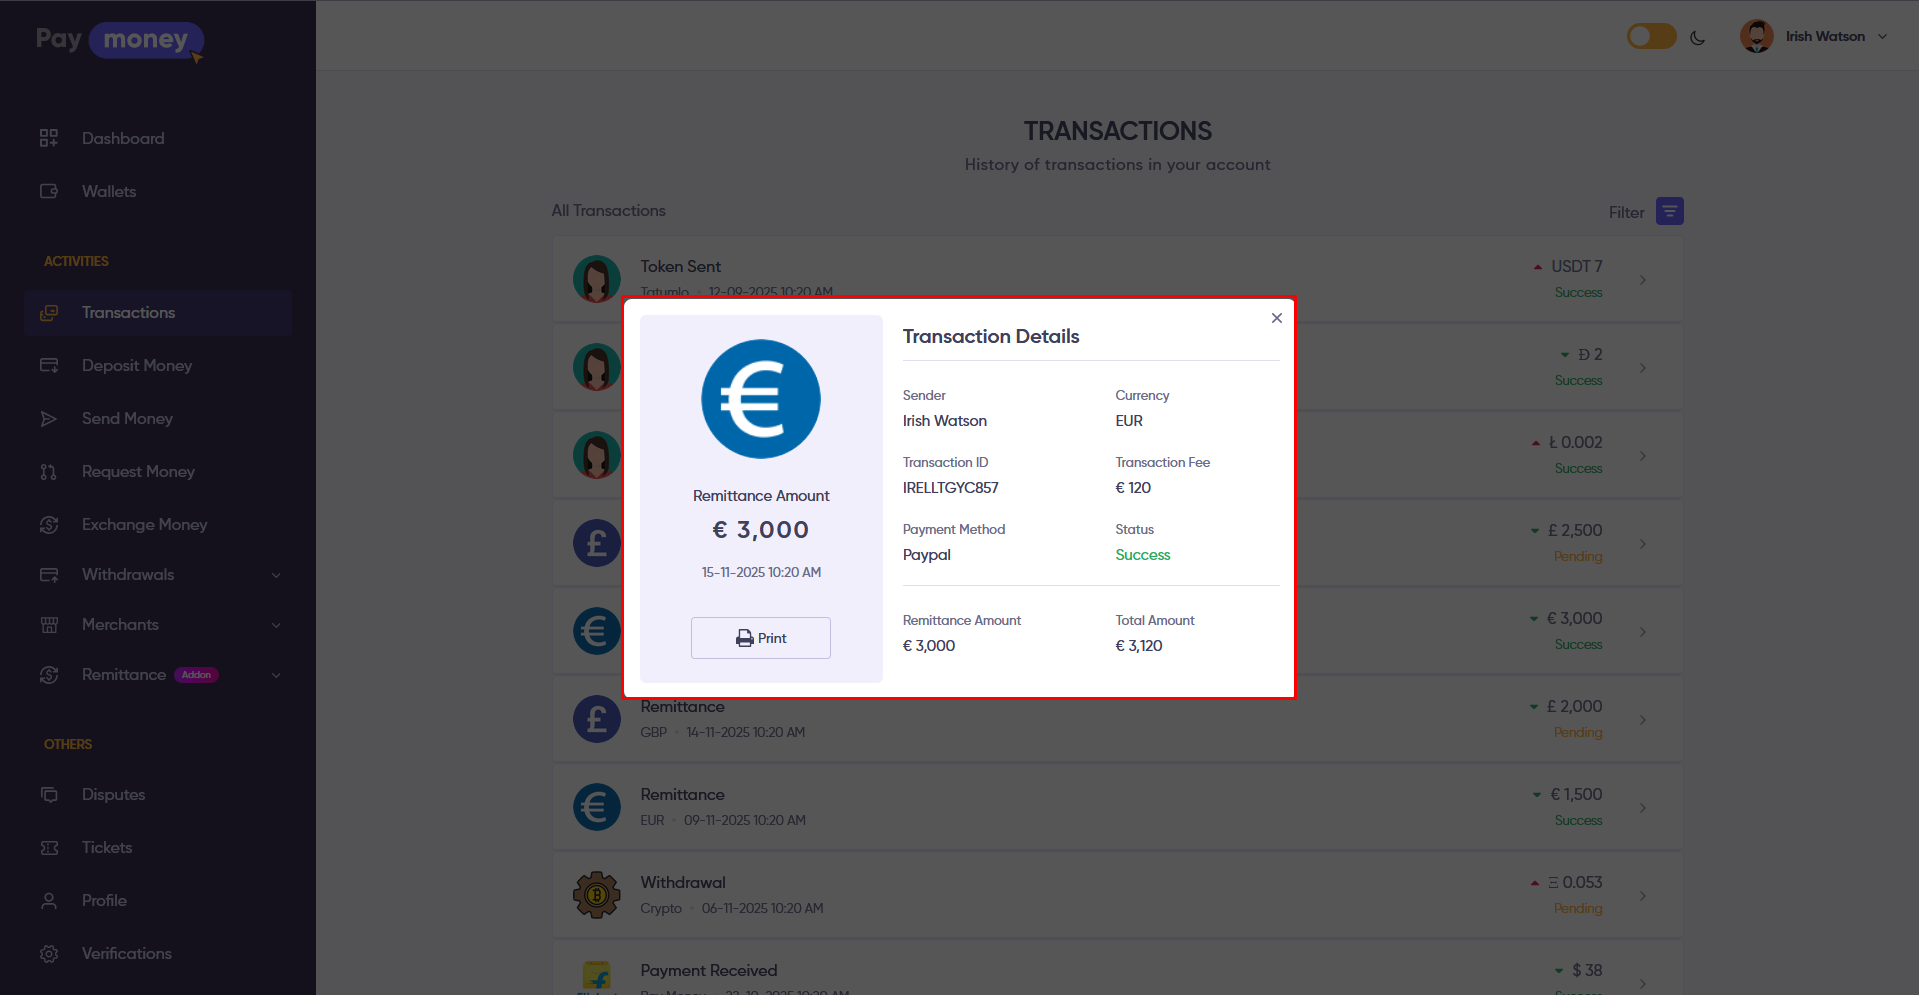
02) User can also see the transaction on user core transaction feature. User can click on the transaction to view complete details including sender information, amounts, fees, payment method, and status. See the image
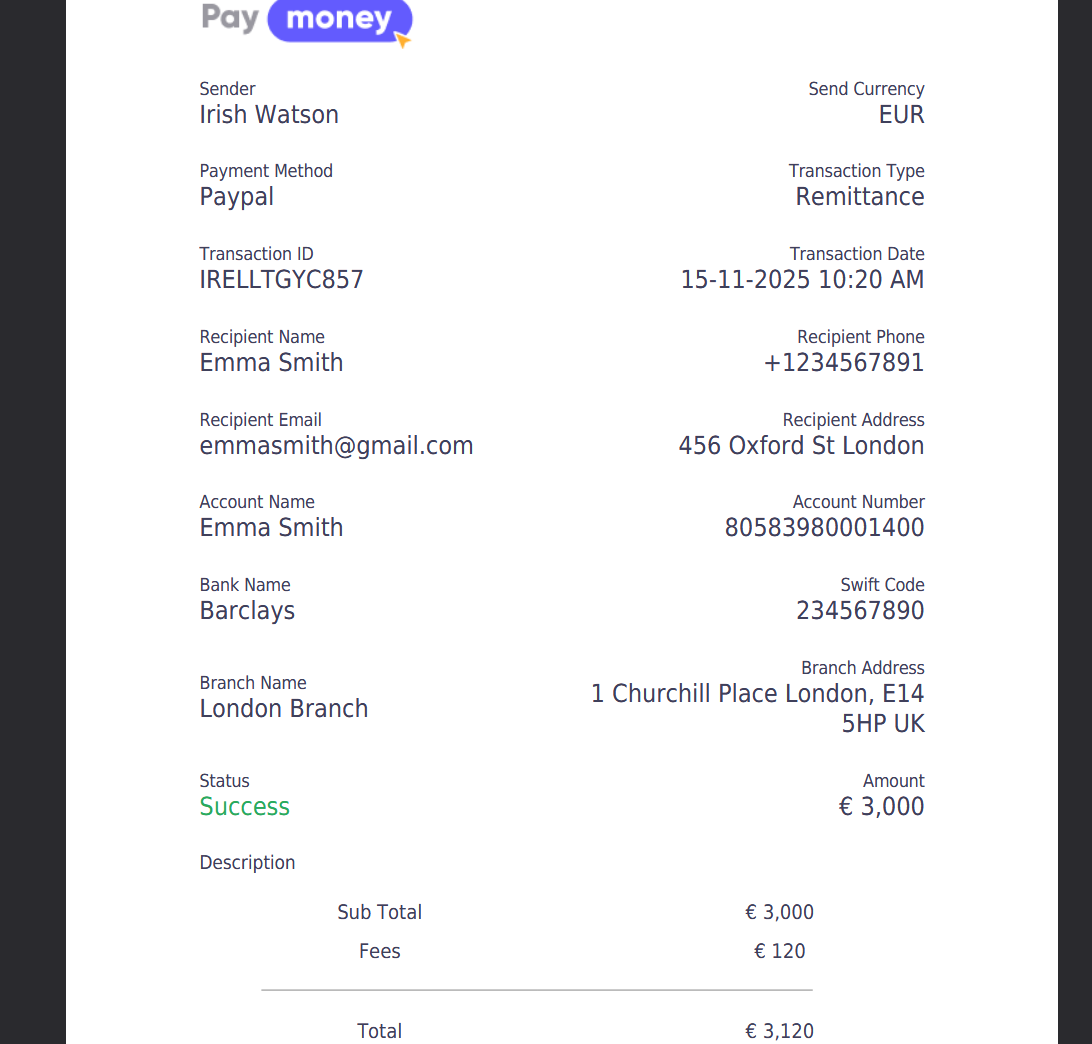
03) User can print transaction receipt by clicking the Print button. A PDF receipt will be generated with all transaction details. See the image
Remittance Recipient:
01) User can save recipient information for quick access. Go to Remittance->Recipients from the user menu. See the image
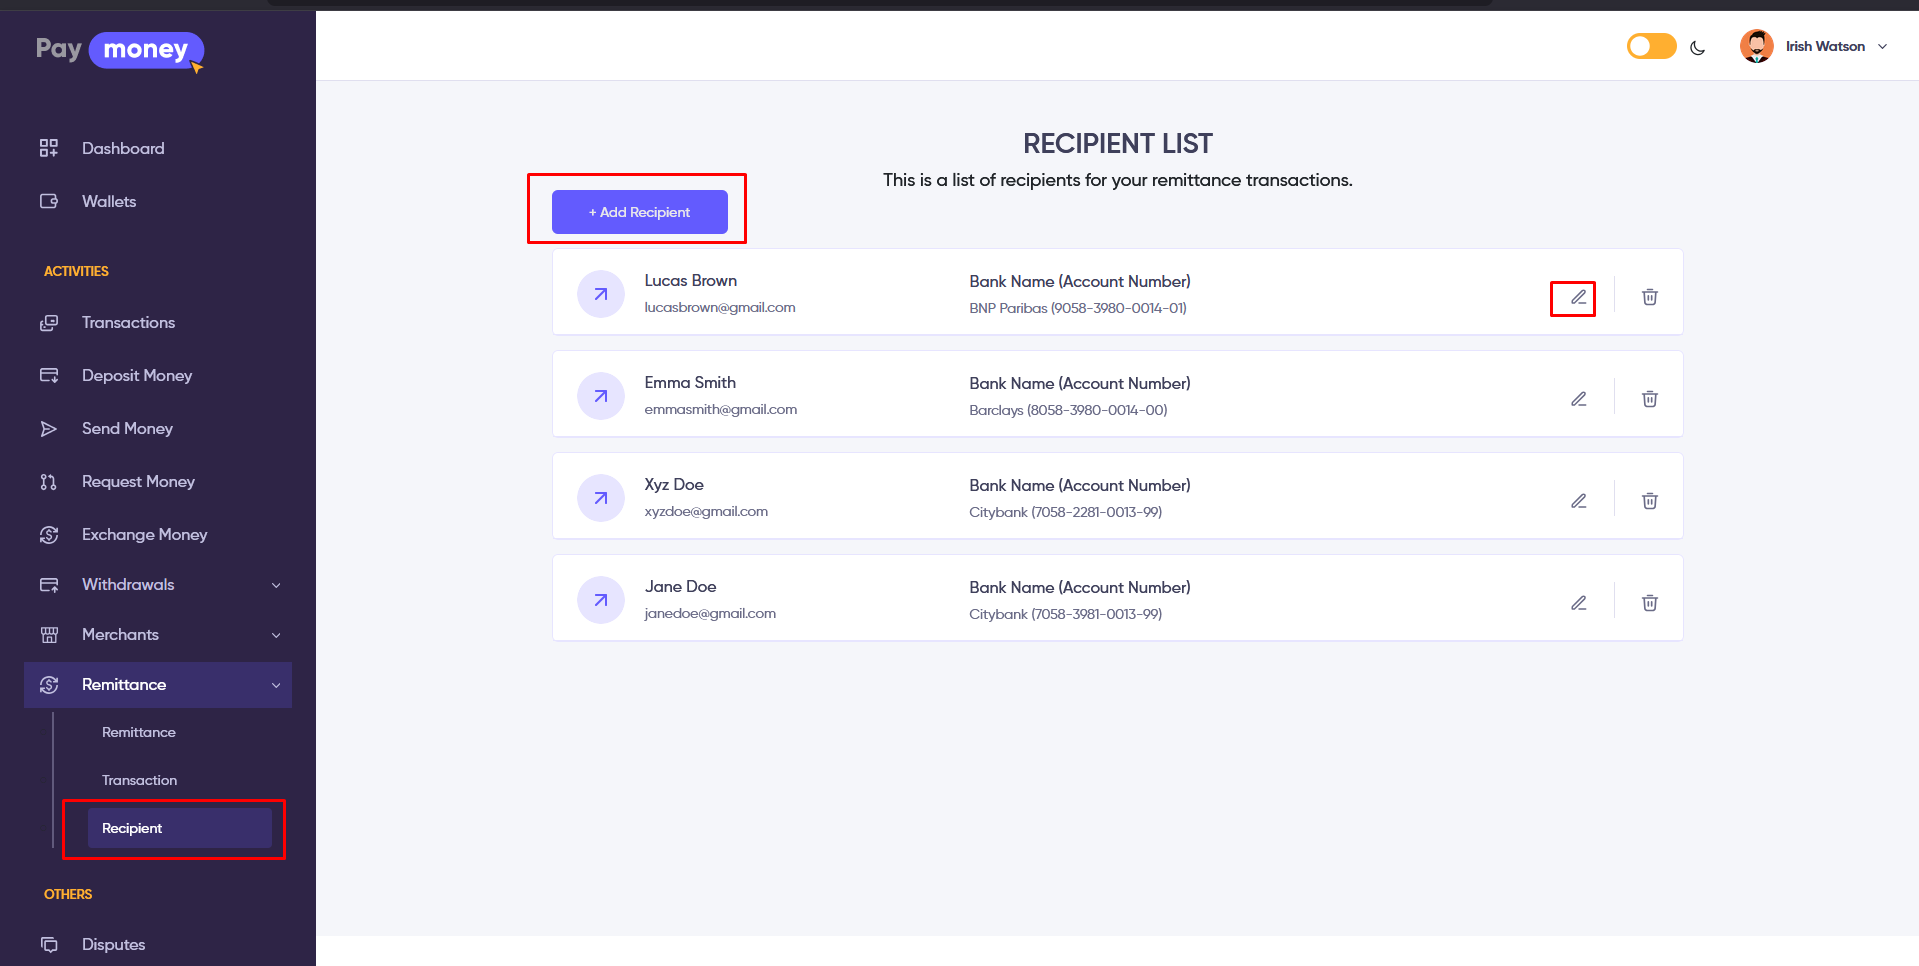
02) User can create a new recipient by clicking Create Recipient button and filling in recipient personal information and beneficiary bank details. See the image
03) User can update recipient information using the edit feature.
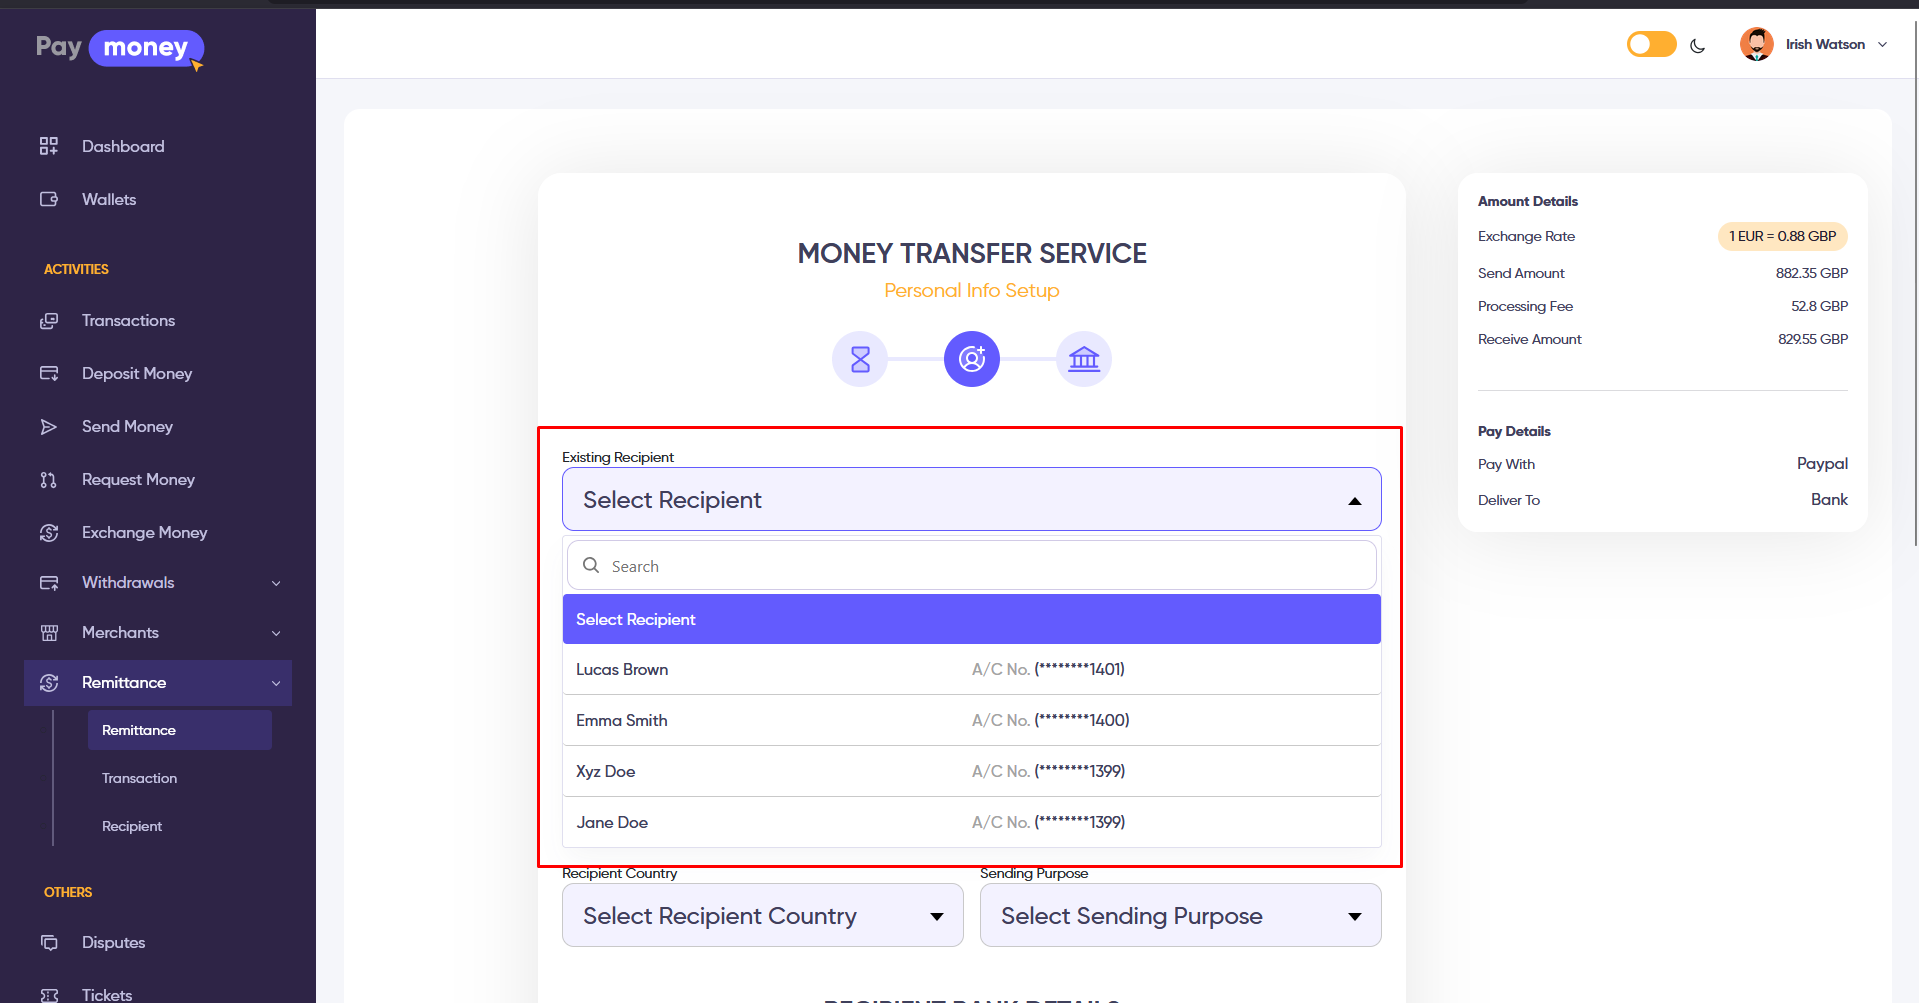
Note: When initiating a new remittance, user can select Use Existing Recipient to auto-fill the form. See the image
Remittance Module Front Panel:
01) Visitors can initiate remittance from the public website. Navigate to the Remittance page from the main website. See the image
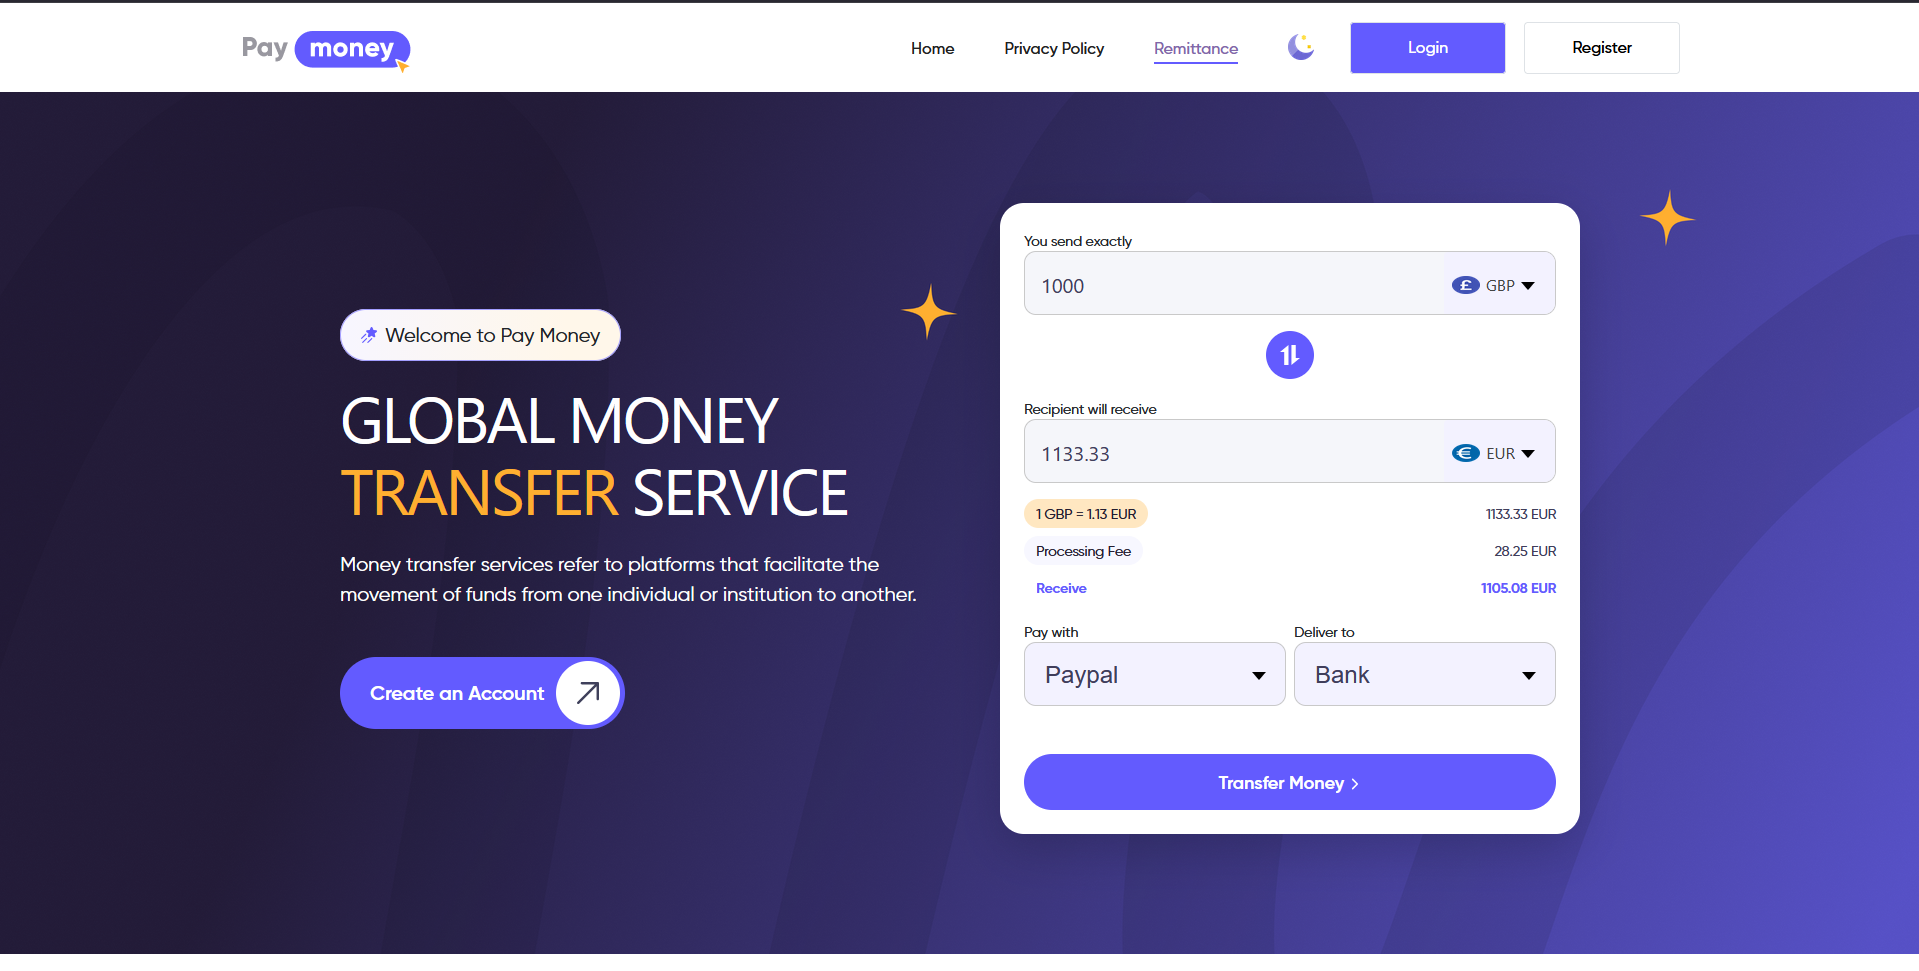
02) User selects send currency, receive currency, and enters amount. System automatically calculates exchange rate, received amount, fees, and total payment.
03) When user clicks Transfer Money, if not logged in, user will be redirected to login page. After login, user will continue to recipient details page. If already logged in, user proceeds directly to recipient details page.